When you hire us as professional interior painters, we’ll start by thoroughly protecting your floors and furniture with drop cloths, then meticulously prep surfaces through cleaning, sanding, and priming. We’ll follow a strategic approach—painting ceilings first, then walls using precise W-pattern techniques, and finishing with trim. You’ll receive multiple coats of premium low-VOC paint with proper drying time between applications. After completing a final quality inspection, we’ll handle complete cleanup and restore your space to pristine condition, and there’s much more to understand about each critical step.
Key Takeaways
- Professional painters will thoroughly prepare your space by removing hardware, protecting floors and furniture, and properly cleaning all surfaces before painting.
- Expect the use of premium primers matched to surface types and high-quality, low-VOC paints appropriate for each room’s specific function.
- Painters follow a strategic sequence: ceiling first, then walls using proper cutting and rolling techniques, and trim last for optimal results.
- Multiple coats with adequate drying time between applications ensure solid coverage and a smooth, consistent finish throughout your space.
- Complete cleanup includes removing all protective materials, reinstalling hardware, disposing of waste, and conducting a final quality inspection.
Thorough Preparation of Your Space Before Painting Begins
Before any brush touches your walls, proper preparation determines whether your paint job will look professional or amateur. We’ll start by clearing counters, shelves, and tables of all items—from décor to electronics. You’ll need to remove wall hangings, mirrors, and artwork, then relocate furniture to the room’s center. Maximizing prep efficiency means coordinating furniture layout with your painter beforehand, so we’re not moving pieces twice.
Next, we’ll protect your floors with drop cloths and cover remaining furniture with plastic sheeting. Wall preparation involves washing surfaces to remove grease and dust, then inspecting for cracks or holes requiring repair. We’ll patch imperfections, sand uneven areas, and guarantee everything’s dry before painting begins. This thorough groundwork ensures the lasting, flawless finish you’re expecting.
Professional Priming for Long-Lasting Results
Our primer selection process matches specific products to your surfaces:
- Water-based latex primers for drywall and general applications
- Oil-based formulas for wood trim and stubborn stains
- Stain-blocking primers like PrepRite ProBlock for smoke or water damage
- Tinted primers coordinated with your final color
We don’t skip steps. New drywall gets taped, sanded, and sealed. Bare wood receives thorough filling and sanding before priming.
We cure new masonry for thirty days minimum, treat porous plaster with vinegar-water solutions, and completely remove wallpaper adhesive.
Each primer application uses dedicated tools—separate brushes, rollers, and trays—ensuring contamination-free coverage that bonds properly to your surfaces.
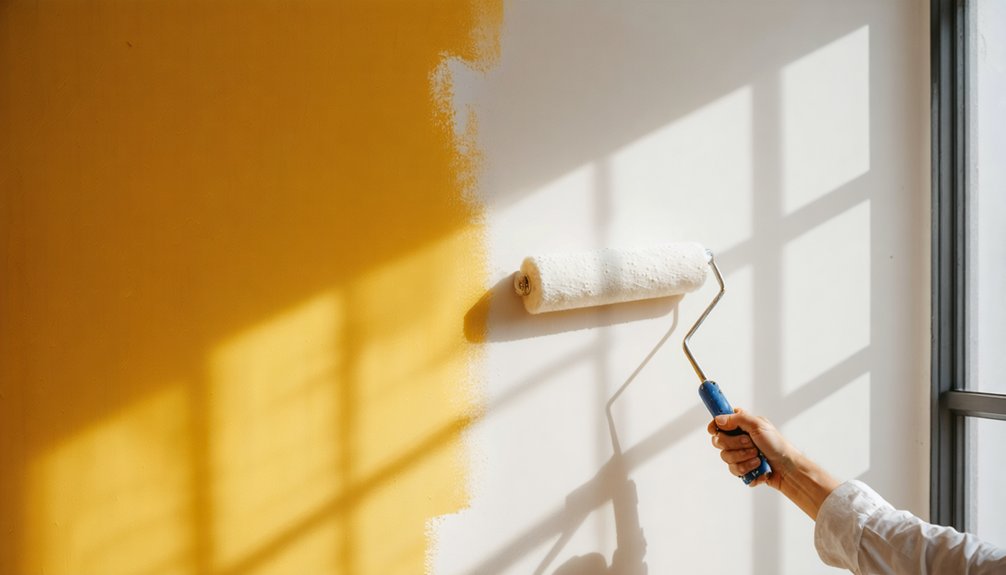
Strategic Painting Order for Optimal Finish
After proper priming sets the foundation, the sequence in which we apply paint determines whether your project succeeds or requires frustrating touch-ups. We always start with ceilings, preventing drips from marring finished surfaces below. Gravity works in our favor—any ceiling mistakes get covered when we paint walls second.
We cut edges with ideal brush selection before rolling in overlapping sections to maintain wet edges. Next, we tackle walls using strategic paint loading in W patterns, working top to bottom. Two coats guarantee solid coverage, drying completely between applications.
Finally, trim receives attention last, safeguarding all previous work. This top-to-bottom logic minimizes rework and eliminates repetitive taping. Each surface becomes a drop cloth for the next level, delivering razor-sharp lines and a polished finish that’ll make you proud.
Expert Application Methods and Quality Materials
The difference between amateur and professional results rests entirely on material selection and application precision. Our targeted product selection begins with premium low-VOC paints matched to each room’s function—matte finishes for bedrooms that allow easy touch-ups, and durable satin for high-traffic areas. We pair these with appropriate primers: water-based latex for walls, oil-based for bare wood, and specialized bonding formulas for unique surfaces.
Our meticulous application practices include:
- Edging first along all wall boundaries before rolling
- W-pattern rolling to distribute paint uniformly
- Maintaining wet edges by overlapping into fresh paint
- Building thin coats rather than applying thick layers
We invest in quality tools—high-density foam rollers for smooth surfaces and brushes with proper bristle types—because these fundamentals determine your final results.
Multiple Coats and Proper Drying Times
Professional painters understand that rushing through coats compromises every careful preparation step that preceded them. We apply primer plus two finish coats as standard practice, ensuring coating thickness considerations meet manufacturer specifications.
Between coats, we observe strict drying intervals—2–4 hours for latex, up to 24 hours for oil-based formulations—because wet-on-wet application causes bubbling and dullness.
Our proper application techniques include W-pattern rolling, edge-cutting with brushes, and meticulous inspection between coats. We sand any imperfections before proceeding.
Extreme color shifts or textured surfaces often require a third coat for maximum opacity and durability. Each additional coat extends your finish lifespan by 3–5 years while delivering the rich, even color you’re investing in.
We won’t compromise on drying times or coat count—your walls deserve nothing less.
Complete Cleanup and Protection of Your Home
We’ve learned through years of interior work that protecting your home during painting requires the same attention to detail as the application itself. Our systematic approach starts with professional-grade drop cloths positioned strategically throughout the work area, continues with meticulous cleaning of all tools and equipment after each session, and culminates in thorough post-project site restoration that leaves your space cleaner than we found it.
These three critical phases—protection, maintenance, and restoration—form the backbone of our cleanup protocol and directly impact both the quality of our finish and your satisfaction with the final result.
Professional-Grade Drop Cloth Usage
- 12-ounce canvas for absorbing minor overspray without bleed-through on floors and furniture
- Butyl-backed varieties for complete liquid resistance on hardwood, tile, and laminate surfaces
- Heavy-duty reusable options that withstand multiple jobs and foot traffic
- Non-slip designs with rubber beads or textured backing to prevent shifting during work
We avoid lightweight fabrics prone to seepage and always lay cloths flat, covering entire work areas. This thorough approach protects your home while maintaining stable footing throughout every project.
Thorough Tool and Equipment Cleaning
After protecting every surface in your workspace, our attention shifts to maintaining the equipment that made your project possible. We begin by relieving pressure from spray systems before executing detailed gun disassembly, accessing every nozzle, tip, and filter where paint accumulates. Matching solvents to paint chemistry—water for latex, mineral spirits for oil-based formulations—ensures thorough internal flushing until discharge runs completely clear.
We soak smaller components while scrubbing larger assemblies, removing residue that compromises future performance. Brushes and rollers receive warm water treatment with soap until fibers release every paint particle. Complete air-drying prevents corrosion before reassembly.
Throughout this process, we prioritize proper solvent disposal, channeling waste into approved containers that protect both your property and our environment while maintaining professional equipment standards.
Post-Project Site Restoration
Once the final brushstroke dries, our commitment to your home intensifies rather than diminishes. We execute a methodical restoration process that returns your space to pristine condition:
- Protective Material Removal – We carefully peel tape between 6-24 hours post-application, rolling it inward to prevent paint damage and guarantee razor-sharp lines along trim and fixtures.
- Surface Detail Work – Baseboards, fixtures, and floors receive thorough cleaning to eliminate dust, fingerprints, and paint residue using targeted damage prevention techniques.
- Debris Elimination – We vacuum and sweep all work areas, checking corners and crevices for overlooked materials that could compromise your newly finished space.
- Quality Verification – Our final walk through with homeowner confirms every detail meets your expectations before we consider the project complete.
Frequently Asked Questions
How Long Will the Entire Painting Project Take to Complete?
We’ll complete your project based on scope—single rooms take 4-6 hours, while whole-house interiors require 1-2 weeks. The painting timeline depends on square footage and labor requirements, with our crew ensuring quality through proper prep and drying time.
Do I Need to Move Out During the Painting Process?
You won’t need to flee to a hotel! We’ll coordinate the painting timeline so you can stay home comfortably. You’ll access most areas normally, and we’ll handle post painting cleanup, making displacement unnecessary for standard interior projects.
What Is Included in the Cost Estimate for Interior Painting?
We’ll include labor, paint quality selection based on your preferences, surface preparation requirements like patching and sanding, and materials such as primer and supplies. Costs also cover trim work, ceiling painting, and protective measures for your belongings.
Are Your Painters Licensed, Insured, and Background-Checked?
Yes, we’re properly licensed, insured, and verified. We’ve thoroughly vetted our painters through in-depth work history reviews and customer references, ensuring you’re welcomed into our trusted community of satisfied homeowners who demand excellence and accountability.
What Warranty or Guarantee Do You Offer on Your Work?
We provide extensive warranty coverage including two years on workmanship and materials. Our quality assurance guarantees address peeling, blistering, or uneven application. We’ll promptly repair any defects caused by our work, ensuring you’re thoroughly satisfied with your investment.