We begin by power washing your Filer home at 2000-2500 PSI, then verify moisture levels stay below 15% before proceeding. Next, we’ll scrape and sand all peeling paint, caulk gaps under ⅛ inch with paintable sealants, and apply Peel Bond primer to bare wood and problem areas. We’ll also prepare hardware with metal primer after thorough cleaning. Filer’s high-desert climate demands meticulous attention to each step, and understanding the complete preparation process will guarantee your paint job lasts for years.
Key Takeaways
- Power wash exterior at 2000-2500 PSI and verify moisture levels below 15% before proceeding with any painting work.
- Scrape and sand all peeling paint using five-in-one tools and 220-grit sandpaper to create smooth, even transitions.
- Remove old caulk and seal gaps under ⅛ inch with paintable siliconized acrylic latex, allowing several days to cure.
- Prime all bare wood, nail heads, and compromised areas with Peel Bond to prevent water damage and ensure adhesion.
- Clean, scuff, and prime hardware with metal spray primer before applying two to three even paint coats.
Power Washing and Initial Surface Inspection
Before we apply the first drop of paint to your Filer home, we’ll need to power wash every exterior surface—a step that’s non-negotiable for long-term paint adhesion. We’ll use a gas-powered pressure washer at 2000-2500 PSI, combined with house detergent and bleach, to remove dirt, mold, mildew, and loose paint chips that compromise bonding.
Conducting thorough visual inspection post-washing reveals critical issues: rotted wood, cracked siding, grey mildew spores, or blistering paint requiring repair before we proceed. We’ll identify areas needing additional attention once loose material is removed.
Achieving optimum surface dryness is essential—we’ll verify moisture levels below 15% before advancing. Depending on climate and sun exposure, surfaces may require up to one week drying. Painting damp wood risks peeling and failure.
Scraping and Sanding Peeling Paint
Once the power-washed surfaces have dried completely, we’ll address every section of loose and peeling paint through systematic scraping and sanding. We’ll start with five-in-one tools and putty knives, applying moderate pressure while working along the wood grain to prevent gouging. Our careful scraping techniques include testing paint adhesion by tapping edges—if it doesn’t pop off easily, we’ll move forward rather than forcing removal. Wire brushes handle stubborn chips and fraying edges effectively.
After scraping, we’ll smooth changes with 220-grit sandpaper, eliminating sharp edges that could compromise new paint adhesion. Throughout this process, we’re wearing protective goggles and masks while working over plastic sheeting for containment. We’ll confirm readiness by running our hands across surfaces, ensuring proper smoothness before applying quality primers like Kilz or Peel Stop for ideal adhesion.
Caulking Cracks and Gaps
After completing our scraping and sanding work, we’ll turn our attention to caulking—a critical step that seals cracks and gaps against moisture infiltration and secures a uniform painted finish.
Proper caulking seals vulnerable gaps against moisture damage while creating the smooth, professional surface essential for a flawless paint application.
We’ll first remove all failing caulk, dust, and debris, then prime bare surfaces before applying new material. Understanding caulking selection limitations guarantees success: we’ll choose paintable formulations and limit application to gaps ⅛ inch or less, using backer rod for anything larger to prevent three-point adhesion failures.
Our caulking application techniques involve laying material deeply into gaps, feathering with a modified chip brush, and smoothing within five minutes. We’ll work only when temperatures exceed 40°F and allow several days’ curing time.
For Filer’s climate, we recommend high-quality siliconized acrylic latex sealants that resist shrinkage and maintain flexibility.
Priming Bare Wood and Problem Areas
We’ll apply Peel Bond to all bare wood surfaces, nail heads, and compromised areas where paint has peeled or lifted.
For blistered siding sections, we must seal these damaged zones to block moisture infiltration that caused the original failure. This sealing process creates a waterproof barrier that prevents future water damage and guarantees your topcoat adheres properly to problem areas.
Peel Bond for Bare Wood
When preparing bare wood surfaces in Filer’s variable climate, we apply Peel Bond primer to create a flexible, protective foundation that prevents future paint failure. This specialized product penetrates deep into raw wood, T1-11 siding, and plywood at 5-10 mils wet, effectively sealing porous surfaces while filling minor imperfections and bridging hairline cracks up to 30 mils wet.
We confirm proper peel bond application by verifying wood moisture content stays below 15% and surfaces are completely clean and dry. The primer applies hazy white and turns clear when ready for topcoating—typically within two hours.
Understanding peel bond limitations is critical: it won’t penetrate old paint or re-bond existing peeling surfaces. We’ll still need traditional wood fillers and caulk for significant repairs, making this product part of our thorough preparation strategy.
Sealing Blistered Siding Areas
While Peel Bond handles raw wood preparation, blistered siding requires a different remediation approach. We’ll begin with moisture content evaluation—identifying whether blisters contain trapped water vapor or have dried completely.
Fresh blisters appear as bubbles with surface skin; we puncture these to release gases, push the sealant back, then apply a skim coat after 2-3 days. Cured blisters need complete removal with a razor blade before filling with fresh sealant.
Surface contaminant removal is critical—we’ll scrape loose paint, sand rough edges with 120-grit paper, and blow off dust. For bare wood exposed during blister repair, we’ll spot prime these areas thickly, achieving 2-250 square feet per gallon coverage. This guarantees our substrate accepts the topcoat uniformly.
Preventing Future Water Damage
After addressing immediate blister concerns, our focus shifts to permanent moisture protection through systematic bare wood treatment. We’ll thoroughly dry waterlogged areas using air circulation or dehumidifiers before proceeding. Monitoring moisture levels guarantees we don’t trap dampness during priming—solid wood survives better than MDF when properly dried.
We’ll sand problem areas with #320-grit or finer sandpaper to level surfaces and enhance primer adhesion. Deep damage requires wood filler or epoxy applications, while loosened joints need gluing and clamping. We apply KILZ RESTORATION Primer to seal heavy stains, followed by waterproof sealants for enhanced resistance.
Conducting periodic inspections helps us catch leaks early, preventing water from reaching primed surfaces. Our community of homeowners understands that resolving moisture sources promptly, combined with quality sealants, safeguards against recurrence.
Preparing Hardware and Decorative Elements
Before applying fresh paint to hardware and decorative elements in your Filer home, we’ll need to properly remove and prepare these components for ideal adhesion and longevity. Our hinge removal strategy begins with securing loose screws by poking them through cardboard box flaps for stability during the painting process.
We’ll clean all surfaces thoroughly using degreaser or alcohol wipes to eliminate grease buildup that compromises paint adhesion. Next, we’ll scuff existing finishes with 180-220 grit sandpaper, creating the necessary texture for primer bonding.
After applying one thin coat of metal spray primer, we’ll follow with two to three even coats of paint from 10-12 inches distance. Our hardware reattachment protocol includes allowing full cure time before reinstalling components to their original positions.
Taping and Protecting Trim
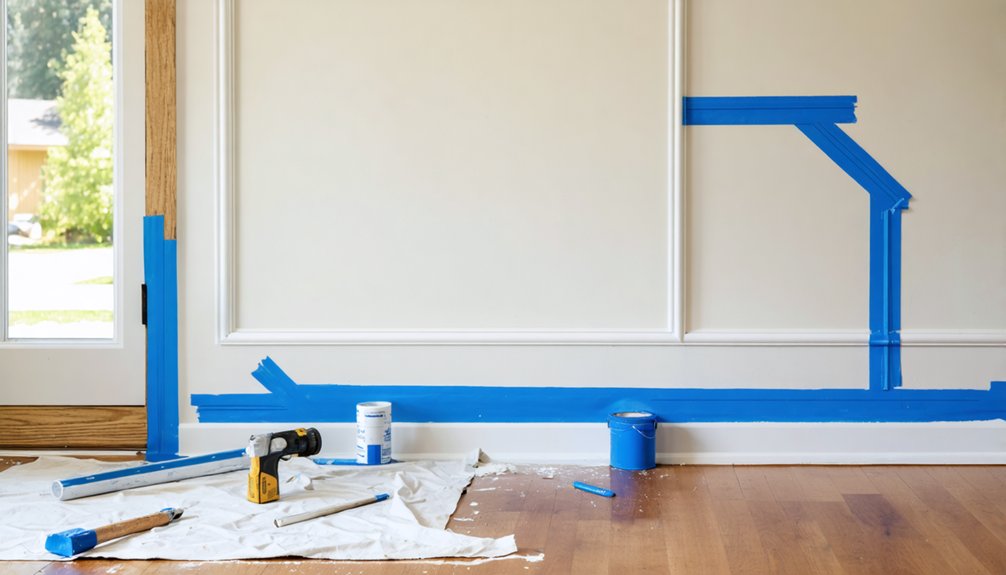
Proper taping techniques create the foundation for professional-grade paint lines and protect your Filer home’s trim from unwanted paint coverage. We’ll start by cleaning baseboards and trim thoroughly, ensuring complete dryness before application. For ideal tape adhesion quality, we recommend FrogTape Multi-Surface or Scotch Painter’s Tape in 1-1/2-inch width or wider. Apply strips in manageable 12-18 inch sections, pressing firmly along edges with our fingers to seal completely.
For conformance to curved surfaces, we’ll select poly or crepe-backed tape that stretches naturally. Before applying our final coat, we’ll paint the background color over the tape edge—this sealing trick prevents bleed-through. We’ll remove tape at a 45-degree angle while paint remains wet, pulling low and close to the surface for control and crisp lines.
Addressing Weather and Temperature Considerations
We’ll now address critical weather and temperature parameters that directly impact paint adhesion and longevity in Filer’s climate. Your project’s success depends on maintaining surface temperatures between 50-85°F and scheduling around Idaho’s distinct seasonal patterns.
Filer’s dry climate offers significant advantages for exterior painting, but we must still carefully time application to avoid temperature extremes and moisture complications.
Ideal Temperature for Painting
Temperature directly determines whether your paint will cure properly or fail prematurely. We recommend painting when ambient temperatures fall between 50°F and 85°F for latex paints, or 40°F to 90°F for oil-based products. The ideal sweet spot is 77°F. However, we can’t rely solely on air temperature—surfaces in direct sunlight often exceed ambient readings by significant margins. We’ll need an infrared thermometer to verify surface temperatures stay within specifications.
Temperature fluctuations pose serious risks; if nighttime temperatures drop below 50°F after daytime application, we risk curing failure and poor adhesion. Additionally, we must guarantee surface temperature exceeds the dew point by more than 5°F, and maintain moisture levels between 40% and 70% humidity to prevent bubbling or premature drying.
Dry Climate Advantages
While Filer’s dry climate presents occasional challenges for exterior projects, it delivers substantial advantages when painting your home. We benefit from efficient drying times as water-based paints cure rapidly through quick evaporation, reducing risks of dust contamination and paint defects like sagging.
Our lower humidity levels—typically within the ideal 40%-70% range—support strong paint adhesion by maintaining dry surfaces and preventing moisture entrapment beneath paint films. We also experience minimized mold growth since fungal spores can’t thrive without sustained moisture exposure.
This dry environment extends paint longevity by reducing premature chalking, surfactant leaching, and weathering damage. Additionally, our surface preparation becomes simpler with faster drying times after cleaning. These conditions create predictable, consistent results for your painting project.
Timing Your Exterior Project
Understanding Filer’s dry climate benefits means little if we paint during unsuitable weather conditions. We must guarantee temperatures remain above 50°F during application and stay above 32°F at night for several days afterward. Our ideal painting window runs from late spring through early fall, when daytime temperatures stay between 50°F-85°F.
During summer’s intense heat, we recommend early morning application to prevent rapid drying that creates uneven finishes. Surface temperatures on siding can exceed 120°F by midday, compromising adhesion quality. We’ve found that optimized drying schedules—working before 10 AM or after 4 PM—deliver superior results.
Fall offers our most reliable conditions with stable temperatures and minimal precipitation. Winter painting isn’t viable, as freezing temperatures prevent proper curing and cause premature paint failure.
Lowering Landscaping for Access
Proper landscape clearance creates the essential workspace painters need to safely access every exterior surface of your Filer home. We’ll need to trim hedges and shrubs at least 2-3 feet from siding, establishing ground clearance measurements that allow ladder placement and foot traffic.
Creating adequate clearance around your home’s exterior ensures our painters can safely position ladders and navigate work areas without obstruction.
Our landscaping impact analysis identifies low-hanging branches over rooflines, overgrown bushes near foundations, and ground cover vines climbing walls—all requiring removal before work begins.
We must redirect sprinklers hitting exterior surfaces to guarantee moisture damage doesn’t occur during preparation. Protecting remaining vegetation involves covering plants with tarps and drop cloths to shield against overspray.
Before making changes, we’ll verify compliance with HOA guidelines and document pre-work conditions with photographs. This systematic approach certifies our team can work safely while preserving your landscape’s long-term health.
Final Pre-Paint Checklist
Getting down to business with our final pre-paint checklist guarantees we’ve addressed every critical detail before the first brushstroke. We’ll confirm all furniture is protected by laying canvas drop cloths across floors and covering larger pieces with plastic sheeting.
Next, we verify artwork, mirrors, and wall décor have been removed and stored safely. We inspect our wall cleaning work, ensuring surfaces are completely dry and free from dust or residue. Our repair work gets a final review—spackled areas should be smooth and sanded, primer applied where needed.
Before proceeding, we complete the critical step of applying masking tape to windows, trim, and baseboards, pressing firmly to prevent paint seepage. We’ve protected electrical outlets and secured fixture covers, creating our ideal painting environment.
Frequently Asked Questions
How Long Does the Entire Exterior Paint Preparation Process Typically Take?
“Good things come to those who wait”—we’ll spend 1-3 days on your prep work. Our surface cleaning requirements and paint scraping techniques guarantee proper adhesion. Together, we’re building lasting protection for your home’s exterior through meticulous preparation.
What Is the Average Cost to Professionally Prep a Home Exterior?
Professional exterior prep typically represents 60-70% of total paint costs, averaging $1,800-$3,500 for most homes. We’ll find labor expenses vary based on surface condition, material type, and required repairs before applying your quality finish coat.
Can I Paint Over Old Paint Without Any Preparation Work?
We don’t recommend painting over old paint without preparation. You’ll need necessary surface cleaning techniques and proper paint removal methods where deterioration exists. Skipping these steps compromises adhesion, resulting in premature failure that’ll cost more long-term.
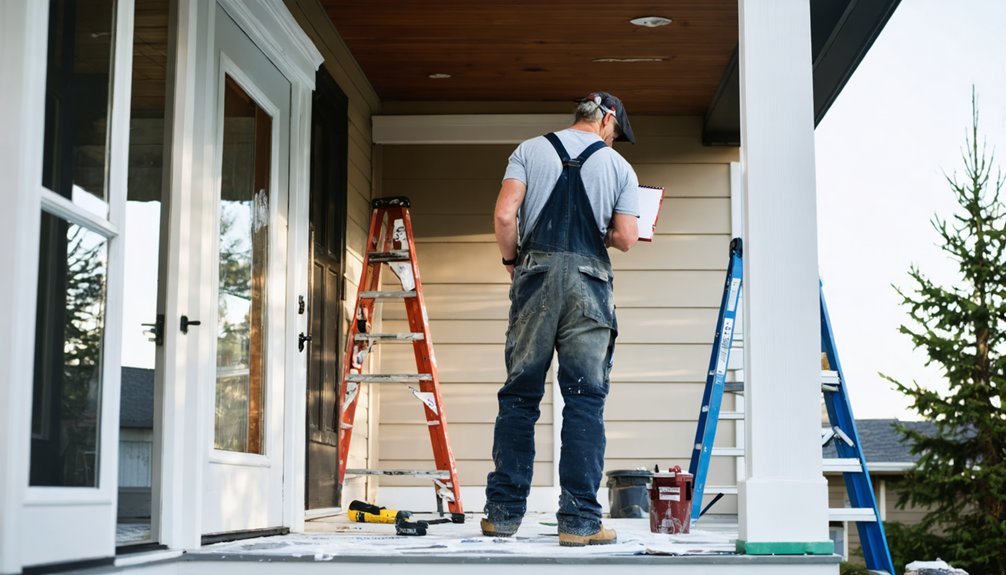
Should I Hire Professionals or Complete Exterior Paint Prep Myself?
We’d recommend hiring professionals unless you’ve got solid DIY experience with ladders and paint removal. Consider your skill level, then evaluate cost benefit analysis—pros deliver safer results and time savings that often justify the investment.
How Often Should Exterior Paint Preparation and Repainting Be Done?
We recommend establishing a paint maintenance schedule every 5–7 years for Filer homes. Paint longevity expectations depend on your siding type and Idaho’s harsh climate. We’ll help you monitor conditions and plan timely touch-ups together.