We’ve found that preparing your Wendell home for painting requires three essential steps: pressure wash at 1,500-2,500 PSI to remove contaminants, scrape loose paint and fill cracks with V-shaped channels for superior adhesion, then sand all surfaces with 80-120 grit paper. Apply exterior-grade primer—oil-based for wood, rust-inhibiting for metal—and caulk all seams thoroughly. Schedule work between May and mid-October when temperatures stay within the critical 60-85°F range with 40-70% humidity. Our thorough guide below covers formulation selection and protection protocols specific to Idaho’s challenging high desert conditions.
Key Takeaways
- Schedule painting during late spring, summer, or early fall when temperatures stay between 60-85°F with 40-70% humidity for optimal curing.
- Pressure wash exterior surfaces at 1,500-2,500 PSI, then scrape loose paint, fill cracks, and sand with 80-120 grit sandpaper.
- Apply exterior-grade primer to bare surfaces: oil-based for wood, rust-inhibiting for metal, ensuring proper paint adhesion.
- Select 100% acrylic latex paint for superior performance in Wendell’s arid climate and extreme temperature fluctuations.
- Protect interior areas with canvas drop cloths, plastic sheeting, and painter’s tape on windows, trim, and baseboards.
Understanding Wendell’s Climate and Its Impact on Painting Projects

Before initiating any exterior painting project in Wendell, Idaho, we must analyze the region’s continental climate and its direct effects on paint application, curing, and long-term performance.
Our area experiences dramatic temperature swings—from 20°F winter lows to 90°F summer highs—creating a 70°F annual range that demands strategic planning. Dew point calculations become critical during winter months when humidity reaches 72-78%, potentially compromising adhesion if we’re not vigilant.
Humidity’s role in paint curing proves especially significant during December and January, our wettest months averaging 1.4 inches of precipitation. However, our annual average of just 10 inches creates ideal conditions for most painting applications.
With 209 sunny days annually and consistent 15 mph winds, we’ve got extended working windows during spring and autumn when temperatures stabilize between 45-65°F.
Choosing the Right Season for Exterior Painting
While Wendell’s continental climate presents a 209-day sunny window annually, we’ll achieve ideal exterior paint performance by targeting three distinct periods: late spring (May-June), peak summer (July-August), and early fall (September through mid-October). Our seasonal scheduling considerations prioritize temperatures between 60–85°F with 40–70% humidity levels—conditions that guarantee proper adhesion and curing.
We’ll implement weather monitoring strategies that account for the 36-hour post-application window when temperatures mustn’t drop below 35°F. Summer’s extended daylight hours accelerate project completion, though we’ll schedule around mid-90s heat by working mornings and evenings. Fall offers optimal conditions with steady 50–60°F daytime temperatures, but we must complete work by mid-October before nighttime freezes compromise paint integrity. Strategic timing transforms quality outcomes.
Essential Surface Preparation Steps
Professional paint adhesion begins with systematic surface preparation—a non-negotiable protocol that determines whether our exterior coating will endure Wendell’s temperature fluctuations or fail within seasons.
Surface preparation isn’t optional—it’s the determining factor between coating systems that endure decades and those that fail within seasons.
We’ll initiate with pressure washing at 1,500-2,500 PSI, maintaining 12-18 inches from surfaces to eliminate contaminants without material damage. After 24-48 hours drying time, we’ll scrape all loose paint and address cracks using V-shaped channels for enhanced filler contact.
Achieving ideal surface smoothness requires 80-120 grit sandpaper across all areas, with random orbital sanders expediting larger sections. We’ll apply exterior-grade primer to bare substrates—oil-based formulations for wood, rust-inhibiting variants for metal.
Ensuring proper paint adhesion demands thorough caulking of seams and exterior-grade filler application. This systematic approach guarantees our coating system performs as engineered.
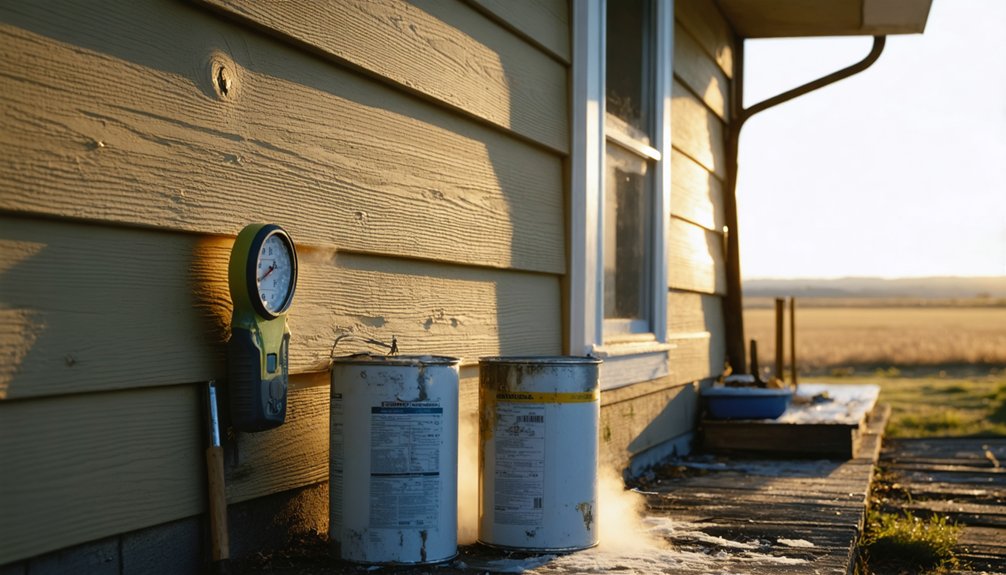
Selecting Paint Types for Idaho’s Dry Climate
Idaho’s arid climate—characterized by low humidity, intense UV exposure, and temperature swings exceeding 40°F between day and night—necessitates paint formulations engineered for dimensional stability and UV resistance. We recommend 100% acrylic latex exteriors that demonstrate superior paint performance in arid conditions, maintaining film integrity through repeated thermal cycling. These formulations incorporate advanced UV inhibitors and flexible resins that accommodate substrate expansion without microcracking.
For moisture barriers in dry climates, we specify breathable elastomeric coatings on masonry surfaces, allowing interior vapor transmission while blocking wind-driven moisture. Alkyd-modified products perform exceptionally on wood substrates, penetrating deeper than standard latex while retaining flexibility. We prioritize products rated for 500+ hours in accelerated weathering tests—ensuring long-term adhesion despite Wendell’s challenging environmental conditions. Your paint selection directly determines coating longevity.
Protecting Your Home’s Surfaces Before You Start
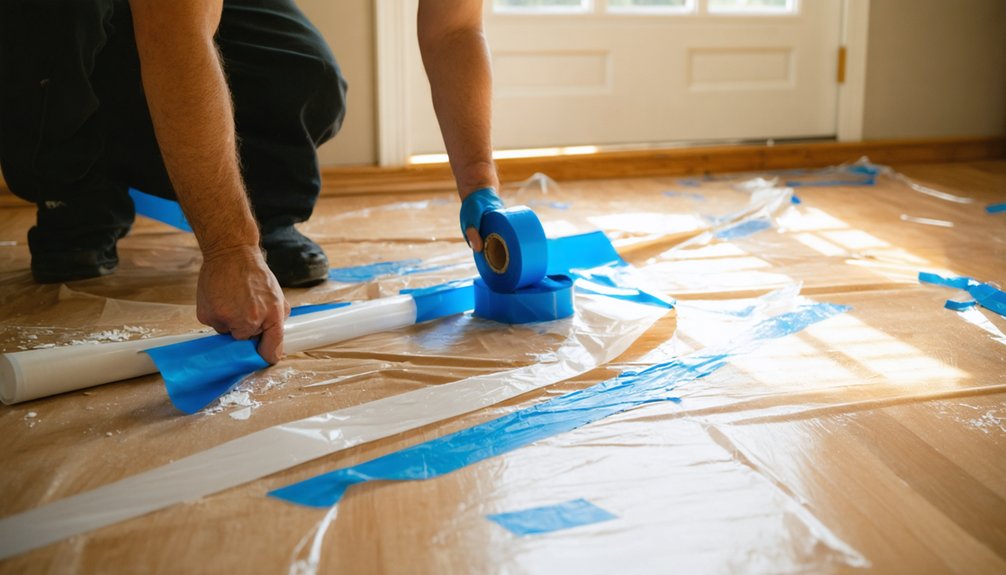
Before we apply the first coat, we’ll establish thorough protection protocols for all surfaces in your Wendell home. Our process begins with layering canvas drop cloths and plastic sheeting across floors, followed by systematic furniture coverage to prevent paint contamination.
We then apply painter’s tape and masking film to windows, trim, and baseboards, creating precise barriers that guarantee clean edge definition throughout the project.
Covering Floors and Furniture
When protecting your Wendell home’s interior surfaces, establishing a thorough floor and furniture covering system prevents costly damage and eliminates post-project cleanup complications. We’ll implement proven techniques that professional painters rely on throughout Idaho.
Preventing floor damage requires selecting appropriate materials:
- Apply rosin paper on hardwood, vinyl, and tile for heavy-duty protection with excellent walkability
- Deploy canvas drop cloths in high-traffic zones where superior traction prevents slipping hazards
- Secure masking film over carpets to guard against paint penetration and fiber soaking
- Stretch coverings flat with edges aligned to walls, taping perimeters for complete coverage
Proper furniture placement involves relocating large pieces toward room center, then enveloping remaining items with 1-mil plastic sheeting. We’ll seal coverings with painter’s tape, extending protection to floor level for exhaustive dust containment.
Masking Windows and Trim
With floors and furniture secured, we’ll establish precision masking protocols for windows and trim—the surfaces most vulnerable to overspray and paint bleed. We’re starting with our side-first method, applying 1-1/2″ blue painter’s tape from corner to corner on sun-exposed windows. For shaded areas with quick removal timelines, white tape suffices. We’re choosing complementary tape colors that match our workflow demands while ensuring proper adhesion through dry-rag surface preparation.
Before committing to traditional methods, we’re testing liquid masking application on smooth glass surfaces. This alternative creates protective barriers without permanent adhesion, brushing product toward edges for even coverage. We’ll reinforce corners with overlapping tape layers and seal all gaps in masking film. Our removal timing—the day after spraying—prevents paint-to-tape bonding while maintaining sharp lines throughout the project.
Gathering the Right Tools and Equipment
Successful paint application depends fundamentally on assembling a complete toolkit before project initiation. We’ll need strategic brush selection across multiple configurations—synthetic bristle brushes (polyester and nylon) for water-based paints and natural bristle options for oil-based applications. Angled 2-inch brushes excel at cutting in corners and trim work with precision.
Strategic brush selection forms the foundation of professional painting—matching bristle composition to paint formulation ensures optimal application performance.
For roller application, we recommend:
- Multiple nap sizes (4-inch, 9-inch, and 18-inch) for varied surface coverage
- Paint trays with disposable liners for efficient cleanup
- Bucket grids to load rollers evenly and remove excess paint
- HANDy Paint Pails featuring magnetic brush holders and adjustable carrying straps
Surface preparation requires 180, 220, and 320-grit sandpaper alongside putty knives for repairs. We’ll protect adjacent surfaces using painter’s tape, drop cloths, and masking film applicators to guarantee professional results throughout our Wendell home.
Priming Techniques for Long-Lasting Results

We’ve equipped ourselves with professional-grade tools, so now we’ll focus on primer selection and application techniques that guarantee maximum paint adhesion and longevity.
Your Wendell home’s surfaces dictate which primer formulation—water-based, oil-based, or stain-blocking—will deliver ideal results, while proper application methods create the foundation for a flawless finish.
We’ll also address critical drying intervals between primer and topcoat applications to prevent adhesion failure and confirm your investment delivers lasting performance.
Choosing the Right Primer
Because substrate characteristics directly influence primer performance, selecting the appropriate primer formulation requires careful assessment of surface material, existing conditions, and intended topcoat application. We’ve developed systematic evaluation protocols to match primer chemistry with specific substrates in your Wendell home.
Primer Classification by Surface Requirements:
- Acrylic formulations deliver water-based convenience with excellent adhesion to drywall, laminate, and non-ferrous metals while maintaining low-VOC compliance
- Alkyd-based products provide superior stain-blocking for tannin-rich woods, rust penetration, and smoke damage remediation
- Specialty primer usage encompasses bonding primers for vinyl siding and masonry primer selection for concrete foundations
- Shellac primers offer single-coat odor sealing and universal topcoat compatibility
We’ll match formulation chemistry to substrate porosity, existing contamination levels, and environmental exposure conditions for ideal coating performance.
Surface-Specific Application Methods
While substrate selection determines primer chemistry, application methodology dictates coating performance and long-term durability. We’ll employ the cutting-in method using angled 2″ brushes to establish clean boundaries along trim and ceiling edges, followed by “W” pattern roller application for finish quality enhancement across wall surfaces.
On porous substrates like new plaster, we’re applying 10% diluted primer for thorough penetration and sealing capabilities. For bare wood and metal, we’re implementing two-coat primer systems to maximize adhesion. Before priming glossy surfaces, we’ll perform light sanding to increase mechanical bonding and minimize brush stroke.
We’re treating textured plaster with vinegar solution (one pint per gallon) before primer application. Immediate coating after surface preparation prevents oxidation and contamination, maintaining the integrity we’ve established through meticulous preparation protocols.
Drying Time Considerations
After completing surface preparation and primer application, drying time management becomes the critical determinant of coating system integrity. Understanding drying conditions in Wendell’s high desert climate—where humidity averages 52.2%—allows us to ideal application schedules for superior adhesion and longevity.
Critical drying parameters we must monitor:
- Temperature maintenance between 50°F–85°F, with 70°F yielding maximum evaporation rates
- Relative humidity below 60%; each 10% increase above 50% extends cure time by 20–30%
- Adequate ventilation through strategic airflow management using fans or natural circulation
- Evening dew exposure prevention in spring and fall months to avoid surface discoloration
Overcoming humidity challenges requires timing applications during Idaho’s March-through-October painting season. We’ll achieve touch-dry status in 2–3 hours with latex systems, though complete curing demands 5–7 days before subjecting surfaces to environmental stress.
Dealing With Temperature Fluctuations During Application
Temperature fluctuations present one of the most challenging variables we’ll encounter during paint application in Wendell’s variable climate. Managing temperature fluctuations requires vigilant monitoring before, during, and after coating application, as swings disrupt proper curing sequences and compromise adhesion. We must verify both ambient air and substrate temperatures remain within manufacturer specifications throughout the entire process.
When regulating environmental conditions, we’ll position climate control systems strategically to maintain stability—heaters for cold mornings, forced ventilation for afternoon heat buildup. Metal substrates demand particular attention since they expand considerably more than organic coatings, creating internal stress that leads to delamination.
We should schedule application windows during periods of thermal stability, avoiding changeover times when differential movement between surfaces and paint films generates bonding failures and premature surface defects.
Maintaining Your Fresh Paint Job Year-Round
We recommend implementing these critical maintenance procedures:
Critical maintenance procedures implemented quarterly prevent costly failures and extend coating system longevity through strategic interventions.
- Conduct quarterly inspections focusing on high-sun southern exposures and moisture-prone northern surfaces for early deterioration detection
- Execute post-summer cleaning using low-pressure washing techniques to remove UV-degraded surface contaminants
- Apply spot primers immediately when bare substrate exposure occurs, preventing accelerated deterioration
- Maintain caulk integrity around vulnerable junctures where water infiltration risks increase
Our seasonal touch up schedule addresses minor failures before requiring complete recoating. We prioritize fall interventions before winter weather intensifies thermal cycling stress on coating systems.
Frequently Asked Questions
How Long Should I Wait Between Painting My Home’s Exterior Coats?
We’re aware you’re keen to complete, but we’ll wait 4-6 hours between coats for latex paint, ensuring proper paint drying time. We’ll monitor suitable humidity levels below 70% and temperatures above 50°F for perfect adhesion and curing.
Can I Paint During Wendell’s Windy Days or Should I Wait?
We recommend waiting for calmer conditions. Monitor wind speed and check weather forecast for readings below 10 mph. Strong winds disrupt spray patterns, embed debris in wet coatings, and compromise proper adhesion—ultimately affecting your project’s long-term durability.
What’s the Best Way to Dispose of Leftover Paint in Idaho?
We’ll recycle paint properly through Ada County’s Material Reuse Program or local collection sites accepting up to 25 gallons per visit. For oil-based products, we’ll dispose of hazardous waste safely at designated household hazardous waste facilities.
Should I Hire a Professional Painter or Do It Myself?
we recommend professionals for lasting results, though DIY painting projects work for budget friendly painting options. Consider surface prep requirements, application techniques, and your timeline—proper substrate preparation and even coating distribution demand technical expertise.
Do I Need Special Permits for Exterior Painting in Wendell?
We don’t need permits for exterior painting in Wendell—it’s exempt from building code requirements and local zoning regulations as routine maintenance. We can proceed confidently without municipal approval, though we’ll verify any HOA restrictions first.