We’ve refined interior painting for Buhl’s high-desert climate into a systematic process: clear and safeguard your space, repair wall imperfections with coarse then smooth putty, sand with 100-150 grit paper, and prime any bare wood or glossy surfaces. You’ll paint ceiling first, cut in wall edges with an angled brush, then roll in W-patterns from top to bottom. We recommend Sherwin-Williams Emerald Urethane for walls and Benjamin Moore Advance for trim—both formulated to handle Idaho’s temperature fluctuations. Below, we’ll walk you through each technique that guarantees professional results.
Key Takeaways
- Clear and protect furniture, remove wall décor, and store items away from work areas before beginning any painting project.
- Repair wall imperfections with putty, sand smooth with medium-grit sandpaper, and clean surfaces thoroughly before priming.
- Prime bare wood, glossy surfaces, stains, and repairs to ensure proper paint adhesion and prevent bleed-through problems.
- Paint ceilings first, then cut in wall edges with angled brushes before rolling walls in W-patterns from top to bottom.
- Choose quality paints like Sherwin-Williams Emerald for walls and Benjamin Moore Advance for trim in appropriate sheens.
Preparing Your Room Before You Start Painting
Before any brush touches the wall, proper room preparation determines project efficiency and final results. We’ll guide you through the systematic approach that professionals follow.
Start by removing lightweight wall hangings, artwork, and frames. Clear all surfaces—tables, shelves, counters, and mantels—of books, décor, candles, and electronics. Box these items and store them away from the work area.
Clear all surfaces of lightweight items—artwork, books, décor, and electronics—then box and store them away from the work area.
Moving bulky furniture to the room’s center protects pieces while providing wall access. Secure items like pianos or grandfather clocks in place.
Next, take down window treatments and disconnect all electronics. Remove wall-mounted televisions from brackets and coil cords away from painting zones. We recommend storing fragile decor in a separate room entirely.
Finally, empty closets and cabinets scheduled for painting, designate a staging corner for equipment, and complete these tasks before your crew arrives.
Essential Surface Preparation Steps
We’ll begin by systematically inspecting every wall surface for cracks, holes, nail pops, and imperfections that require patching compound or spackle. Once repairs have cured completely, we’ll sand all surfaces to create the smooth, even foundation necessary for proper paint adhesion and professional results.
Finally, we’ll apply the appropriate primer based on your substrate condition—whether it’s bare drywall, stained surfaces, or drastic color shifts—to guarantee ideal coverage and longevity.
Inspect and Repair Walls
Since proper adhesion depends entirely on surface integrity, we’ll start with a systematic wall inspection using three proven techniques. First, we’ll run our hands across surfaces to detect irregularities.
Next, we’ll tap walls with a small hammer—hollow sounds indicate moisture mitigation concerns or structural issues. Finally, we’ll examine everything under natural light from multiple angles.
Our drywall joint repair process follows this sequence:
- Apply coarse putty (BIRLA PUTTY) directly to joints and grind smooth
- Coat entire surface with one layer of coarse putty
- Apply one coat of smooth putty (BIRLA or ASIAN) over everything
- Sand with fine-grit sandpaper until uniformly smooth
We’ll overfill cracks slightly to compensate for shrinkage, then prime all repaired areas before painting begins.
Sand and Clean Surfaces
After completing wall repairs, proper surface preparation requires systematic sanding and thorough cleaning to certify paint adhesion. We’ll employ medium-grit sandpaper (100-150 grit) across most surfaces, switching to fine-grit for water-based painted areas. Our sanding techniques create uniform texture while preventing future peeling on previously painted surfaces.
For cleaning methods, we’ll apply mild detergent solution with a scrub brush, using circular motions on general walls. Kitchen surfaces demand grease-cutting detergent for oil removal. We’ll thoroughly rinse all areas, then wipe with damp cloths.
Post-sanding dust removal involves vacuuming baseboards before wiping surfaces clean. For mildew, we’ll use three-to-four parts water to one part bleach. Stubborn grease requires trisodium phosphate or commercial degreaser. Complete drying before priming verifies professional, long-lasting results.
Prime When Necessary
Proper primer application stands as the critical bridge between surface preparation and topcoat success. We prime for proper adhesion on bare wood, new drywall, and surfaces previously coated with oil-based paint.
When we prime for enhanced appearance, we’re sealing stains, creating uniform bases, and reducing topcoat requirements—especially when covering dark colors with tinted primers.
Essential priming scenarios include:
- Bare wood surfaces requiring sealed pores for consistent coverage
- Glossy surfaces after scuff sanding to guarantee mechanical bond
- Stained or discolored walls preventing bleed-through issues
- Repaired patches maintaining visual consistency across surfaces
We’ll apply primer using 2-3 inch angled brushes for cutting in and rollers in W patterns for field coverage. Complete drying per manufacturer specifications remains non-negotiable before topcoating.
The Right Order for Painting Your Interior
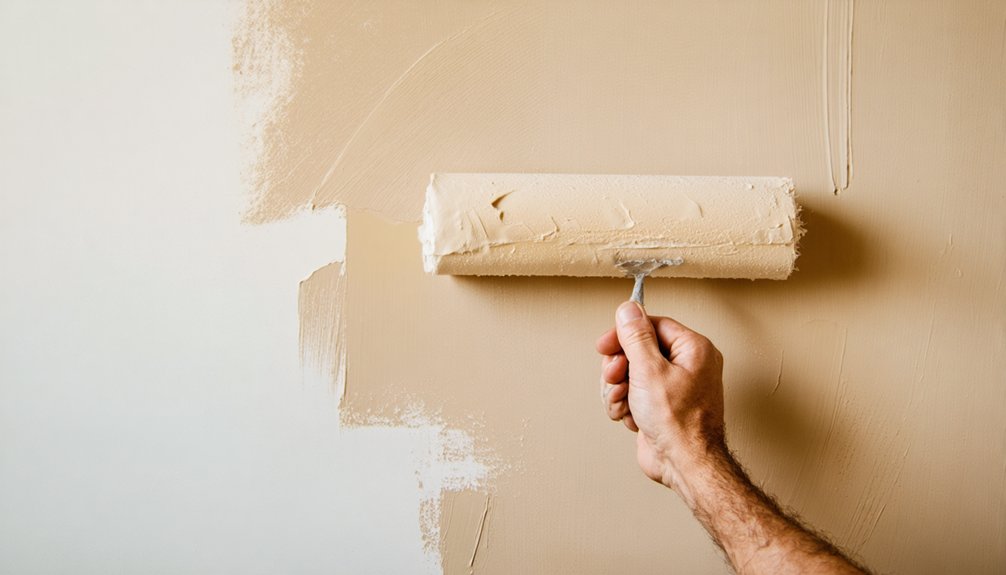
When tackling an interior painting project, the sequence of surface application directly impacts the quality of your finished work. We’ll always start with ceilings, allowing drips to fall onto unpainted walls below without concern. After the ceiling dries for 1-2 hours, we’ll cut in wall edges using an angled brush, creating a 2-3 inch border before rolling V- or W-shaped strokes from top to bottom.
This methodical approach maintains wet edges and prevents lap marks. Finally, we’ll address trim and baseboards, using small brushes for precise detail work. Between coats, we’ll follow manufacturer drying intervals—typically 2-4 hours—ensuring proper paint storage and uniform paint sheens throughout. This systematic sequence eliminates touch-ups and delivers professional results.
Choosing the Best Materials for Your Project
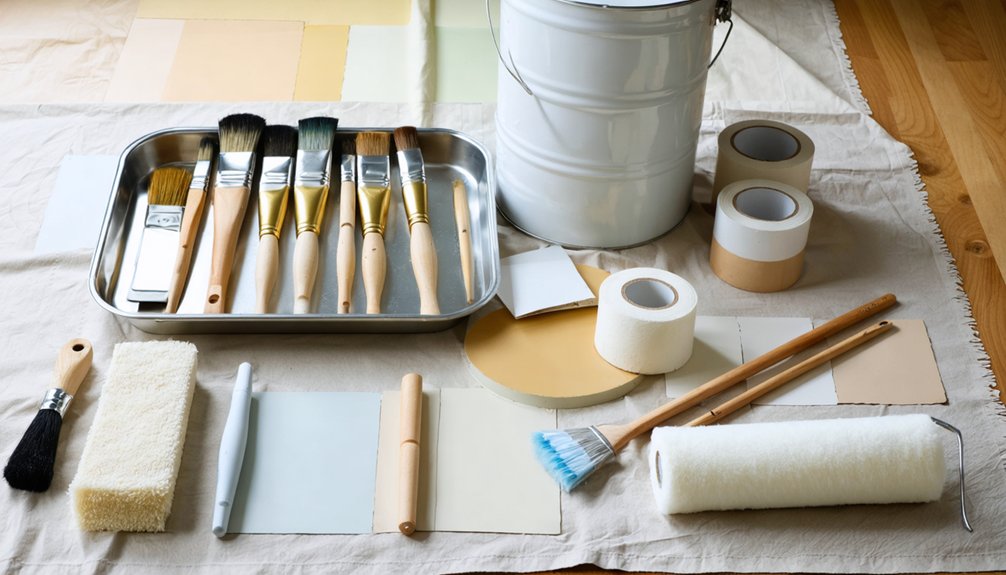
For rooms handling moisture and traffic, consider these proven specifications:
High-traffic and moisture-prone areas demand paint formulations engineered specifically for durability, cleanability, and long-term performance under challenging conditions.
- Walls: Sherwin-Williams Emerald Urethane Enamel in eggshell resists fading while tolerating temperature fluctuations
- Trim: Benjamin Moore Advance in satin provides superior touch-up performance alongside off-white palettes like City Loft
- Ceilings: Semi-gloss bright white maximizes light reflection in homes with 8-foot clearances
- Cabinets: 2K water-based polyurethanes outperform lacquers when properly ventilated
Our specialty coating considerations include low-VOC formulations for sealed interiors and low-temperature products applicable down to 35°F during shoulder seasons.
Professional Techniques for Clean Paint Lines
We’ll achieve razor-sharp paint lines by combining proper tape application with strategic caulking along wall-ceiling junctions. The tape-and-caulk method creates a physical barrier that blocks paint seepage, especially critical when shifting between dark accent walls and lighter adjacent surfaces.
Removing the tape at a 45-degree angle while the paint remains slightly wet prevents edge peeling and maintains the crisp demarcation you’ve established.
Tape and Caulk Method
Although cutting in freehand produces acceptable results for many painters, the tape and caulk method delivers razor-sharp lines that distinguish professional work from amateur efforts. We’ve refined this technique to guarantee achieving smooth caulk lines while avoiding common caulking mistakes that compromise finish quality.
- Apply FrogTape Green firmly to one wall section, preventing premature drying during extended work sessions.
- Cut the tube tip at a 45-degree angle and load into your caulk gun with consistent trigger pressure.
- Run a thin bead along the tape edge at 45 degrees, then immediately tool with firm finger pressure to push caulk deep into joints.
- Brush paint over wet caulk using soft filament brushes, then pull tape while paint remains wet to prevent bridging.
This methodology eliminates finger marks and delivers exhibition-quality edges.
Proper Paint Removal Timing
While many painters rush tape removal immediately after application, mastering the critical window between paint application and tape pulling separates professional finishes from amateur results in Buhl’s dry climate. We’ve found that waiting for complete paint drying before removal prevents jagged ridges and lifted edges that compromise clean lines.
Heavy paint loads require extended drying times—premature tape removal creates uneven buildup along borders. For proper tape removal methods, we evaluate paint thickness and environmental conditions before pulling. When applying paint protection products like varnish over taped edges, we employ heat softening techniques using a moving torch to release adhesive bonds without damaging the finish.
This methodical approach guarantees our lines adhere evenly to tape edges, delivering the crisp results Buhl homeowners expect from professional craftsmanship.
Optimal Drying Conditions for Buhl’s Climate
Since Buhl’s semi-arid climate creates distinct seasonal variations in temperature and humidity, we’ll examine how these conditions directly impact paint drying times and finish quality.
Optimal Interior Conditions for Paint Curing:
- Maintain ambient temperatures between 50-85°F throughout the application and curing phases
- Target relative humidity levels at 40-50% using dehumidifiers during high-moisture months (December’s 78% necessitates active humidity control)
- Implement temperature regulation systems during winter months when exterior temps drop to 21°F
- Guarantee adequate ventilation while avoiding direct airflow on wet surfaces
We’ve found that February’s 72% humidity and March’s elevated moisture levels necessitate extended drying periods between coats. During these months, we recommend spacing applications 4-6 hours apart rather than the standard 2-4 hours, guaranteeing proper film formation and adhesion.
Working With Trim and Baseboards
After establishing proper environmental controls for paint curing, we’ll address the technical requirements for trim and baseboard preparation. We begin surface preparation by vacuuming debris, then applying a vinegar-water solution (1/2 cup per gallon). Next, we’ll scuff existing finishes with an abrasive hand pad to guarantee primer adhesion.
For new installations, we’ll sand using 120-grit sandpaper, removing surface sheen. Rough trim requires 80-grit initially, followed by 100-120 grit passes.
Proper brush selection demands 1-2 inch angled sash brushes with nylon/polyester bristles for precision work. We’ll maintain trim protection using painter’s tape on adjacent walls, pressing edges firmly with fingernails or credit cards. Paint shields separate baseboards from carpet fibers during application. We recommend semi-gloss formulations for durability and cleanability in high-traffic areas.
Achieving Perfect Coverage With Two Coats
Professional painters recognize that two-coat systems deliver superior performance over single applications through measurable improvements in dry film thickness, color uniformity, and long-term durability.
We achieve 3–4 mils DFT with two coats versus 1–1.5 mils from single applications, meeting manufacturer specifications across paint brand considerations. Here’s our systematic approach:
- First coat stabilizes the surface by evening absorbency and covering initial imperfections
- Inspect for holidays—thin or missed areas—before second application
- Apply perpendicular to first coat direction for superior leveling and mark elimination
- Monitor environmental conditions to prevent flashing or sheen variations
Two coats extend lifespan from 2–3 years to 6–10 years while doubling washability and fade resistance. Maintenance after two coats becomes minimal, as the complete film resists moisture, UV degradation, and abrasion effectively.
Tips for Faster Drying and Same-Day Results
We’ve identified environmental control as the primary variable affecting paint drying rates in Buhl’s high-desert climate. Our humidity control strategies involve maintaining 40-50% relative humidity through dehumidifier deployment, while keeping temperatures between 65-85°F. We’re implementing air monitoring techniques by positioning fans at indirect angles, several feet from painted surfaces to prevent dust contamination while accelerating evaporation.
We’re applying multiple thin coats rather than thick layers—this technique delivers touch-dry results in 1-2 hours under ideal conditions. We’ve switched to water-based formulations with waterborne alkyd additives, enabling same-day room completion. For enhanced airflow, we’re opening windows strategically and utilizing extractors in moisture-prone areas. We’re checking dryness by testing hidden spots, distinguishing between touch-dry and full cure times for proper recoating intervals.
Frequently Asked Questions
What Sheen Should I Use for High-Traffic Areas Like Hallways?
We’d recommend satin sheen for your hallways—it’s durable and easy to clean without excessive shine. For maximum moisture resistance and scuff protection, we’d suggest semi-gloss sheen, though it’ll highlight any wall imperfections more noticeably.
How Do I Fix Paint Drips or Runs After They Dry?
Like erasing mistakes on canvas, we’ll restore your walls by sanding dried drips with 100-grit paper in circular motions, then covering paint drips with spackling if gouges appear. We’ll feather edges and repaint for seamless results.
Can I Paint Over Wallpaper or Must I Remove It First?
You can paint over wallpaper, but we recommend removing it first for ideal results. If you proceed, use proper wall preparation—clean thoroughly, repair defects, and apply oil-based primer. Otherwise, consider re-papering instead for better longevity.
What’s the Best Way to Store Leftover Paint for Touch-Ups?
We’ll guarantee proper paint lid sealing using a rubber mallet, then store containers in a temperature-controlled environment between 50-80°F. Label each can with color details and dates, keeping them upright away from temperature extremes for maximal longevity.
How Long Should I Wait Before Moving Furniture Back Into the Room?
We recommend waiting 24-48 hours minimum to allow paint to fully cure before repositioning items. Avoid heavy furniture placement for at least 72 hours with oil-based paints, ensuring ideal adhesion and preventing surface damage to your walls.