We’ll start by clearing rooms of artwork, curtains, and décor, then protect floors with overlapping 12-ounce canvas drop cloths taped at seams. Next, we’ll mask trim with 1-inch frog tape and apply paper-tape combinations at baseboards. Clean walls with mild detergent, treat mildew with diluted bleach solution, then scrape flaking paint and sand with 100-150 grit paper. Fill imperfections, caulk gaps, and prime where needed. Our systematic approach below reveals the LRV targets and timeline coordination that transform surface preparation into lasting results.
Key Takeaways
- Remove all wall hangings, curtains, and personal items from counters, shelves, and closets scheduled for painting.
- Protect floors with overlapping canvas drop cloths and mask trim with painter’s tape, pressing firmly to seal edges.
- Clean walls with detergent solution, scrape flaking paint, sand smooth with 100-150 grit sandpaper, and wipe dust.
- Fill wall imperfections with spackling compound, caulk gaps between trim and walls, then sand repairs smooth.
- Apply primer to repaired areas and unfinished trim, especially where dramatic color changes will occur.
Clear and Declutter Your Rooms
Successful interior painting begins with systematic room preparation, starting with complete decluttering of all surfaces and wall-mounted items. We’ll remove all pictures, artwork, and wall hangings, then take down curtains and window treatments.
Clear counters, shelves, and tables of books, décor, and personal items. Empty targeted closets and cabinetry scheduled for coating application.
Mark wall imperfections requiring patching with sticky notes for our crew’s reference. We’ll consolidate keepsakes and fragile items into labeled containers, organizing removed hardware by room. Disconnect electronics, coil cords, and relocate equipment away from work zones.
Arrange relocation plan for pets during active project hours. Box non-essential items like coffee station accessories. Store bathroom towels and shower curtains. This methodical approach creates ideal working conditions and protects your belongings throughout the painting process.
Protect Floors, Furniture, and Fixtures
With cleared rooms ready for work, we shift focus to establishing thorough protection systems for all surfaces in the paint zone. We lay 12-ounce canvas drop cloths on hardwood floors, overlapping edges six inches and taping down seams. For valuable hardwood, we add a paper underlayer blocking moisture penetration.
We mask trim and baseboards with 1-inch frog tape, pressing firmly to seal edges and prevent bleeding. A 9-inch paper-tape combination holds drop cloths against baseboards while protecting trim work.
For secure furniture placement, we position remaining pieces centrally, covering bases with canvas for drip absorption. We apply foam padding to delicate corners preventing tears in protective materials. On tile and vinyl, we extend full canvas coverage preventing ladder scratches. We tape all plastic edges securing position throughout our workflow.
Repair and Clean All Wall Surfaces
Before primer contacts drywall, we address every surface defect that compromises paint adhesion and final appearance. We start by cleaning walls with mild detergent solution, scrubbing away dirt and debris. Kitchen surfaces require grease-cutting formulas followed by clean water rinses.
Next, we remove mildew and mold using a three-to-four parts water to one part bleach solution, wearing proper protective equipment. Heavy growth demands anti-mold treatment and specialized sealers—never paint over active mildew.
We scrape away flaking paint and sand for smoothness and adhesion using medium-grit sandpaper (100- to 150-grit) on rough spots and glossy surfaces. This creates the mechanical tooth necessary for proper primer bonding. We finish by wiping dust with damp cloths and allowing complete drying before priming begins.
Prepare Trim, Molding, and Edges
Trim preparation demands the same attention to surface integrity we applied to walls, but with added complexity from profiles, joints, and architectural details. We’ll start by wiping down all trim with a damp rag to remove surface contaminants, then address greasy areas using warm water and TSP. After surfaces dry, we’ll fill imperfections with spackling compound or wood putty, then caulk gaps between trim and adjacent surfaces for seamless finishes.
Next, we’ll sand with 120-grit paper to remove gloss and smooth repairs, wiping away dust thoroughly. Unfinished trim or dramatic color changes require primer—we recommend making test strokes on inconspicuous areas first. Finally, we’ll apply painter’s tape along both edges, pressing firmly to prevent bleed-through and guarantee razor-sharp lines.
Coordinate Colors and Project Timeline
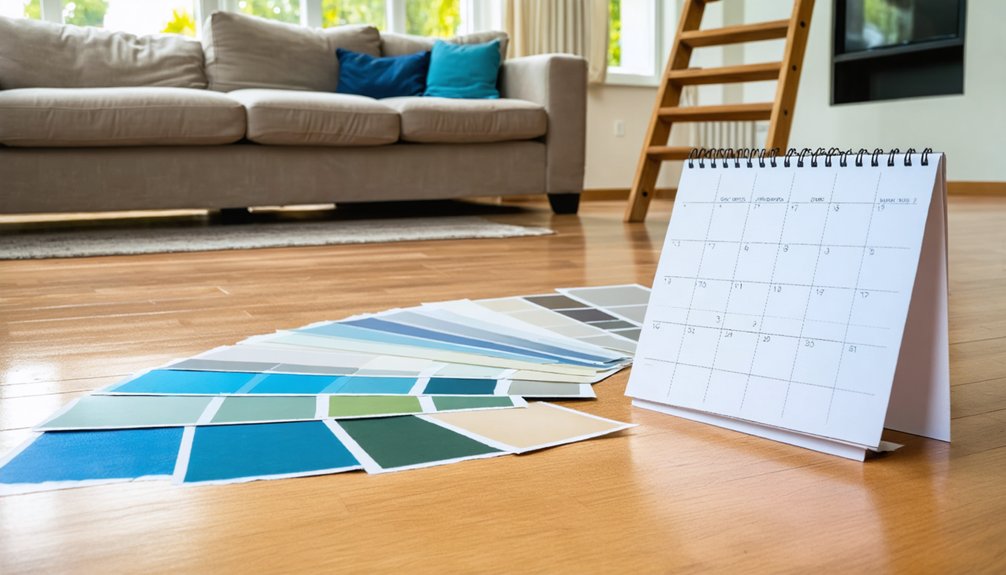
Once surface preparation concludes, we’ll shift focus to color coordination—a technical process that balances light reflectance values, contrast levels, and spatial flow. We’ll establish LRV targets first: low-contrast palettes need 15-20 points difference, medium requires 30-40, and high-contrast demands 45+. For cabinet-to-wall combinations, we’re pairing 40-55 LRV cabinets with 82-94 LRV whites.
Next, we’ll apply color wheel schemes—complementary opposites for drama, analogous adjacents for harmony, or triadic spacing for balance. The 60-30-10 rule distributes our palette: 60% dominant walls, 30% secondary furniture, 10% tertiary accents.
Timeline planning accounts for sightlines between rooms, restricting bold colors to enclosed spaces. We’ll maintain flow-through consistency in open plans using repeated base colors, ensuring cohesion across connecting areas without visual choppiness.
Gather Essential Tools and Materials
After finalizing color selections and project sequencing, we’ll assemble our toolset using specification-grade equipment that matches surface requirements and paint chemistry. We’ll select separate brush sets—Wooster, Purdy, or Corona—designated for water-based versus oil-based applications. Our angled sash brushes (2″-2.5″) handle trim work, while 9-inch microfiber roller covers paired with extension poles address wall expanses efficiently.
For surface preparation, we’ll stock 150-220 grit sandpaper, spackle with applicators, and caulk guns for sealing baseboards. Low-tack painter’s tape guarantees crisp lines, while canvas drop cloths protect work zones. We’ll test paint samples on primed surfaces before full application.
Our roller frames accommodate 4″, 9″, and 18″ naps for varied textures. Paint bucket grids control excess material. Post-project, we’ll store brushes and rollers properly—suspended or laid flat—maintaining bristle integrity for future applications.
Frequently Asked Questions
Should I Prime Walls if I’m Painting Over the Same Color?
We’ve seen pros skip primer application on intact same-color latex, but here’s the truth: 80% prime anyway for uniform paint sheen selection and durability. If your walls show wear, stains, or texture changes, we’re priming—no shortcuts.
How Long Does Interior Paint Typically Take to Fully Cure and Dry?
We’ll see latex paint drying time reach touch-dry in 1-2 hours, but the paint curing process takes 21-30 days for full hardness. Oil-based dries slower at 6-8 hours, yet cures faster within 3-7 days.
Can I Paint in Cold Weather or High Humidity Conditions Indoors?
Like Goldilocks seeking “just right” conditions, we’ll need to maintain ideal temperature range above 50°F and avoid excessive moisture indoors. Proper substrate temperature and controlled humidity guarantee suitable film formation, bonding, and cure rates for professional-grade results.
What’s the Best Order to Paint: Ceiling, Walls, or Trim First?
We’ll follow the proper paint sequence: ceiling first, then walls, finally trim. This top-to-bottom approach guarantees ideal paint coverage while preventing drips on finished surfaces. It’s how we achieve professional results every time.
Do I Need to Turn off Electricity When Painting Near Outlets?
We’ll take precautions by cutting power to outlets during prep work involving cover removal. For routine brush work near receptacles, maintain ventilation, use proper masking techniques, and keep wet paint from entering slots—no shutdown necessary.