For wet drips, we’ll immediately brush out excess paint or remove heavy buildup with a damp cloth before reworking the area. Once paint has dried, we’ll scrape drips with a putty knife held at 30-45 degrees, then shave remaining material with a razor blade. We’ll sand progressively from 150-grit to 220-grit for smoothness. To eliminate brush marks, we’ll sand lightly with 220-grit paper between thin coats, maintaining a wet edge throughout application. The sections below cover proper tool selection and prevention techniques in detail.
Key Takeaways
- For wet drips, immediately brush out excess paint or remove heavy buildup with a damp cloth before working the area smooth.
- Remove dried drips by scraping with a putty knife at 30-45 degrees, then progressively sand from 150-grit to 220-grit.
- Eliminate brush marks by lightly sanding with 220-grit paper between thin coats and maintaining a wet edge during application.
- Fix roller marks through targeted sanding with 220-grit paper, then recoat using thin layers with the correct roller nap.
- Prevent future issues by thinning paint appropriately, applying uniform strokes, and avoiding re-brushing partially dried areas.
Understanding Common Paint Application Problems
Paint failures don’t happen by accident—they’re the direct result of specific missteps in preparation, application, or material selection. When we skip proper surface cleaning or insufficient priming, we’re setting ourselves up for adhesion failures that manifest as peeling, blistering, and flaking. Contaminated substrates with oil or wax create cissing, where paint literally recoils from the surface.
Uneven paint coverage stems from inconsistent application methods—brushing corners while rolling centers produces picture framing with telltale darker edges. Wrong roller selection compounds these issues: sponge rollers with water-based paints generate foam and craters, while improper technique creates runs and spatter.
Environmental factors matter too. High humidity causes curtains in fresh coats, while temperature extremes compromise leveling and cure. Understanding these root causes helps us prevent problems before they start.
Fixing Wet Paint Drips Before They Dry
When drips occur during application, we’ve got a narrow window—often just minutes—to correct them before the paint begins its flash-dry phase. Our first move is visual scanning during application, catching excess buildup before it runs.
For correcting wet paint drips, we’ll brush out the affected area immediately, working in the direction of our original stroke. A clean, dry brush with sharp edges gives us precision control. When we’re dealing with heavy accumulation, we’ll use a damp cloth to remove bulk, then follow with brushwork for seamless integration.
Avoiding wet paint drips starts with thin application layers and appropriate brush sizing. We work in manageable sections, maintaining control over our coverage. A quality 3-inch brush provides ideal paint distribution while minimizing runs.
Removing Dried Paint Drips From Walls
Once a drip has fully cured, we’ll need to mechanically remove it through scraping and cutting before sanding the surface smooth.
We start by using a sharp scraper or razor blade held at a 30–45-degree angle to shave away the bulk of the dried paint without gouging the underlying wall.
Following the initial removal, we’ll sand the area progressively from coarser to finer grits to feather the edges and restore a uniform surface.
Scraping and Cutting Techniques
Dried paint drips require methodical removal that balances efficiency with surface protection. We’ll hold our putty knife or 5-in-1 tool at a 30–45-degree angle, applying light, even pressure to avoid gouging the substrate. First, we’ll confirm the drip’s completely dry, then use a razor blade to shave the bulk without cutting into the wall.
A stiff scraper handles the remaining material—we’ll work the blade flat against the surface, removing high spots iteratively until we’ve achieved a level plane.
For effective scraping on plaster, we’ll maintain constant pressure due to its hardness. Textured walls demand careful technique with lighter touch to preserve the pattern. We’ll finish by wiping away loose particles and inspecting for remaining ridges before advancing to surface preparation.
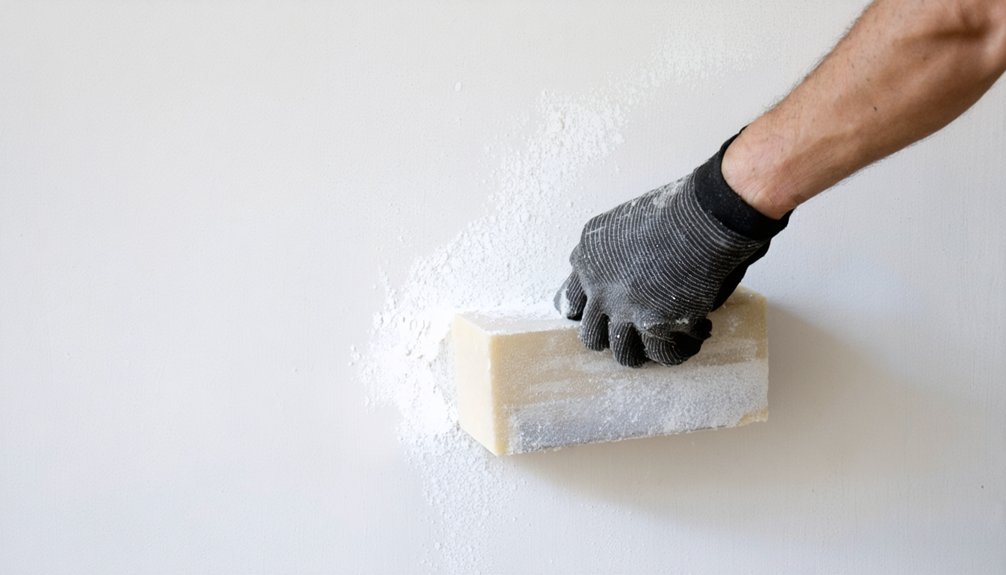
Sanding and Smoothing Process
After scraping away the bulk of dried paint drips, we’ll smooth out the remaining irregularities through progressive sanding. Start with 150-grit sandpaper on a sanding block, distributing pressure evenly to prevent divots. Our sand grain sequencing follows professional standards: progress from 150-grit for leveling to 220-grit for final smoothing.
We’ll employ sanding pattern variations based on the drip’s orientation—always sand in the direction of the original drip to prevent flaking. Apply light, consistent pressure using small, controlled motions until there’s no bump under your fingertips. For stubborn ridges, wet sand with a dampened 3M sponge to prevent paint gumming.
Feather the edges with fine-grit paper for seamless blending. We’ll wipe away dust with a tack cloth, inspect under angled light, then prime any repairs before repainting.
Correcting Brush Marks on Painted Surfaces
Brush marks on painted surfaces result from improper technique, inadequate paint flow, or premature drying during application. We’ll need to address these issues systematically for professional results.
Controlling paint viscosity guarantees ideal flow characteristics. Thin the paint with appropriate thinner to achieve smoother application without sacrificing coverage. We’re aiming for paint that levels naturally without working it excessively.
Applying uniform paint film necessitates loading ¼ to ⅓ of bristle length and working the coating evenly across the surface. Execute back-and-forth strokes until uniform, then finish with continuous end-to-end tipping in one direction. Never re-brush partially dried areas—this creates additional marks.
Maintain a wet edge throughout application to prevent lap marks. If brush marks persist, lightly sand with 220-grit sandpaper between thin coats, allowing complete drying intervals.
Smoothing Out Unwanted Roller Marks
We’ll address roller marks through targeted sanding and strategic recoating, focusing on the specific techniques that eliminate texture irregularities and sheen variations. The fix requires proper surface preparation with 220-grit sandpaper using feathering strokes, followed by dust removal and thin paint application with a quality roller.
Selecting the correct roller nap—1/4 to 3/8 inch for smooth walls—and maintaining consistent pressure during recoating guarantees we achieve a uniform finish without introducing new defects.
Sanding and Reapplying Paint
When roller marks appear on your walls, sanding becomes the essential first step to restore a smooth, uniform surface. We’ll use fine 220-grit sandpaper or sanding sponges with light pressure in circular motions to level raised texture and eliminate sheen differences. After thoroughly removing dust with microfiber or tack cloths, we’re ready to repaint.
For minor marks, we’ll apply one thin coat using even pressure and consistent rolling direction, maintaining uniform sheen across the entire section. Paint conditioners like Floetrol® improve blending and self-leveling properties when addressing inadequate color coverage. We always repaint full wall sections rather than spot-touching to guarantee consistency.
The “W” pattern technique distributes paint smoothly while keeping a wet edge prevents new lap marks from forming during application.
Choosing the Right Roller
Microfiber roller benefits include superior paint pickup and release, reducing trips to the tray while maintaining consistent coverage. We prefer high-quality synthetic or microfiber rollers over foam—they hold more paint and provide better durability.
Mohair blends rank highest for ultra-smooth finishes on high-gloss surfaces, though they require prepping to minimize shedding. Choose shed-resistant woven covers for flat, eggshell, or satin sheens.
Preparing Walls for Touch-Up or Repainting
Before applying fresh paint to fix drips and brush marks, we’ll verify the wall surface is clean, smooth, and properly prepared. Cleaning painted surfaces starts with removing all contaminants—grease, dust, and oils—using a damp cloth with mild dish soap solution.
Once dry, we’ll sand existing drips and brush marks with 120-grit sandpaper to feather the edges flush with surrounding areas. For deeper imperfections, we’ll apply lightweight spackle, let it cure, then sand smooth.
Prepping surfaces for painting requires wiping away all sanding dust and applying painter’s tape to protect trim and fixtures. We’ll prime repaired sections using manufacturer-matched primer for optimal adhesion and uniform sheen. This methodical approach ensures our touch-up work blends seamlessly with the existing finish.
Choosing the Right Tools and Materials
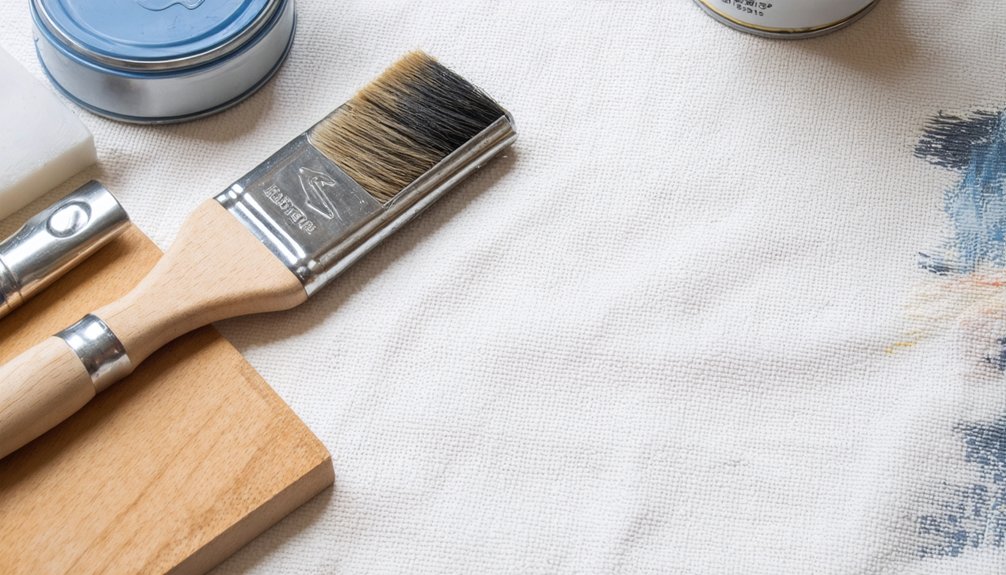
Selecting professional-grade tools directly impacts our ability to guarantee drips and brush marks without creating new surface defects. Optimizing surface preparation requires selecting specialized tools matched to specific repair tasks:
Professional-grade tools are essential for eliminating drips and brush marks while preventing new defects during surface preparation and repair work.
- Sandpaper progression: Start with 100-120 grit for hardened drips, finish with 220 grit between coats
- Scraper varieties: Use razor blade scrapers on hardwood or tile; wide and narrow paint scrapers for different drip sizes
- Quality applicators: Wooster or Purdy brushes with synthetic fiber rollers (3/8-inch nap for flats and satins, 1/4-inch for gloss)
- Prep materials: Tack cloths for dust removal, lint-free cloths for cleanup, strainers for paint debris
We’ll pre-dampen latex rollers and de-lint them with packing tape before application. This systematic approach secures professional results.
Preventing Future Paint Drips and Marks
Mastering prevention techniques eliminates the need for extensive repairs and saves both time and materials on every project. We’ll achieve flawless results through proper paint mixing—stir thoroughly before application and periodically during use to keep pigments suspended.
Maintain consistent paint application by working in manageable sections while preserving a wet edge. Load brushes and rollers adequately without overloading, then apply moderate pressure to prevent buildup. Keep our tools wet between sections and avoid scraping excess paint from rollers, which causes dry dragging.
We’ll apply thin coats rather than heavy layers, allowing complete drying between applications. Direct horizontal strokes on baseboards and vertical strokes on door frames. By controlling room temperature and airflow, we prevent uneven drying that creates visible imperfections.
Frequently Asked Questions
How Long Should I Wait Between Paint Coats to Avoid Drips?
We’ll wait 2-4 hours between coats for proper application timing with water-based paints. This guarantees the base layer’s dry enough to prevent drips. For oil-based finishes, we’re looking at 24 hours minimum, regardless of paint consistency.
Can I Fix Paint Drips on Textured Walls Differently Than Smooth Ones?
Yes, we’ll need gentler grinding on textured wall preparation using 220-grit sandpaper and circular motions to preserve patterns. We’ll replicate texture over sanded spots before thick paint application, while smooth surfaces simply require feathering edges for seamless blending.
Will Paint Drips Show Through if I Repaint Without Fixing Them First?
Yes, drips will show through new coats, creating visible ridges and texture lines. We’ll need proper surface preparation—sanding dried drips flat—before repainting. Even with perfect wet paint consistency, unleveled surfaces telegraph through, compromising our professional finish.
What Temperature and Humidity Levels Are Best for Preventing Paint Problems?
We’ll get best results maintaining the ideal temperature range of 50°F to 85°F with suitable humidity levels between 40% and 70%. These conditions guarantee proper flow, adhesion, and curing—preventing drips, sags, and surface defects we’re trying to avoid.
Should I Use the Same Paint Sheen When Touching up Drips and Marks?
Absolutely—we’ll achieve paint finish consistency only by matching the original sheen exactly. Appropriate paint selection means using identical gloss levels and application methods, since even slight sheen variations create visible touch-up lines that betray our repair work.