We’ll start by clearing vegetation and furniture from your work area, then systematically inspect every siding panel for cracks, rot, and loose boards that compromise adhesion. Next, we’ll pressure wash all surfaces and allow 24-48 hours drying time before scraping failed paint layers and filling substrate damage with siding spackle. After sanding to 120-grit and selecting appropriate primer formulations for Buhl’s temperature extremes, we’ll apply thin, even coats using proper cutting-in techniques. The following sections detail each critical step to maintain your exterior withstanding Idaho’s harsh seasonal changes.
Key Takeaways
- Clear and protect your work area by relocating furniture, trimming vegetation, and covering immovable items with drop cloths.
- Inspect all siding and trim for cracks, loose boards, mold, and rot; repair or replace damaged sections before painting.
- Clean exterior surfaces using appropriate methods, removing mold with bleach solution and allowing 24-48 hours drying time.
- Remove loose paint with scrapers and heat guns, fill surface damage with spackle, and sand to 120-grit smoothness.
- Apply primer in 10-25°C temperatures, lightly sand after drying, and tape trim edges before applying topcoat.
Clear the Work Area Around Your Home
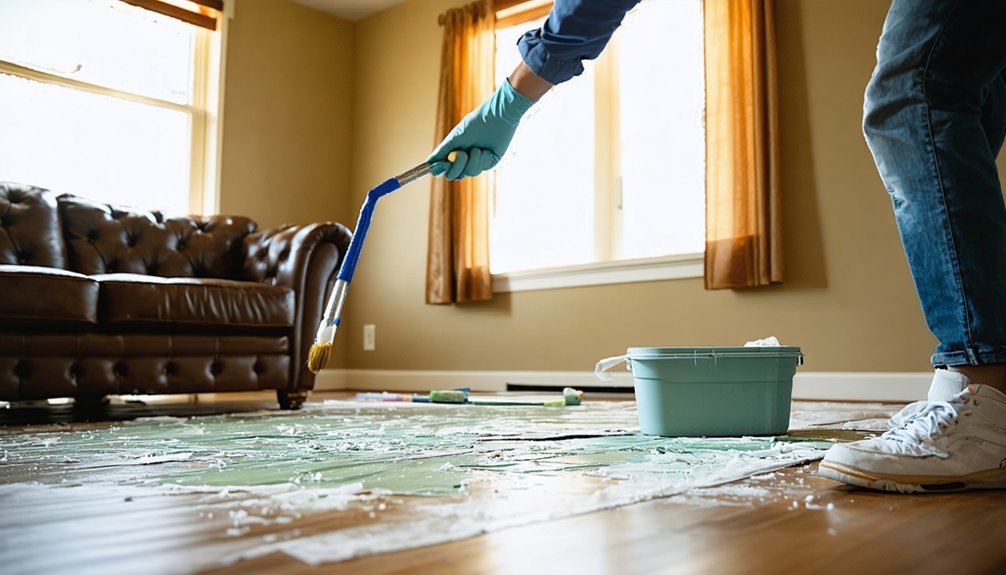
Before painters arrive at your Buhl home, you’ll need to systematically clear the work area to ascertain efficient project execution and protect your belongings from paint contamination. Start with furniture relocation by moving items to room centers or your garage, covering immovable pieces with protective drop cloths. We recommend clearing one room at a time to maintain workflow efficiency.
For outdoor landscaping preparation, trim back vegetation near your home’s structure and relocate grills, patio furniture, and decorative elements to a safe distance. Cover walkways and remaining plants with tarps during application. After pressure washing exterior surfaces, guarantee adequate drying time before final clearance. This methodical approach prevents project delays and protects your investment.
Inspect Siding and Trim for Damage
While clearing your workspace establishes the foundation for a successful paint project, conducting a thorough structural assessment of your siding and trim determines whether surfaces can accept new coating.
We’ll systematically examine every panel for cracks, punctures, and gaps near seams and corners where water infiltration compromises structural integrity. When we identify loose or missing boards, we’ll secure or replace them to guarantee proper substrate adhesion.
Green or black streaks signal moisture problems—we’ll detect mold and mildew issues early by cutting open paint blisters to inspect underlying wood. Power washing reveals soft, rotten sections requiring replacement. We’ll probe clapboard undersides, check window and door caulking, and document damage severity.
This methodical inspection protocol determines repair scope before primer application begins.
Clean All Exterior Surfaces Thoroughly
After documenting structural deficiencies and completing necessary repairs, we’ll remove contaminants that prevent primer and paint from bonding to substrate surfaces. Choose appropriate cleaning methods based on material resilience—pressure washers at 1,500-2,500 PSI work effectively for vinyl, aluminum, and HardiePlank, while hand scrubbing with stiff-bristled brushes suits textured stucco.
Consider pre existing surface conditions when selecting solutions: one part bleach with three parts water addresses mold on moisture-prone north-facing walls, while TSP removes stubborn stains.
Our process follows these critical steps:
- Pre-clean preparation – Dry brush loose debris, close windows, cover electrical fixtures and landscaping
- Application sequence – Work top to bottom maintaining 12-18 inch distance, allow dwell time for cleaning agents
- Post-cleaning protocol – Rinse thoroughly, verify 24-48 hours drying, check moisture levels digitally before proceeding
Remove Loose Paint and Make Necessary Repairs
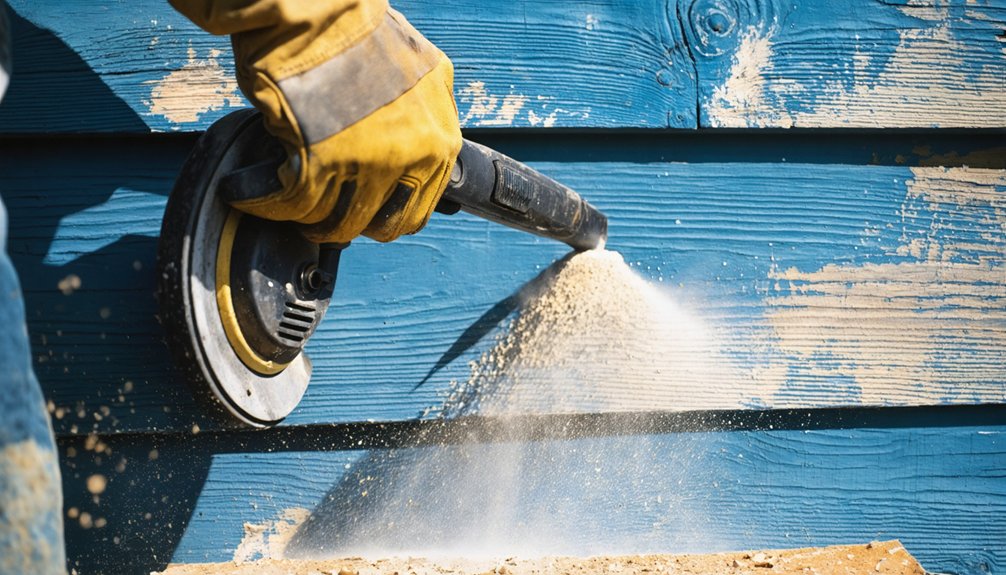
Once surfaces have dried completely, we systematically remove compromised paint layers that’ll telegraph through new coatings and cause premature failure. Determining appropriate tools begins with evaluating paint condition—we’ll hold scrapers at 45-degree angles for loose sections, then deploy heat guns positioned 2 inches from surfaces for stubborn areas.
Chemical strippers work for intricate profiles, though we’re mindful of minimizing environmental impact through proper collection methods. Wagner Paint Eaters attached to grinders prove superior to hand-scraping for extensive flaking. After removal, we address substrate damage with siding spackle, filling craters and gouges around high-traffic zones. Steel wool smooths residual paint edges. This thoroughness guarantees all remaining layers bond securely to substrates, establishing proper foundation for primer adhesion.
Sand Surfaces for a Smooth Finish
With substrate integrity restored, proper surface preparation demands mechanical abrasion to create ideal paint adhesion. We’ll sand bare wood to 120-grit maximum, guaranteeing sufficient tooth for primer bonding. Our uniform sanding pattern follows wood grain exclusively, never crossing perpendicular to fiber direction.
Critical Sanding Protocol:
- Initial abrading – Progress from 60-80 grit on rough lumber through 100, 150-180, ending at 220 extra-fine
- Primer preparation – Apply 220-grit sponges once dust generates, maintaining even pressure application throughout
- Between-coat refinement – Hand-sand each dried layer before subsequent applications, vacuum thoroughly, finish with tack cloth
We’ll verify smoothness tactilely, not visually—your palm confirms dead-smooth texture. Avoid over-sanding edges; they’ll appear prematurely worn. Feel prioritized over appearance secures flawless topcoat application.
Apply Primer to Prepared Areas
Before primer application commences, we’ll verify ambient conditions fall within the 10-25°C threshold—temperatures outside this range compromise film formation and adhesion properties.
Temperature control between 10-25°C is critical for proper primer film formation and optimal adhesion to wall surfaces.
We’ll select water-based latex primer for standard interior walls, while oil-based formulations prevent wallpaper glue reactivation on papered surfaces. Primer compatibility with substrates requires attention—porous materials like wood demand specific products, and metal surfaces need moisture-resistant options.
We’ll dampen foam rollers slightly before loading, then apply using W-patterns to maintain wet edges across large sections. Synthetic brushes handle cutting-in at corners and trim. Thin, even coats provide superior primer coverage compared to heavy applications.
On absorbent or dark surfaces, we’ll apply second coats after initial drying. Following manufacturer-specified cure times, we’ll perform light sanding with 220-grit paper, removing surface irregularities before topcoat application.
Final Preparation Steps Before Painting
Before we apply the first coat, we’ll execute critical masking procedures and conduct a thorough surface assessment to guarantee superior paint adhesion and professional results.
We use painter’s tape along all trim edges and apply protective coverings to floors and fixtures, creating clean boundaries for precise application.
Our final inspection verifies that all repairs are properly sanded, surfaces are dust-free, and primer coverage is uniform across your Buhl home’s walls.
Masking and Protecting Areas
Proper masking serves as the critical barrier between pristine finished surfaces and unwanted paint application, requiring systematic execution of proven techniques to achieve professional results. We’ll begin with thorough dust removal using microfiber cloths across all baseboards, window frames, and door trim before applying any tape. Proper masking techniques demand we work in 1-foot increments, pressing 1.5-inch painter’s tape firmly with a flexible 2-inch knife to create secure seals.
Our systematic approach includes:
- Trim Protection: Apply tape along edges, dabbing lightly before final compression with flexible blade
- Horizontal Coverage: Use hand masker with 9-inch paper for mantles, shelves, and baseboard tops
- Fixture Masking: Protect bathroom fixtures and light switches before applying plastic sheeting
Careful fixture masking prevents splatter damage during roller application.
Final Surface Inspection
Once masking protection is complete, we initiate a thorough surface inspection that determines whether the substrate meets professional painting standards. We examine every square inch for contaminants, defects, and adhesion concerns that could compromise the finish.
Our tape adhesion evaluation involves applying painter’s tape firmly to the surface, then removing it quickly to verify proper bonding strength. We conduct scratch tests in inconspicuous areas using a utility knife to confirm adequate surface conditioning.
Running our hands across old paint shifts detects ridges requiring additional feather-sanding. We verify moisture meter readings remain below 15% and confirm all repairs are fully cured, smooth, and flush. This systematic adhesion testing protocol guarantees we’ve achieved clean, dry, properly prepared surfaces ready for primer application.
Frequently Asked Questions
What Weather Conditions Are Best for Exterior Painting in Buhl, Idaho?
We’ve found 80% of paint failures stem from poor weather choices. We recommend the ideal temperature range of 60-80°F with perfect humidity levels below 50% during late spring through early fall for superior adhesion and curing performance.
How Long Should I Wait Between Priming and Applying the Topcoat?
We’ll wait 3-4 hours for water-based primers or 24 hours for oil-based before topcoating. Proper surface preparation and paint application timing depend on your primer type, temperature, and humidity levels for ideal adhesion and finish quality.
What Type of Paint Finish Works Best for Different Exterior Surfaces?
We recommend satin finish for siding and trim since it offers superior durability and moisture resistance. Matte finish works well for textured brick surfaces, hiding imperfections while providing adequate protection. Let’s match your surface’s needs perfectly.
Do I Need Permits to Paint the Exterior of My Home?
We’ve confirmed that exterior painting doesn’t require permits in Buhl. However, DIY painting considerations include verifying zoning compliance when painting historic home exteriors, as architectural review districts may mandate color approval before proceeding with your project.
How Much Does Professional Exterior Painting Typically Cost in Buhl?
In Buhl, we’ll find professional exterior painting typically costs $2,300-$4,000 for average homes. We recommend getting multiple paint contractor estimates since local paint supply costs and square footage greatly/substantially/considerably impact your final project price in our Idaho market.