We prepare exterior surfaces through five essential steps: First, we inspect for structural damage, rot, and lead paint hazards in pre-1978 homes. Next, we power wash at 1,500–2,500 PSI and allow 24–48 hours drying time. Then we systematically scrape all loose paint using proper containment protocols. We fill cracks with substrate-matched compounds once surfaces are completely dry. Finally, we prime bare wood with oil-based formulations for UV protection. The detailed guide below covers each phase’s technical requirements and safety considerations.
Key Takeaways
- Inspect siding, trim, and gutters for damage, rot, or pest issues, and check for lead paint in homes built before 1978.
- Power wash durable surfaces at 1,500–2,500 PSI and allow 24–48 hours drying until moisture content drops below 15%.
- Scrape off all loose and peeling paint systematically, following lead-safe practices if necessary, then sand to smooth edges.
- Fill cracks and holes with appropriate repair materials, ensuring surfaces are completely dry for proper adhesion before application.
- Prime all bare wood, brick, and stucco with substrate-matched formulations, allowing complete drying before applying topcoat.
Conduct a Thorough Exterior Inspection
Before applying the first coat of paint, we must systematically evaluate every exterior surface to identify structural deficiencies, moisture intrusion points, and paint failures that’ll compromise adhesion and longevity.
Our exterior condition documentation begins with siding inspection for pest damage, wood rot, and flaking paint. We’ll examine trim for moisture-induced deterioration and check caulking around windows and doors for gaps that allow water penetration.
Gutters, downspouts, and soffits require assessment for clogs, cracks, and vulnerable areas. We’ll inspect stucco for hairline cracks from foundation movement, evaluate decks and fences for decay, and note chalky residue indicating paint degradation.
For pre-1978 homes, we’re identifying lead paint risks. This extensive assessment enables us to conduct targeted repairs before surface preparation begins.
Clean All Exterior Surfaces Properly
Thorough surface cleaning constitutes the most critical pre-paint step that’ll directly determine coating adhesion and longevity. We’ll start by dry brushing to remove loose debris, then power wash durable surfaces like vinyl and aluminum at 1,500–2,500 PSI using a 25–40 degree nozzle angle.
For delicate cedar, we’ll hand scrub with soft-bristled brushes. When we use environmentally safe cleaners—white vinegar solutions, oxygen bleach, or natural dish soap—we’re protecting surrounding vegetation while eliminating mold and mildew effectively.
Stubborn stains require TSP or specialty prep cleaners with proper safety equipment. After thorough rinsing, we’ll maintain ideal moisture levels by allowing 24–48 hours drying time until surfaces reach 15% moisture content or less, ensuring preferred paint adhesion and manufacturer warranty compliance.
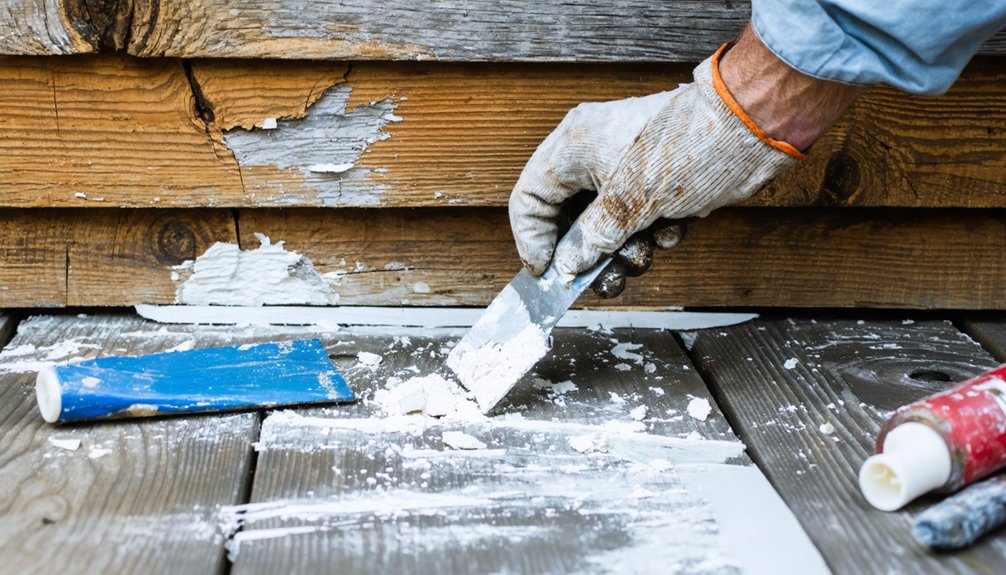
Remove Loose and Peeling Paint
We’ll systematically remove all loose and peeling paint using proper scraping techniques before applying new coatings. This critical preparation phase requires selecting appropriate tools—from putty knives to wire brushes—and following specific mechanical removal methods to create sound substrate adhesion.
If we’re working on homes built before 1978, we must implement lead paint safety protocols including containment measures and approved respirators.
Scraping Techniques and Tools
When paint loses its bond to exterior surfaces, proper scraping becomes the foundation of successful preparation work. We’ll need to master both tool selection and technique to achieve professional results.
Selecting appropriate scraper tools starts with understanding your surface requirements. For large areas, we recommend 2½ to 3-inch reversible blades with curved edges that prevent wood gouging. Pull scrapers strip paint to bare wood efficiently, while carbide scrapers handle flat surfaces. We’ll use 1-inch detail scrapers for tight corners and 5-in-1 carpenter’s tools for versatile applications.
Scraping proper technique demands holding your blade perpendicular to the surface while maintaining firm, consistent pressure. We must keep blades flat against wood to avoid damage, and always pound protruding nail heads flush beforehand. Sharp blades are non-negotiable—dull tools waste time and compromise results.
Sanding Rough Paint Edges
After scraping exposes the boundary between sound paint and bare wood, we’re left with rough edges and ridges that telegraph through fresh coatings. We’ll employ optimum sanding grit sequence and proper sanding motion techniques to eliminate these imperfections.
Our approach follows this progression:
- Start with 80-grit on random orbit disc sanders (4500 RPMs) to smooth shifts between painted and bare surfaces
- Use extra coarse grit to continue smoothing remaining old paint without bogging down
- Follow with lighter grit to eliminate scratches that new paint magnifies in high-traffic areas
- Deploy 7-inch discs over 5-inch plates for effective feathering of paint edges
- Employ detail sanders for tight corners inaccessible to random orbit tools
We’ll wear respirators during orbital sanding operations and blow off dust before advancing to repairs.
Lead Paint Safety Precautions
Lead-based paint requires specialized handling protocols that distinguish it from standard surface preparation work. We’ll establish containment zones using rigid barriers and negative air pressure systems with HEPA filtration to prevent airborne particle migration. Our respiratory protection compliance demands HEPA-filtered respirators—non-negotiable for lead exposure prevention.
We’re prohibiting high-risk methods: no open-flame burning, machine sanding, or heat guns exceeding 700°F. Instead, we’ll mist surfaces before manual scraping with wire brushes, removing paint two inches beyond deteriorated sections. Full PPE includes disposable coveralls, gloves, and safety goggles.
Post-removal decontamination involves HEPA vacuuming protective gear, wet-wiping all surfaces, and applying trisodium phosphate detergent. We’ll seal waste immediately in labeled, leak-proof containers and document disposal per OSHA standards. This systematic approach protects everyone involved.
Repair Cracks, Holes, and Damaged Areas
Before we apply any primer or paint, we must address structural deficiencies that compromise both adhesion and long-term performance. We’ll assess damage types systematically, distinguishing settlement cracks from structural failures requiring professional intervention. Once we’ve identified vulnerabilities, we’ll select repair materials matched to specific substrates and stress conditions.
Structural repairs must precede any coating application to ensure proper adhesion and prevent premature failure of the finished surface.
Our repair protocol includes:
- Remove loose debris with stiff brushes and vacuums before applying fillers
- Cut out cracks using angle grinders for deeper material penetration
- Inject epoxy or urethane into concrete fractures requiring structural restoration
- Pack mortar into masonry voids after color-matching existing joints
- Insert backer rod into deep gaps before sealant application to prevent air pockets
We’ll guarantee surfaces remain completely dry during application, as moisture compromises bonding integrity and long-term durability.
Prime Bare and Prepared Surfaces
With structural repairs completed and surfaces stabilized, we’ll establish the foundation layer that determines coating system longevity. We’ll apply primer to all bare wood, brick, and stucco, selecting formulations matched to substrate challenges—high-build for textured stucco, alkyd for problematic surfaces, rust-inhibiting for treated metal. Oil-based primers provide essential UV protection on wood exteriors. We’ll feather existing primers at juncture zones for seamless topcoat adhesion.
For stucco, we’ll apply elastomeric primers after treating efflorescence. Previously oil-painted surfaces require compatible primers, while dark colors benefit from tinted formulations reducing topcoat passes. We’ll guarantee proper primer drying—verify complete cure, test adhesion on prepared areas, and confirm substrate remains tight and moisture-free. Extended drying accommodates high humidity and porous materials before topcoating begins.
Protect Your Property and Complete Final Preparations
Before we apply any paint, we’ll safeguard your property with thorough protection measures and complete critical surface preparations.
We’ll cover all landscaping with drop cloths, remove hardware and downspouts to prevent overspray damage, and degloss any high-gloss surfaces to guarantee proper paint adhesion. These final steps shield your investment and create ideal conditions for a professional, long-lasting finish.
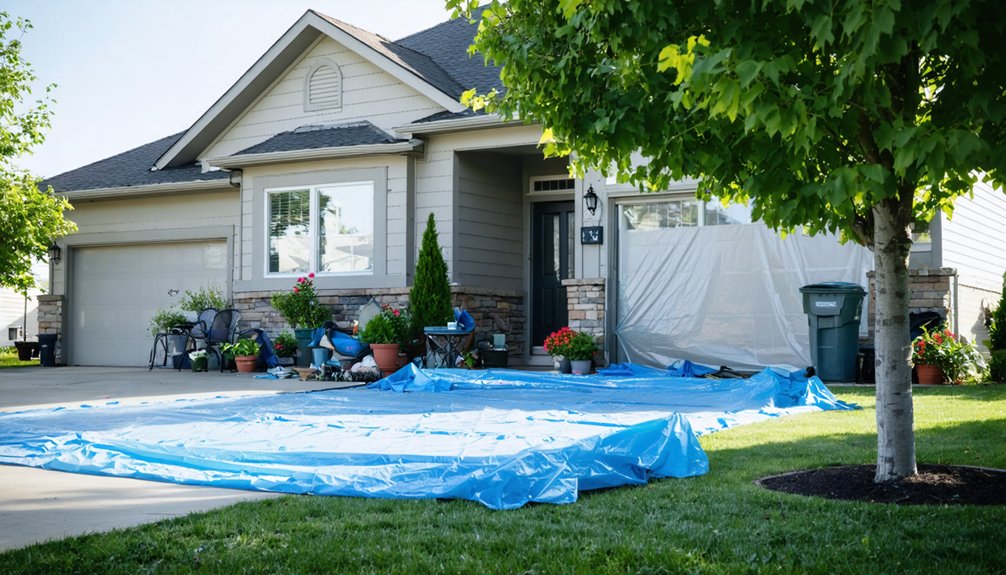
Cover Landscaping and Fixtures
Proper landscape protection prevents costly damage to plants, hardscaping, and outdoor fixtures during exterior painting operations. We’ll implement exhaustive coverage strategies by elevating ground coverings above sensitive plantings and enclosing delicate foliage with breathable barriers.
Our protection protocol includes:
- Drop cloth deployment – Overlap tarps with weighted edges to eliminate gaps where paint droplets penetrate
- Structural barriers – Construct frames using stakes and support systems to suspend plastic sheeting without direct plant contact
- Strategic trimming – Maintain minimum two-foot clearance between vegetation and siding to prevent wet paint transfer
- Overspray mitigation – Adjust spray equipment nozzles for controlled application patterns around landscaping zones
- Expedited removal – Remove all coverings immediately after completion to minimize moisture accumulation risks
We’ll secure every covering point throughout operations to maintain complete protection integrity.
Remove Hardware and Downspouts
As exterior painting operations approach their final preparatory phase, systematic removal of hardware and downspouts becomes critical for achieving professional-grade surface coverage and protecting factory-finished components. We’ll unscrew rivets from bottom clamps upward using interchangeable screwdrivers for Phillips, flathead, or hex fasteners.
Factory-finished downspouts require careful handling—we’ll mask them in place if removal risks damage, preserving downspout restoration options. We’ll tape screws inside each section’s end cap, labeling corners (NW, SE) for accurate reinstallation.
Beyond downspouts, we’ll secure exterior elements by removing lights, hose holders, and obstructive hardware using power drills and multipurpose painters’ tools. We’ll disconnect light fixtures completely when feasible. Duster brushes eliminate cobwebs from exposed areas.
This 4-hour process demands immediate execution before masking begins, ensuring ideal workflow and surface accessibility.
Degloss High-Gloss Surfaces
High-gloss exterior surfaces—including factory-finished metal trim, glossy enamel doors, and polyurethane-coated woodwork—reject new paint through their non-porous finish, necessitating chemical degradation before coating. Product selection depends on substrate compatibility: water-based deglossers like M-1 offer low-VOC performance, while acetone-based formulas penetrate marine-grade finishes.
Application techniques require methodical execution:
- Apply full-strength deglosser with clean cloths, allowing 10-15 seconds for chemical penetration
- Scrub softened surfaces using scouring pads to roughen the profile
- Test compatibility in concealed areas before full application
- Protect aluminum surfaces from TSP darkening
- Dispose of contaminated rags per local hazardous waste protocols
We’ll achieve mechanical adhesion within minutes, eliminating sanding dust while creating the roughened texture necessary for primer bonding. Always wear chemical-resistant gloves during handling.
Frequently Asked Questions
What Weather Conditions Are Best for Exterior Painting Preparation Work?
We’ll prepare your exterior when conditions fall within the ideal temperature range of 50°F to 85°F and ideal humidity levels between 40-70%. These parameters guarantee proper surface preparation, cleaning effectiveness, and safe working conditions for our team.
How Long Does the Entire Exterior Preparation Process Typically Take?
We’ll typically complete exterior prep in 1-3 days for average homes after evaluating your home’s condition. Determining the preparation timeline depends on size, stories, and surface damage—small homes need one day, while complex properties require three-plus days.
Should I Hire Professionals or Can I Do the Prep Work Myself?
We’d recommend hiring professionals if you’re uncertain about your DIY painting skills or lack proper safety equipment for heights. However, you can handle basic prep work yourself when you’ve selected paint quality materials and understand proper surface preparation techniques.
What Safety Equipment Do I Need for Exterior Painting Preparation?
Even if you’re experienced, we’ll need proper PPE: wear safety goggles, chemical-resistant gloves, and respirators with VOC-rated cartridges. Always use ladder stabilizers to prevent falls. OSHA compliance isn’t optional—it protects our community of dedicated craftspeople.
How Much Does Professional Exterior Painting Preparation Typically Cost?
We’ll find professional prep work typically runs $0.26-$0.36 per square foot for basic preparation. Hourly labor rates range from $40-$100 per painter, with estimated costs varying based on your home’s surface condition and required repairs.