We’ve found that successful interior painting in Eden’s 4,800-foot elevation requires meticulous surface preparation—cleaning top-to-bottom, treating mold, and filling defects with joint compound. You’ll need proper masking systems using painter’s tape and drop cloths, while selecting finishes from flat (ceilings) to semi-gloss (trim) based on traffic patterns. Apply thin coats in ‘W’ patterns with appropriate roller nap, and critically, maintain 40-50% relative humidity between 50-85°F to prevent adhesion failures common in our high-desert climate’s rapid moisture swings. Below, we’ll break down each technique for professional-grade results.
Key Takeaways
- Clean walls top-to-bottom, fill cracks with spackling compound, and sand smooth before priming for optimal paint adhesion.
- Apply painter’s tape firmly along edges and use drop cloths to protect floors, carpets, and fixtures from paint splatter.
- Choose paint finishes strategically: flat for ceilings, satin for moisture-prone areas, and semi-gloss for high-traffic trim and doors.
- Maintain indoor humidity between 40-50% and temperature at 50-85°F to ensure proper drying and prevent adhesion problems.
- Apply multiple thin coats using a W-pattern with appropriate roller nap, removing tape while paint remains wet.
Proper Room Preparation and Surface Repair Before Painting
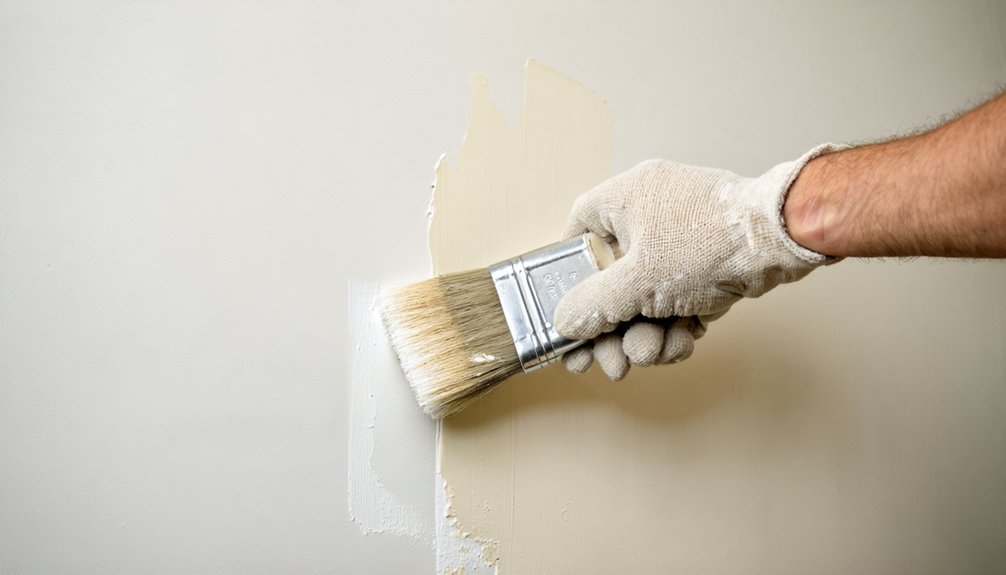
Before we apply the first coat of paint, we’ll need to establish a contamination-free substrate through systematic wall cleaning. We’ll start at the top, working downward with damp rags and warm water to remove dirt, grease, and oil buildup.
Systematic top-to-bottom cleaning with damp rags establishes the contamination-free substrate essential for optimal paint adhesion and professional results.
Our wall preparation procedures include vacuuming baseboards and surfaces with a brush attachment, then treating any mold with anti-mold solution.
Next, we’ll inspect for cracks, holes, and bubbling paint. Our imperfection repair techniques involve scraping loose paint with a putty knife, then filling defects with spackling compound or joint compound. We’ll remove outlet covers and switch plates during this phase.
After patches cure, we’ll sand repaired areas with 220-grit sandpaper, achieving uniform smoothness. Finally, we’ll vacuum dust and wipe surfaces clean before priming.
Masking Techniques to Protect Floors and Fixtures
We’ll show you how proper masking techniques prevent costly damage to your floors and fixtures during interior painting projects. Your choice of painter’s tape—whether delicate surface formulations for hardwood or standard grades for trim—directly impacts the quality of your finished edges and protects underlying surfaces from paint bleed and finish damage.
We combine strategic tape placement with drop cloths and masking paper to create a complete barrier system that controls overspray, catches drips, and secures professional results.
Carpet Protection Paper Methods
Carpet fibers act as magnets for paint droplets, overspray, and tracked debris during interior painting projects. We recommend builders paper as our primary defense—it costs one-third the price of equivalent blue tape lengths while delivering superior coverage. Roll it along your longest wall, cut to length, then quarter the tube with a utility knife. The non-adhesive sections slide effortlessly under baseboards versus trim, eliminating furniture removal options in many cases.
For tighter spots, we fold strips in half to create stiffer edges. When spraying near carpet, we apply 2-inch kick paper tape first to hold back fibers, then layer masking paper over floor protection to catch bounce-back. Tack down every few feet for security, ensuring your workspace remains protected throughout the project.
Tape Selection and Placement
Proper tape selection determines whether your masking efforts prevent paint migration or create costly finish damage during removal. We recommend standard painter’s tape for drywall and trim applications, but wood flooring demands FrogTape Yellow‘s delicate surface formula to prevent finish damage. Adhesive durability becomes critical when tapes remain applied for extended periods—you’ll want materials that maintain their seal without degrading floor finishes.
Press tape firmly along all edges, overlapping at doorframe corners to create secure barriers against paint infiltration. For baseboards, we combine painter’s tape with 6-inch masking paper, tucking tape underneath flooring edges. Apply clear caulking along tape-to-floor contact points where paint delineation quality matters most. Wide tape (2.5+ inches) accommodates spray applications effectively, while narrower options navigate intricate panel designs with greater precision.
Drop Cloth Positioning Tips
Even minor drop cloth displacement creates pathways for paint migration that compromise flooring surfaces and generate costly restoration requirements. We’ll establish secure positioning through adhesive strip applications: apply 2-inch masking tape tight against baseboards, spread the drop cloth edge over this foundation, then seal with a second tape layer overlapping both cloth and trim. This three-layer system works across carpeted, hardwood, or vinyl installations.
For furniture drip guards, we’ll select oversized drop cloths and tape lower edges to walls, directing spills away from flooring. We’ll weight corners and edges with paint cans or tools, maintaining flat surfaces that won’t shift during roller work. Multiple overlapping cloths guarantee complete coverage, while combining plastic sheeting with absorbent newspaper layers manages wet paint effectively.
Choosing the Right Paint Products and Finishes
When selecting interior paint finishes for your Eden home, understanding the technical properties of each sheen level guarantees ideal performance and durability. We recommend flat finishes for ceilings and low-traffic spaces due to their imperfection-concealing properties, though they’re least resistant to cleaning.
For finish selection for rooms with moderate activity, eggshell offers DIY-friendly application with minimal sheen. We specify satin for moisture resistant finishes in kitchens and bathrooms, where mildew resistance proves vital. Semi-gloss provides superior cleanability for high-traffic doors and trim, though surface preparation becomes essential as reflectivity increases.
High-gloss delivers maximum durability for cabinetry and baseboards, requiring meticulous surface smoothing before application. Proper finish selection directly impacts your project’s longevity and maintenance requirements.
Professional Application Methods for Smooth Coverage
Achieving professional-grade interior finishes requires meticulous surface preparation that we’ve identified as consuming 30% to 50% of total project time in Eden residential applications. We’ll wash walls thoroughly, fill imperfections with spackle, and apply appropriate primers—including stain-blocking formulations for older surfaces.
For application, we recommend roller nap selection matched to your surface texture: 3/4-inch naps work best for smooth walls and high-sheen finishes. We’ll employ the proven ‘W’ pattern across 3-4 foot sections, maintaining a consistent application throughout to prevent lap marks and sheen inconsistencies.
Multiple thin coats outperform single heavy applications. We’ll apply two coats minimum, lightly sanding between with 220-grit paper. Paint conditioners extend working time, while uniform application ensures consistent coverage. This methodical approach delivers the professional results our Eden community expects.
Achieving Perfectly Straight Lines and Clean Edges
Sharp paint shifts separate amateur work from professional-grade results, particularly where walls meet ceilings, trim, or contrasting color sections. We’ll guide you through proven techniques that deliver razor-straight junctures.
Start with thorough surface preparation—clean all dust and contaminants before taping. For stripes, measure wall length and calculate stripe spacing optimization using a plumb level for vertical accuracy. We recommend 3M Blue tape for standard walls or 1.5-inch Frog Tape for premium results.
The back sealing technique proves critical: paint over tape edges with your base color first, filling microscopic gaps before applying new paint. This prevents bleed-through regardless of paint sheen selection.
Remove tape while paint remains wet, pulling upward at an angle. This method guarantees crisp lines that showcase your craftsmanship.
Optimizing Drying Conditions for Best Results
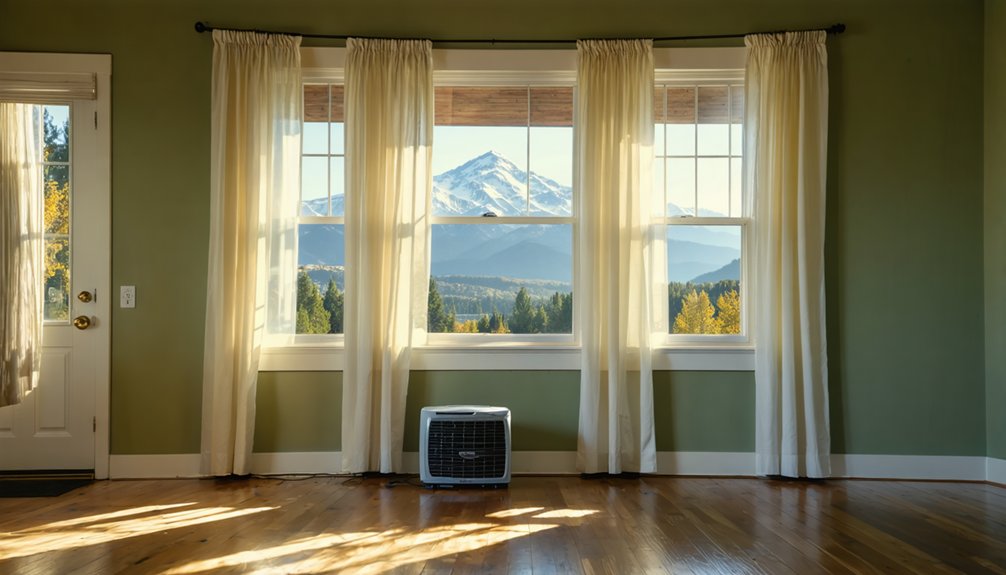
- Maintain 40–50% relative humidity (RH) for latex paints—each 10% increase above 50% extends drying time by 20–30%
- Keep ambient temperature between 50°F and 85°F to prevent adhesion failure, blisters, and discoloration
- Install dehumidifiers when RH exceeds 70% and use fans for air circulation without direct heat application
We avoid opening windows on humid days, as outdoor moisture counteracts drying efforts. When dew point approaches ambient temperature, condensation traps moisture behind the paint film, guaranteeing adhesion problems.
Opening windows during humid weather introduces outdoor moisture that undermines paint drying and risks trapping condensation beneath the film surface.
Oil-based enamels tolerate 40–55% RH, while humidity below 30% or above 85% creates significant application risks.
Frequently Asked Questions
How Do I Choose Paint Colors That Complement Eden’s Natural Mountain Surroundings?
We’ll select hues by sampling Eden’s aspens, cottonwoods, and willows—consider local flora and fauna during site visits. We’ll highlight scenic viewpoints like Pomerelle’s golden slopes, then match interior palettes to mustard yellows, rustic oranges, and autumn golds surrounding our community.
What Is the Average Cost per Square Foot for Interior Painting?
Ironically, while Eden’s pristine views are free, we’ll invest $2 to $6 per square foot for interior painting. Material costs and labor requirements drive this range, with proper surface preparation and ventilation protocols ensuring your family’s safety throughout the project.
How Long Should I Wait Before Moving Furniture Back Into Painted Rooms?
We recommend waiting 24-48 hours for latex paint and 48-72 hours for oil-based finishes. Proper paint curing time prevents potential furniture damage risks like smudges, dents, and impressions that’ll compromise your freshly painted surfaces permanently.
Can I Paint During Eden’s Cold Winter Months Safely?
We strongly recommend interior painting during Eden’s winter months. With proper preparation techniques and suitable insulation requirements, we’ll achieve professional results in climate-controlled environments. Cold weather actually provides ideal scheduling opportunities for transforming your indoor spaces safely.
Should I Hire a Professional Painter or Do It Myself?
We’ll help you weigh pros and cons together. Evaluate skill level honestly—small rooms suit DIY, but professionals deliver warranty-backed precision. Consider surface prep requirements, VOC exposure risks, and long-term durability when choosing your approach.