We recommend starting with thorough surface preparation—cleaning, patching, and priming all areas before applying paint. In Heyburn’s high-desert climate, you’ll need to maintain temperatures between 50°F and 85°F with controlled humidity levels for proper adhesion and curing. We use quality brushes for cutting in edges, followed by microfiber roller covers for smooth wall coverage. Apply multiple thin coats rather than single heavy applications, and always follow the ceiling-to-walls-to-trim sequence. The sections below detail our complete systematic approach for achieving professional-grade results.
Key Takeaways
- Use quality 2.5-inch angle sash brushes and 9-inch microfiber roller covers for professional-looking interior paint application.
- Clean and repair all surfaces thoroughly, patching drywall imperfections and applying primer before painting for optimal adhesion.
- Paint ceilings first, then walls, and finish with trim to avoid splatters and achieve clean edges.
- Maintain indoor temperature between 50°F and 85°F with 40-70% humidity for proper paint curing and performance.
- Remove painter’s tape at 45-degree angles while paint is slightly tacky for crisp, professional lines.
Selecting the Right Tools and Supplies for Your Project
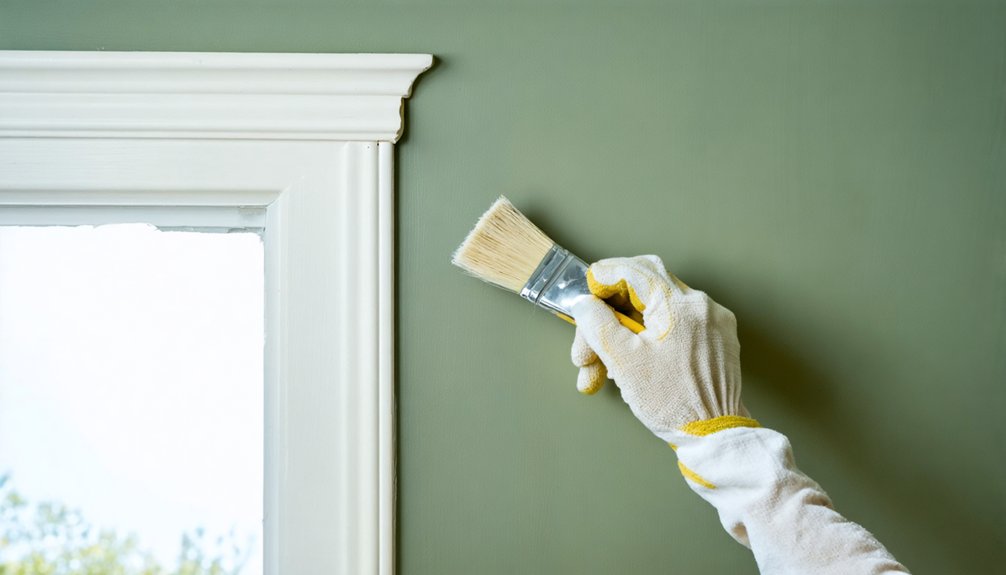
Before starting any interior painting project in Heyburn, selecting the proper tools directly impacts your finish quality and project efficiency. We’ll need a 2.5-inch angle sash brush with quality bristle selection—synthetic for latex paints, natural for oil-based formulations.
Quality bristle selection makes the difference—synthetic brushes for latex paints, natural bristles for oil-based formulations in Heyburn projects.
For broader surfaces, we recommend a 9-inch roller frame with microfiber covers: 3/8-inch nap for smooth walls, 1/2-inch for textured applications.
Essential protection includes canvas drop cloths and painter’s tape (blue high-tack for baseboards, yellow low-tack for walls). We’ll require paint trays with liners, an adjustable extension pole, and a stable 4-6 foot ladder rated for our combined weight plus materials.
Establish efficient paint supply storage in your workspace, keeping repair tools—spackle, putty knife, and sanding blocks—readily accessible throughout the project.
Preparing Your Heyburn Home’s Interior Surfaces
When preparing interior surfaces in Heyburn homes, we’ll begin with thorough cleaning to eliminate dust, grease, and contaminants that compromise paint adhesion. Power washing exterior-facing interior surfaces removes accumulated grime effectively.
Evaluating surface condition comes next—we’ll identify cracks, peeling paint, and damage requiring repair. Addressing moisture issues is critical before proceeding, as trapped moisture causes paint failure.
We’ll patch drywall imperfections to create flawless surfaces that won’t highlight defects later. Sanding removes rough spots and old paint inconsistencies, ensuring even coverage across all areas. We’ll apply primer to seal porous surfaces and prevent bleed-through, creating a uniform base for superior results.
Finally, we’ll tape trim and baseboards for crisp lines while protecting flooring with drop cloths, minimizing cleanup and preventing accidental damage.
Understanding the Proper Painting Sequence
We’ll walk you through the critical painting sequence that prevents rework and guarantees professional results in your Heyburn home. Following the proper order—ceilings, walls, then trim—eliminates splatter damage to finished surfaces and reduces project time.
We’re focusing onroller techniques and edge work that maintain wet blending throughout application to avoid visible lap marks and streaking.
Ceilings Come First Always
Since gravity doesn’t discriminate between professional painters and DIY enthusiasts, we’ll establish the fundamental rule of interior painting: ceilings always come first. This painting sequence consistency guarantees splatters and drips land harmlessly on unpainted walls below, eliminating costly touch-ups later.
The ceiling first importance becomes clear when we consider physics—working top-down aligns with natural forces rather than fighting them. We’ll cut in edges and fixtures with a brush, then use an extension pole for roller application. Apply two coats of flat-finish paint, allowing full drying between applications.
Once ceilings cure completely, we can precisely cut in wall edges against the finished surface above, creating clean adaptations and professional-looking corners that showcase our craftsmanship.
Wall Rolling Techniques
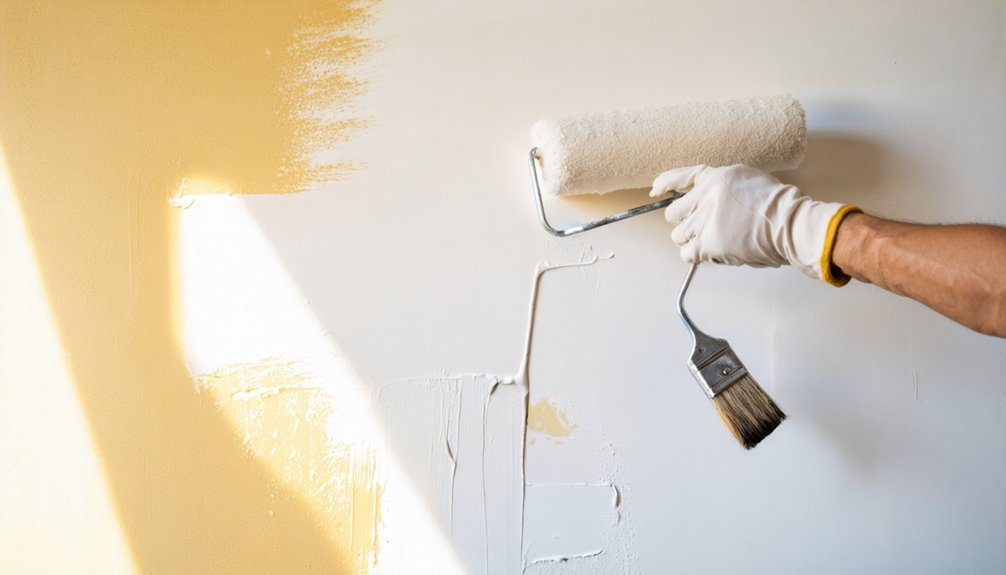
Professional results depend on mastering the five-step wall painting sequence that transforms amateur work into expert craftsmanship. We begin by painting edges with our angled sash brush, applying a 2-3 inch border where walls meet ceilings, corners, and trim. Load your brush properly and remove excess paint for precision lines.
Next, we execute the W-rolling pattern using starting strokes no wider than 32 inches—within comfortable arm’s length. Fill empty spaces systematically from top to bottom while maintaining a wet edge. We complete one full wall before advancing to the next, blending brush marks with our roller while paint remains wet.
After allowing 2-4 hours drying time, we apply our second coat following identical procedures. Remove tape while paint stays wet for crisp, professional lines.
Trim and Final Touches
After completing your walls, we shift focus to the proper painting sequence that prevents costly mistakes and delivers professional-grade results. We’ll tackle trim work using specialty painting techniques that require precision and patience. Interior color coordination becomes critical here, as we’re applying semi-gloss finishes that demand careful preparation.
Our Professional Trim Sequence:
- Crown molding first – Work top-down to catch drips before they reach lower surfaces, using sharp angled brushes for clean edges
- Window and door frames second – Apply painter’s tape to protect dried walls, dipping brushes one-third deep for controlled application
- Baseboards last – Wait 2–4 hours for wall paint to fully cure, then complete final coats covering nail holes and minor wall spatters
We remove tape at 45° angles while paint remains slightly tacky, ensuring crisp professional lines throughout.
Mastering Application Techniques for Professional Results
We’ll guarantee professional results by mastering how you load your roller and brush—dipping the roller moderately to prevent drips and overload, then rolling upward with light, even pressure.
Temperature control directly impacts paint performance, so we recommend maintaining your workspace between 50-85°F with proper ventilation to achieve ideal drying times and finish quality.
These application fundamentals, combined with monitoring ambient conditions, will help you avoid common issues like sagging, poor adhesion, and uneven texture throughout your Heyburn home.
Proper Paint Loading Methods
Everything in professional painting hinges on controlling paint volume from the first roller dip. We’ve found that proper loading techniques eliminate costly mistakes before they reach your walls.
- Full Saturation Protocol: We dip the roller completely, ensuring the nap absorbs maximum paint volume. For textured surfaces, heavy loading becomes critical—the nap must remain soaking wet to press paint into irregularities effectively.
- Controlled Excess Removal: We roll multiple up-down motions on tray ridges, distributing paint uniformly while retaining adequate volume. Roller angle adjustments during this phase optimize paint viscosity control.
- Maintenance Frequency: We redip every three laps, preventing dry napping that causes lap marks and uneven coverage.
This disciplined loading system keeps wet edges manageable throughout application, delivering the seamless finish Heyburn homeowners expect.
Drying and Temperature Control
Perfect paint loading means nothing if environmental conditions sabotage the drying process. We maintain suitable substrate temperature between 50°F and 85°F, verifying surface readings with an infrared thermometer before application begins. Our target zone of 60°F to 75°F guarantees proper leveling and bonding throughout Heyburn’s variable climate.
Controlling indoor humidity between 40% and 70% prevents tacky surfaces and adhesion failures. We use dehumidifiers when levels exceed 70%, particularly in basements and bathrooms where moisture accumulates.
During winter months, we keep heating systems active to prevent temperature fluctuations that compromise application quality.
Proper ventilation removes excess moisture without dropping room temperature. We position fans outward through windows, maintaining airflow while preserving thermal stability. This approach accelerates curing and eliminates lingering fumes safely.
Using Tape for Clean, Straight Lines
When executing interior paint projects, tape selection forms the foundation for achieving professional-grade lines. We recommend low-tack options like Frog Tape or ProDec Precision Edge to protect your Heyburn home’s existing finishes while delivering sharp results.
Our proven application process includes:
- Surface preparation: Clean walls thoroughly, mark heights with pencil and level, then press tape edges firmly to eliminate air gaps
- Edge sealing: Paint over tape boundaries with your base color, or apply thin caulk bead on textured surfaces for enhanced protection
- Strategic painting: Sweep strokes away from tape edges rather than toward them to prevent paint seepage
We’ve found that tape removal while paint remains wet produces the crispest lines. Pull tape in its original laying direction, then address any minor imperfections with an artist’s brush for flawless finishes.
Painting Trim, Baseboards, and Window Casings
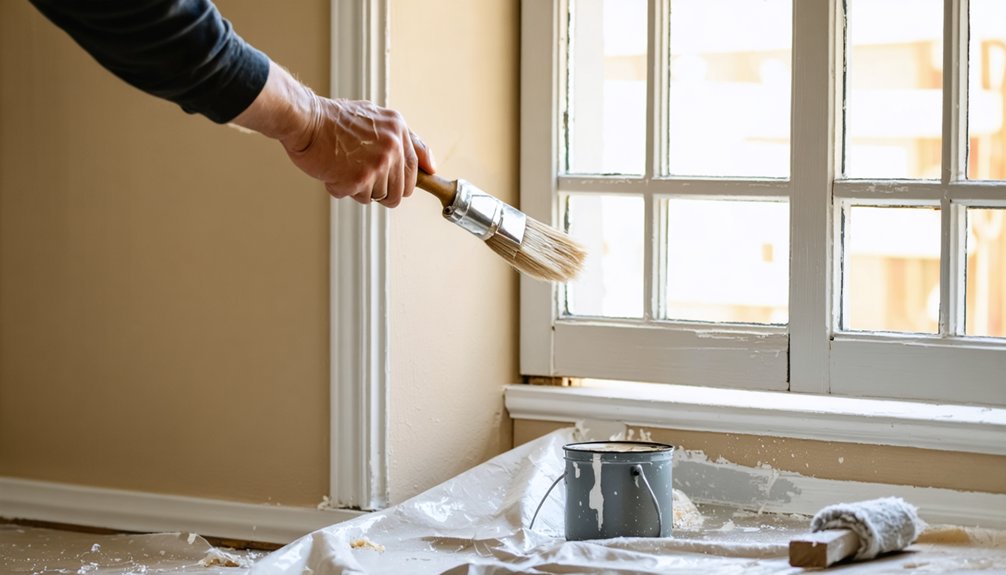
Trim work demands precision techniques that differ substantially from wall applications. We’ll secure professional results by following proven methods that separate surface preparation from application strategy.
For previously painted trim, we sand flaked edges with 150-grit, then finish with 220-grit for ultra-smooth surfaces. New unfinished trim requires only 220-grit to create proper adhesion. We select high-quality latex semi-gloss paint paired with appropriate primers—Zinsser for wood, STIX for PVC materials.
Our technique addresses orientation systematically. Vertical trim painting starts with edges, then center sections using vertical strokes. Horizontal trim painting follows the same edge-first approach, brushing horizontally across surfaces. We maintain wet edges with three to four overlapping strokes per section.
Using 1½-inch angled brushes for corners and 2½-inch brushes for larger moldings guarantees controlled coverage without overworking surfaces.
Achieving Full Coverage With Multiple Coats
Multiple coats create the foundation for professional-grade paint finishes that deliver both visual uniformity and long-term performance. We’re building paint thickness consistency when we apply two coats—achieving 3–4 mils of dry film thickness compared to 1–1.5 mils from a single application. This process is essential for reducing color contrast, particularly when switching from dark to light shades.
Professional paint application requires multiple coats to build proper film thickness, ensuring visual consistency and durability that single-layer coverage cannot achieve.
First coat stabilization – Apply with cross-roll strokes at consistent pressure, allowing 4–6 hours dry time to seal porous surfaces
Holiday inspection – Identify thin or missed areas before second application
Perpendicular layering – Roll second coat opposite to first direction, doubling washability and fade resistance for 6–10 year durability
We’re ensuring proper film build through careful technique and patience.
Protecting Your Investment With Quality Coatings
Proper coating selection determines whether our paint job delivers 3–5 years of service or 8–10 years of maintenance-free performance. We’ve learned that premium formulations contain superior binders that penetrate deeply, preventing bubbling and blistering while resisting moisture damage in humid spaces.
Interior sheen selection matters—satin and semi-gloss finishes offer enhanced scrub resistance for high-traffic areas, while matte formulations work well in low-traffic rooms.
Budget friendly paint options exist, but we’ll find that higher pigment concentrations reduce required coats from three to two, offsetting initial costs. Quality coatings resist mildew growth, scuffing, and fading, maintaining vibrant color retention for years.
We’re protecting our investment through stain-resistant properties that allow repeated cleaning without surface degradation, ultimately reducing maintenance expenses and extending repainting intervals substantially.
Drying Time and Temperature Considerations
Temperature control fundamentally dictates whether our paint application achieves professional results or suffers from adhesion failures and surface defects. We maintain workspace temperatures between 60-80°F throughout both drying and curing phases. Below 50°F, latex paints thicken dramatically, compromising coverage uniformity and adhesion strength.
Critical environmental parameters we monitor:
- Ideal curing temperatures remain constant at 16-26°C for 2-4 weeks post-application
- Maintaining proper humidity between 40-60% prevents surface tackiness and blistering defects
- Ventilation protocols balance moisture evacuation without accelerating surface drying rates
Temperatures exceeding 38°C cause surface skinning—the top layer hardens while underlying material remains wet, producing wrinkles and blisters. We’ve learned that humidity above 90% extends drying times exponentially, leaving surfaces vulnerable to contamination and mechanical damage during the curing period.
Frequently Asked Questions
How Do I Choose the Right Paint Color for My Heyburn Home?
We’ll help you select paint by testing samples in your lighting conditions, considering complementary color schemes for visual balance, and exploring neutral paint palettes that guarantee safe resale value while creating the welcoming atmosphere you’re seeking.
Should I Hire a Professional Painter or Do It Myself?
Ironically, DIY painting challenges like surface prep and ventilation safety often cost more long-term than hiring pros initially. We recommend professional painter benefits—proper equipment, technique expertise, and durable finishes—ensuring our community’s homes meet quality standards together.
How Much Does It Cost to Paint a Room in Heyburn?
We’ll pay $240-$870 for an average room size in Heyburn, depending on dimensions and prep requirements. Local paint costs run $2.02-$5.25 per square foot, with proper surface preparation and ventilation being essential for our community’s painting success.
What’s the Best Time of Year to Paint Interiors in Idaho?
We’ll find ideal weather conditions during fall and winter for interior projects. These seasons offer controlled humidity and temperature, letting us properly evaluate interior paint sheen considerations while ensuring safe ventilation and adhesion for our community’s homes.
How Long Before I Can Move Furniture Back After Painting?
We’ll need to wait 24-48 hours before moving furniture back, though drying time requirements vary by paint type. Before relocating items, we should complete paint cleanup considerations and verify surfaces aren’t tacky to prevent damage.