We’ve found that Hansen’s high-desert climate requires careful paint selection and application techniques to achieve lasting results. Start by washing walls with mild detergent, then fill imperfections with lightweight spackling compound before sanding smooth with 180-220 grit sandpaper. We recommend tinted primers beneath darker colors and applying two thin coats in 2-meter sections using large “N” patterns with quality microfiber rollers. Maintaining wet edges prevents lap marks in our dry Idaho air. Below, we’ll detail the specific material choices and protocols we’ve refined through hundreds of local projects.
Key Takeaways
- Choose paint finishes based on room function: flat for ceilings, eggshell for bathrooms, satin for bedrooms, and semi-gloss for kitchens.
- Prepare surfaces by washing walls, scraping loose paint, filling holes with spackling compound, and sanding with 180-220 grit sandpaper.
- Use quality tools including angled sash brushes, microfiber roller covers, canvas drop cloths, and high-tack painter’s tape for professional results.
- Apply two thin coats using “N” patterns in 2-meter sections, cutting in edges first and maintaining wet edges to avoid lap marks.
- For touch-ups, match original paint sheen exactly and thin latex paint 5%-10% with water to prevent sheen buildup and visible patches.
Choosing the Right Paint and Finishes for Your Hansen Home
Selecting appropriate paint finishes requires matching sheen levels to specific room functions and surface conditions. We’ll guide you through paint sheen selection that maximizes both aesthetics and performance in your Hansen home.
For ceilings, we recommend flat or matte finishes that minimize light reflection while concealing imperfections. Eggshell sheens work well in hallways and bathrooms where you’ll need enhanced stain resistance. Living rooms and bedrooms benefit from satin finishes that provide subtle glow without excessive shine.
When approaching paint color coordination, consider using light grays as base coats beneath translucent or ultra-deep colors. Semi-gloss options deliver superior washability for kitchens where grease accumulation occurs frequently. We advocate water-based formulations for their durability, fade resistance, and lower VOC levels—essential factors for maintaining healthy indoor environments throughout Idaho’s seasonal variations.
Proper Surface Preparation Before You Start Painting
After securing the right paint products and finishes, your Hansen painting project demands meticulous surface preparation to guarantee ideal adhesion and durability. We’ll start by washing walls and trim with warm water and mild detergent, working top to bottom with a sponge. Once dried, we’ll scrape away loose paint using metal putty knives, then fill imperfections with lightweight spackling compound, assuring structural integrity throughout.
After patching material cures, we’ll sand surfaces with 180-220 grit sandpaper, creating smooth shifts at repair edges. Chemical pretreatments like primer seal porous surfaces and provide consistent adhesion bases—we recommend tinted primers for darker colors. We’ll apply caulk to gaps between baseboards and walls using steady pressure, smoothing excess immediately. This systematic approach confirms professional results we can rely on.
Essential Tools and Materials for a Professional-Looking Job
Beyond surface preparation, we’ll need contractor-grade tools and materials to conduct a professional Hansen interior painting project.
For trim painting, we rely on 2.5-inch angle sash brushes—synthetic bristles for latex paints, natural for oil-based formulas. Brands like Wooster, Purdy, and Corona minimize bristle shedding and eliminate brush marks. Proper brush cleaning promotes tool longevity between applications.
Our roller system includes microfiber covers with ⅜-inch nap for smooth surfaces and ½-inch for textured areas. Quality roller frames paired with lint-free covers deliver professional-grade finishes.
We’ll protect surfaces using canvas drop cloths and blue high-tack painter’s tape for baseboards, yellow low-tack for walls. Standard 1.5-inch tape width upholds clean lines without bleeding.
Access equipment includes stable 4-6 foot ladders and adjustable extension poles for comfortable ceiling work.
Application Techniques for Smooth and Even Coverage
While quality tools establish our foundation, mastering proper application techniques separates amateur results from professional-grade finishes in Hansen’s interior spaces.
Optimal roller nap selection begins with surface assessment: ¼” for smooth level 5 drywall, ½” for standard walls with satin finishes, and ¾” for textured ceilings. We’ll achieve superior results using microfiber covers that minimize stipple.
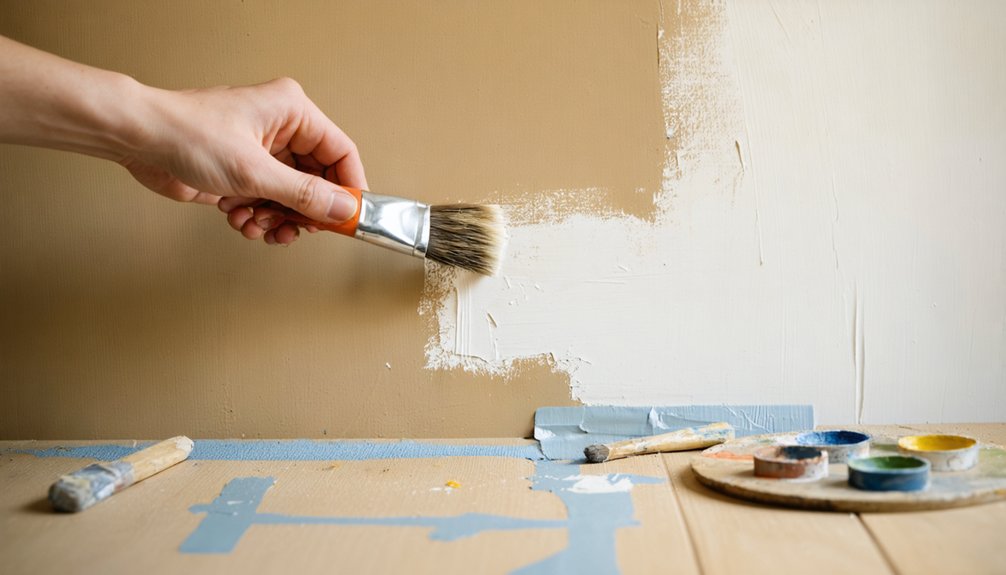
Our coordinated painting approach starts with cutting in edges using angled sash brushes, positioning bristles centimeters from corners before moving inward. We apply paint in 2-meter sections using large “N” patterns, rolling sideways for distribution, then vertically for even spread.
Maintaining wet edges prevents lap marks—we overlap into freshly painted areas while working systematically. Two thin coats with 2-4 hours drying time deliver full coverage without drips or visible brush strokes.
Mastering Touch-Ups to Keep Your Walls Looking Fresh
Even professionally executed paint jobs in Hansen homes require periodic touch-ups as walls endure daily wear from furniture contact, cleaning activities, and environmental factors. We’ll guide you through proper touch up techniques that guarantee seamless results.
Start by cleaning scuffs with a magic eraser, then repair any damage with spackle. Once dry, sand lightly with 120-grit paper. Match your original paint type and sheen exactly—stir well and thin latex paint 5%-10% with water to prevent sheen buildup.
Use the same application tool as your original job. Apply minimal paint from the center outward, feathering edges like sun rays. Common touch up mistakes include over-priming and applying excessive paint, which highlights the repair rather than concealing it. Let dry completely before evaluating your blend.
Frequently Asked Questions
How Do I Protect Switches and Outlets When Painting Interior Walls?
We’ll protect your switches and outlets using proper masking techniques with 2-inch painter’s tape applied horizontally across tops, or remove cover plates entirely. This approach prioritizes ensuring electrical safety while preventing paint splatter and maintaining code compliance.
Should I Check Gutters and Sprinklers Before Starting Interior Painting Projects?
While it seems unrelated, we’d recommend checking exterior systems first. Guarantee downspouts are clear and inspect sprinkler heads for proper operation. This prevents moisture infiltration that could compromise your interior paint application and long-term adhesion.
What Is the Proper Paint-To-Water Ratio for Touch-Up Applications?
We’ll use a 30-50% paint-to-clear ratio for touch-ups, ensuring proper paint application techniques. Testing your paint mixing consistency on scrap surfaces first confirms coverage before application. This approach delivers professional results we’d expect from careful preparation.
How Can I Prevent Drips When Loading Paint Onto My Roller?
We’ll prevent drips by mastering proper roller loading technique: dip only one-third depth, distribute evenly on ribbed tray, and roll off excess paint—avoiding excess paint buildup that causes runs when you’re applying to walls.
What Masking Tools Help Achieve Professional Results More Quickly?
We’ll accelerate your workflow with hand maskers that apply painter’s tape and film simultaneously, eliminating separate steps. Combined with proper brush selection for cutting-in, you’ll achieve professional-grade edges while reducing masking time considerably.