We’ve safely pressure washed countless decks by keeping PSI at or below 1500, using 25-degree green or 40-degree white nozzles, and maintaining a consistent 12-18 inch standoff distance from the surface. Start at lower pressure settings around 600 PSI and gradually increase while moving the wand in long, even strokes following the wood grain direction. Pre-treating with cleaning solution using a low-pressure nozzle prevents fiber damage, and allowing 24-48 hours drying time before sealing protects your investment. Our thorough approach covers proper technique, equipment selection, and post-cleaning care.
Key Takeaways
- Keep pressure at or below 1500 PSI, starting at 600 PSI for softwoods and gradually increasing while monitoring surface condition.
- Use only 25-degree green or 40-degree white nozzles; avoid red, yellow, and rotating turbo nozzles that damage wood fibers.
- Maintain 12-18 inch distance from deck surface and move in long, even strokes following the wood grain direction.
- Pre-wet the deck and apply cleaning solution with low-pressure nozzle, allowing 10-15 minute dwell time before washing.
- Rinse thoroughly, allow 24-48 hours drying time, then inspect for damage like splintering or tiger striping before sealing.
Understanding Safe Pressure Levels for Different Wood Types
When pressure washing a deck, selecting the appropriate PSI setting for your wood type prevents irreversible damage to the surface. We recommend an ideal pressure range of 500-1500 PSI for most applications.
Softwoods like cedar and pine require maximum caution—never exceed 1500 PSI, and start below 1200 PSI to prevent splintering. Hardwoods such as oak and teak tolerate up to 1500 PSI but demand gradual adjustment from lower settings.
Start softwoods below 1200 PSI to avoid splintering, while hardwoods can handle 1500 PSI with careful pressure adjustment.
Before full application, we’ll test a small section at a 2-foot distance while safely inspecting wood fibers for damage. Electric washers provide superior control for delicate surfaces.
Hold the wand 12-16 inches away, using a 40-degree nozzle with sweeping motions along the grain. Monitor the surface closely when increasing pressure, and never exceed 1500 PSI regardless of wood type.
Choosing the Right Nozzle and Equipment for Deck Cleaning
Selecting the correct nozzle configuration directly determines whether your deck cleaning project preserves or damages the wood surface. After appraising wood condition, we’ll match equipment specifications to your deck’s requirements. Electric pressure washers operating between 1,500-2,500 PSI provide ideal cleaning power without compromising wood integrity.
Essential Nozzle Selection Protocol:
- 25-degree green nozzle – our standard recommendation for balanced pressure distribution and general dirt removal
- 40-degree white nozzle – ideal for delicate wood surfaces requiring gentler treatment
- Black detergent nozzle – exclusive low-pressure application for pre-treatment solutions
- Avoid red and yellow nozzles – concentrated streams damage soft wood fibers
We maintain consistent nozzle-to-surface distance while maximizing pressure duration through long, grain-following strokes. Never use rotating turbo nozzles on wood—their concentrated pressure capability causes irreversible surface degradation.
Maintaining Proper Distance and Spray Technique
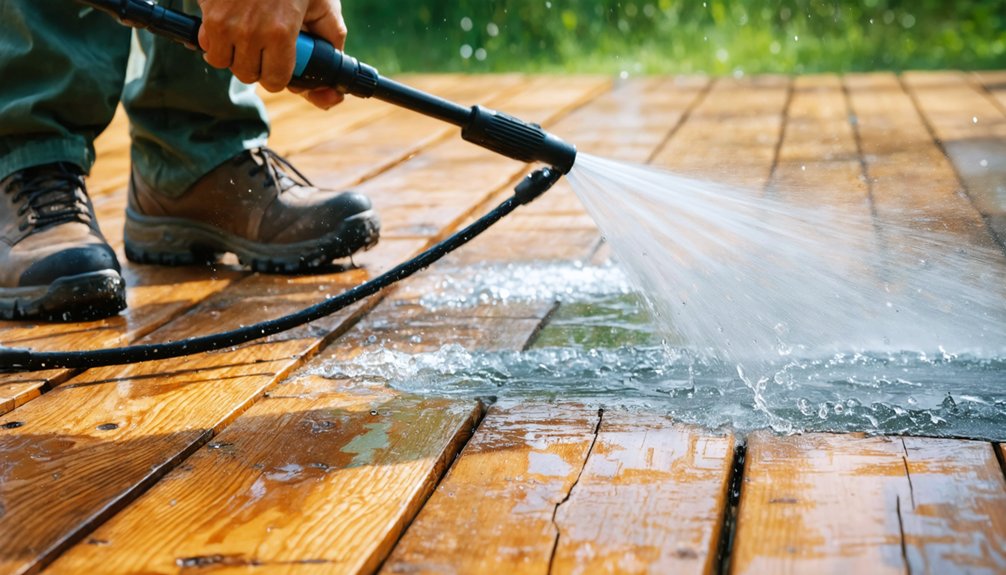
We’ll establish the critical 12–18 inch minimum distance between your nozzle and deck surface to prevent gouging and etching damage.
This standoff distance must remain consistent throughout your entire cleaning operation to avoid streaking and zebra-striping effects.
When applying pressure, we’ll move the wand in long, even strokes that follow the wood grain direction, maintaining steady forward motion without hovering over any single area.
Optimal Nozzle Distance Guidelines
Maintaining the correct nozzle distance stands as one of the most critical factors in preventing irreversible deck damage during pressure washing. We recommend adhering to these distance protocols:
- Standard operating range: Keep the nozzle 12-18 inches from the wood surface for optimum cleaning without fiber damage.
- Initial testing distance: Start at 24 inches on a hidden section, monitoring pressure variances as you gradually move closer.
- Minimum safe threshold: Never approach closer than 12 inches, even at reduced PSI settings—this proximity causes gouging regardless of pressure adjustments.
- Trajectory control: Maintain the wand at 25-40 degrees to the surface while controlling spray trajectories through long, sweeping motions.
Operating within these parameters guarantees we’re removing contaminants effectively while preserving wood integrity throughout the cleaning process.
Move With Wood Grain
While proper distance creates the foundation for safe deck cleaning, directional technique determines whether we preserve or destroy the wood’s structural integrity. We must execute all sweeping motions parallel to the grain, establishing water flow direction that follows the wood’s natural fiber orientation. Starting from the house and working outward, we’ll maintain grain alignment maintenance through long, even strokes that prevent splintering and fiber damage.
Our nozzle stays in constant motion, covering two-board-wide swaths without pausing or hovering. We overlap each pass by several inches, ensuring complete coverage while hiding pressure variations. Walking at a steady pace with uniform pressure distribution, we avoid saturation that compromises grain structure.
For stubborn areas, we make multiple gentle passes rather than increasing pressure, protecting the wood’s integrity throughout.
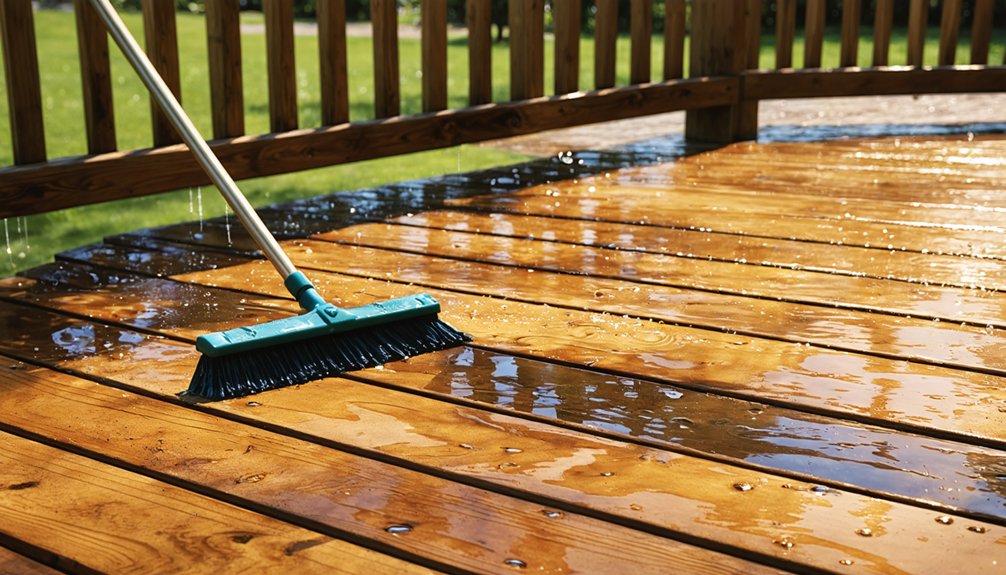
Pre-Treating Your Deck Before Pressure Washing
When applying deck-cleaning solutions, we’ll use a black low-pressure nozzle or pump sprayer to guarantee gentle, even coverage across the entire surface. Before treating the full deck, we must test the cleaning solution on an inconspicuous area—typically underneath stairs or along a hidden corner—to verify it won’t discolor or damage the wood.
This test patch reveals any adverse reactions within the 10-15 minute dwell time, allowing us to adjust the product concentration or select an alternative cleaner before treating visible surfaces.
Gentle Soap Application Methods
Before pressure washing begins, applying a deck-safe cleaning solution breaks down embedded dirt, mildew, and organic stains that water pressure alone can’t eliminate. We’ll guide you through proper application methods that safeguard your investment:
- Pre-wet dry surfaces with clean water to prevent chemical burn and fiber lift before cleaner contact.
- Use low-pressure soap nozzles or pump sprayers to achieve even chemical saturation levels across all boards.
- Apply in sweeping motions parallel to grain direction, maintaining 12-18 inch distance for uniform coverage.
- Work systematically in sections to guarantee consistent application timing and prevent premature drying.
Allow 10-15 minutes dwell time for mildew removal, working in shade when possible. This absorption period lets the cleaner penetrate deeply without over-saturating wood fibers.
Testing Inconspicuous Deck Areas
Testing pressure washer settings on hidden deck sections prevents costly damage to visible surfaces and allows you to calibrate equipment before full-scale cleaning begins. We’ll select corners behind planters or under railings—masking inconspicuous areas where mistakes won’t show. Start at 1200-1800 PSI with a 40° nozzle, maintaining parallel motion to wood grain.
Apply pre-treatment solution for 10-15 minutes, then rinse thoroughly. After 24 hours of drying, inspect for raised fibers, discoloration, or etching that signals excessive pressure. Compare before/after photos for verifying desired outcomes without surface compromise. If mildew persists, extend dwell time; if wood dulls, reduce PSI immediately. Re-test adjacent hidden sections after adjustments.
Only proceed to visible deck areas once we’ve achieved clean results without fiber damage during our 48-hour inspection window.
Step-by-Step Application Process for Wood Surfaces
Pressure washing a wood deck requires systematic execution across five critical phases: preparation, equipment selection, pre-treatment, washing technique, and post-washing care. We’ll guide you through each stage to guarantee professional results while safeguarding your investment.
Critical Application Steps:
- Surface Preparation – Clear all furniture and sweep debris. Inspect for damage and protect surrounding areas with plastic sheeting.
- Pre-Treatment Protocol – Apply wood-specific cleaning solution concentration at manufacturer’s specifications. Allow 10-15 minutes penetration time without surface drying.
- Controlled Washing – Maintain 6-18 inches distance, working with wood grain using sweeping motions. Start at 600 PSI, adjusting upward cautiously.
- Post-Wash Requirements – Rinse thoroughly and verify ideal moisture levels below 15% using a moisture meter before sealing after 24-48 hours drying time.
Recognizing Signs of Pressure Washing Damage
Wood damage from improper pressure washing manifests through distinct physical indicators that require immediate identification to prevent structural deterioration. We’ll recognize splintering when sustained stream exposure removes wood fibers, particularly in dry or unsealed boards. Fuzzing creates rough surfaces as dead fibers lift and refuse to resettle, requiring sanding intervention.
Etching produces gouges where soft grains erode while hard grains remain intact—damage resembling wire brush scarring when nozzles position closer than 8 inches. Tiger striping appears as permanent deep lines from zigzagging against grain direction. Finish removal shows through uneven clean spots, lost sheen, or peeling coatings.
These damage patterns prove critical for determining hazardous wood conditions and identifying signs of aging wood, enabling us to assess repair needs before structural compromise occurs.
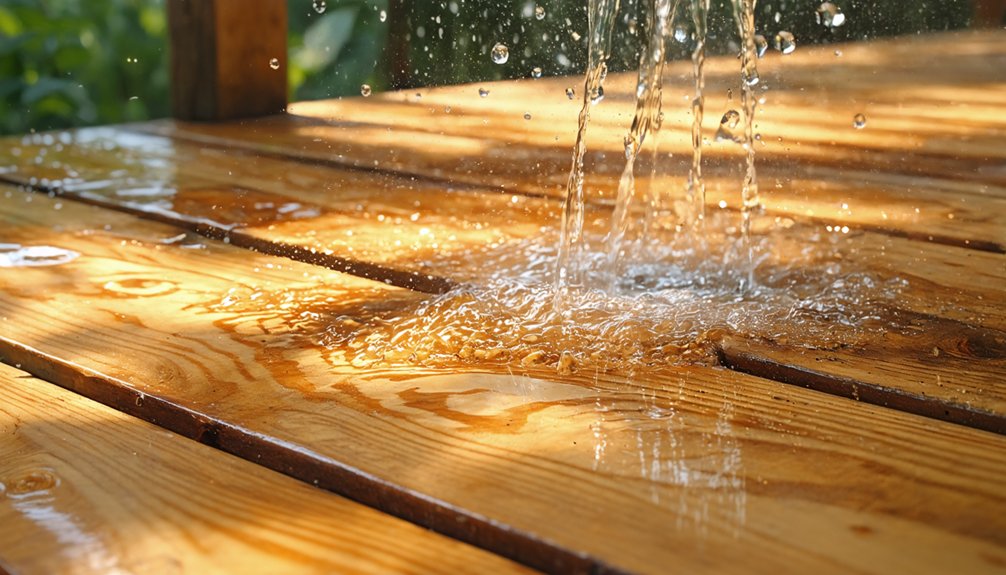
Post-Cleaning Care and Drying Requirements
After completing the pressure washing process, we’ll initiate thorough rinsing procedures using a fan nozzle to remove residual dirt, debris, and cleaning solution from all deck surfaces. We’ll flush cracks, joints, and corners systematically with overlapping strokes to guarantee complete detergent removal and prevent long-term wood damage.
Critical Drying Protocol:
- Allow 24-48 hours minimum for complete moisture evaporation based on sunlight exposure and humidity levels
- Restrict all foot traffic and furniture placement during drying period to prevent warping
- Conduct moisture content assessment by inspecting for raised fibers or rough patches
- Implement preventive maintenance tips including light sanding of rough areas before any sealing applications
High humidity conditions may extend drying beyond 48 hours. We’ll verify complete dryness before proceeding with staining or sealing operations.
Protecting Your Deck With Sealants and Stains
Once your deck reaches complete dryness, we’ll apply protective coatings to shield the wood from environmental degradation and extend its serviceable lifespan. Our sealer selection depends on regional climate conditions and wood characteristics.
For pressure-treated lumber in wet environments, we’re choosing products offering oil based durability that penetrate deeply to prevent moisture infiltration, swelling, and structural damage. In humid zones where fungal growth threatens deck integrity, we’re selecting formulations with water based mildew resistance and low VOC emissions for safer application.
We’ll evaluate clear versus tinted options based on UV exposure levels—pigmented sealers provide superior protection in high-sunlight areas. Professional-grade products like DEFY Extreme or Thompson’s WaterSeal deliver proven performance on rough-cut surfaces. We’re applying coatings within 48-72 hours post-cleaning for ideal penetration and bonding strength.
Alternative Cleaning Methods for Delicate Wood
When deck surfaces feature delicate wood species or aged lumber showing fiber deterioration, we’re bypassing pressure washers to prevent irreversible structural damage. We’ll safeguard our investments using these proven alternatives:
Protecting vulnerable wood from pressure washer damage requires strategic alternatives that preserve structural integrity while delivering professional-grade results.
- Mild Soap Solutions: Apply warm water mixed with dish detergent using soft-bristle brushes, scrubbing parallel to grain on cedar and redwood surfaces.
- Oxygen Bleach Mixtures: Combine 1 cup oxygen bleach per gallon of water for mold removal, utilizing sodium percarbonate that breaks down safely.
- Vinegar-Based Cleaners: Mix 1 part white vinegar with 4 parts water, letting solution sit 15-20 minutes before scrubbing.
- Baking Soda Pastes: Create thick paste for spot treatment, carefully applying to avoid surface scratching.
Following professional advice consultation and applying natural oil treatments post-cleaning secures we’re maintaining structural integrity while achieving thorough cleanliness.
Frequently Asked Questions
How Often Should I Pressure Wash My Deck Each Year?
Like clockwork maintaining any cherished outdoor space, we recommend seasonal cleaning once annually for most decks. However, humid climates necessitate professional pressure washing every six to nine months to prevent moisture-related deterioration and maintain structural integrity.
Can Pressure Washing Void My Composite Deck Warranty?
Yes, we’ll void your composite deck warranty if we exceed manufacturer PSI limits or use improper pressure washing techniques. Following approved protocols protects the deck’s structural integrity and safeguards our warranty coverage remains valid for years ahead.
What’s the Best Time of Year to Pressure Wash a Deck?
When’s the perfect window for deck maintenance? We recommend spring or fall, when ideal temperature ranges stay above 52°F and preferred weather conditions—mild, dry days—ensure proper drying while preventing wood damage from temperature extremes.
How Long Does a Deck Take to Dry After Pressure Washing?
We recommend waiting 48 hours minimum for proper deck drying time after rain or pressure washing. Factors affecting deck drying time include humidity levels, sunlight exposure, and air circulation—we’ll verify moisture content stays below 19% before staining.
Should I Remove Furniture Before Pressure Washing My Deck?
We’ll always remove all furniture before pressure washing to protect furniture from splashing and avoid damaging deck edges. This essential prep step guarantees proper technique, maintains consistent spray patterns, and keeps you safe while operating equipment.