We’ve found cabinet painting in Paul, Idaho costs $2,000-$7,000 compared to $8,000-$25,000 for replacement, delivering approximately 77% ROI while reducing landfill waste. The process requires meticulous surface preparation with TSP cleaning and 120-grit sanding, followed by high-quality bonding primers and professional-grade sprayers applying two primer coats and two topcoats of high-build lacquer. Local companies like N-Hance Wood Refinishing of Boise and Spray ‘n Coat Painting serve the Paul area with specialized techniques including UV curing technology. We’ll walk you through the complete methodology and material specifications that guarantee factory-quality results.
Key Takeaways
- Cabinet painting costs $2,000-$7,000, offering 77% ROI and significantly less expense than full replacement at $8,000-$25,000.
- Proper preparation includes TSP cleaning, 120-grit sanding, wood filler repairs, and bonding primer application for lasting results.
- Professional techniques require thin coats, 24-48 hours drying time between applications, and 30+ days for complete curing.
- High-quality finishes use cabinet-specific primers, professional sprayers, and two primer plus two topcoat applications of high-build lacquer.
- Local providers include N-Hance Wood Refinishing, Spray ‘n Coat Painting, Paul’s Precision Painting, and Five Star Painting.
Benefits of Cabinet Painting for Paul Homeowners
When homeowners in Paul, Idaho evaluate kitchen upgrades, cabinet painting delivers measurable cost advantages that traditional replacement projects can’t match. We’re talking $2,000-$7,000 versus $8,000-$25,000 for full replacements—savings that free your budget for countertops or lighting enhancements.
This approach avoids hidden expenses like plumbing modifications and structural adjustments while generating approximately 77% ROI on minor kitchen remodels. We’ve seen sustainable upgrades like cabinet painting add $2,000 in increased resale value on average, with 53% of realtors confirming kitchens drive the highest property appreciation.
The process completes in days rather than weeks, minimizing disruption to your daily routine. You’ll reduce landfill waste by reusing existing cabinetry while achieving endless customization through colors, finishes, and updated hardware that align with current design trends.
The Cabinet Painting Process Explained
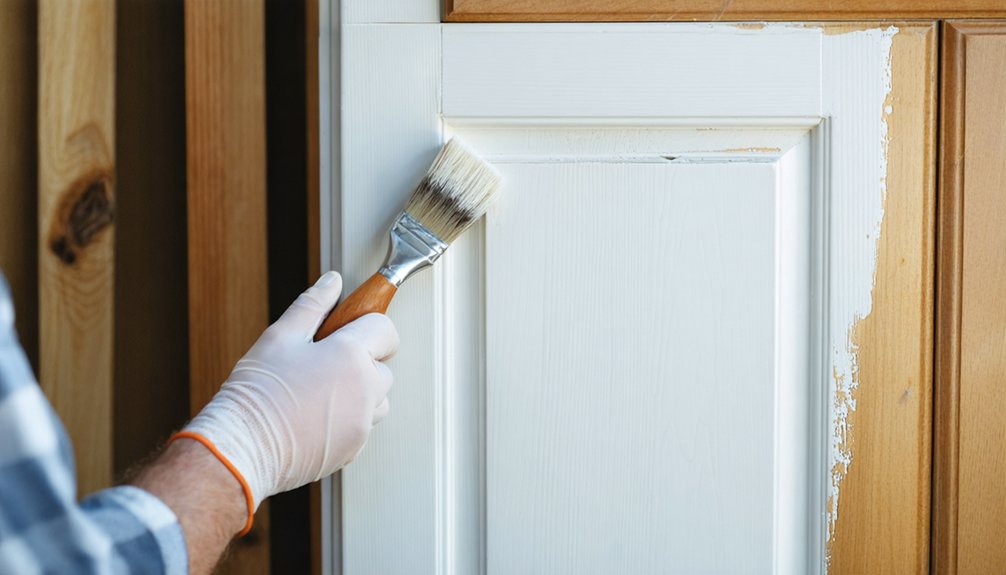
Our cabinet painting process in Paul begins with meticulous surface preparation—we clean all surfaces with Dawn dish soap to eliminate grease buildup, then sand to create ideal adhesion points for primer.
We apply cabinet-specific bonding primers to damaged areas and use heavy-duty products like X-I-M UMA for melamine surfaces that require enhanced adhesion.
For application, we employ professional-grade sprayers with adjustable fan patterns and our PSDR rack system, delivering two primer coats followed by two topcoats of high-build lacquer for maximum durability and a factory-quality finish.
Surface Preparation Steps
Before applying the first coat of paint, proper surface preparation determines whether your cabinet finish will last years or fail within months. We’ll start by removing all doors, drawers, and hardware, labeling each component with painter’s tape for accurate reinstallation.
Next, we’ll clean every surface with TSP cleaner to eliminate grease and contaminants that prevent adhesion.
Our sanding techniques involve 120-grit sandpaper to degloss existing finishes and create tooth for primer bonding. We’ll repair imperfections with wood filler, allowing suitable cure time before smoothing. After vacuuming and tack-cloth wiping, we’ll apply high-quality bonding primer like Extreme Bond.
For hardware replacement projects, we’ll fill old holes during repairs. The primer requires 24-hour drying before final 220-grit sanding, ensuring ideal paint adhesion on your Paul cabinets.
Professional Application Techniques
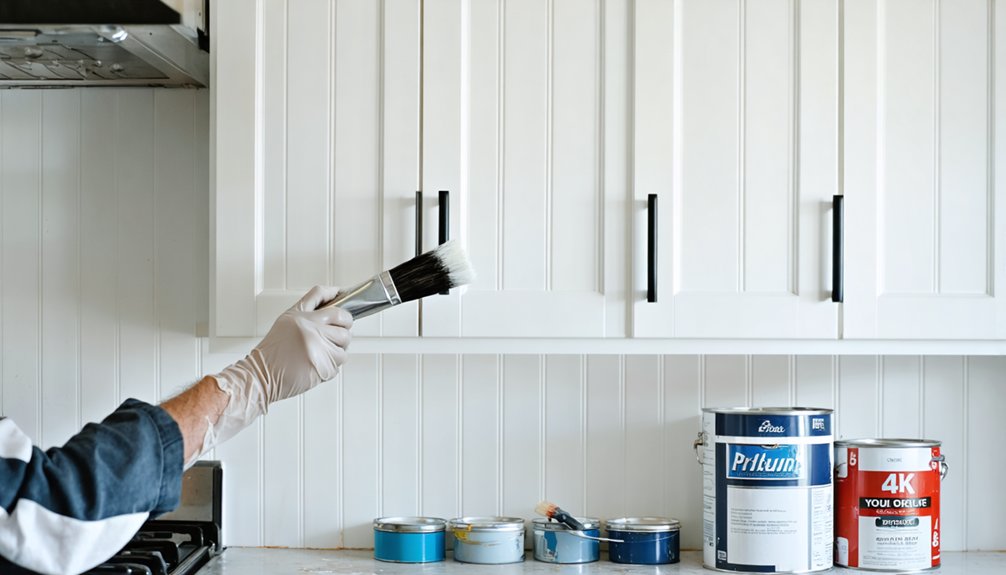
With surfaces properly prepped and primed, the application phase separates amateur results from professional-grade finishes. We achieve uniform application by combining angled brushes for detailed work with flock foam mini rollers for flat surfaces—this prevents brush strokes and air bubbles that compromise quality.
Our professional techniques follow a methodical sequence: cabinet frames first, working inside-out with finishing strokes into wet paint. We apply thin, even coats rather than single heavy layers, building depth gradually. Between coats, we sand with 400-600 grit paper and remove all dust with tack cloths.
Timing matters critically—we allow 24-48 hours between coats and a full week before reinstalling hardware. Complete curing takes 30+ days, ensuring the durability you expect from professionally finished cabinetry.
Trusted Cabinet Painting Companies Serving Paul and Boise Area
Since cabinet painting requires specialized expertise and professional-grade equipment, we’ve identified the most trusted companies serving Paul and the greater Boise area.
Top Cabinet Refinishing Providers:
- N-Hance Wood Refinishing of Boise – Woman-owned franchise since 2004 utilizing UV light technology for factory-grade durability, offering exact color matching and cabinet hardware upgrades
- Spray ‘n Coat Painting – Established 2009, specializing in complete refinishing services with soft-close hinge installations and decorative hardware options
- Paul’s Precision Painting LLC – 4th generation business (RCE# 40798) providing custom finishes including faux painting and epoxy coatings
- Five Star Painting – Cost-effective alternative to replacement, focusing on professional cabinet transformations
Understanding cabinet refinishing costs varies by project scope, materials, and add-on services. We recommend requesting detailed estimates from multiple providers to compare pricing structures and service inclusions for your specific project requirements.
Essential Surface Preparation and Priming Techniques
We’ll walk you through the critical surface preparation sequence that determines your cabinet painting success in Paul’s climate. Proper cleaning, sanding, and primer selection create the foundation for a durable finish that withstands daily use.
Let’s examine each preparation step, from TSP application through adhesion testing, to guarantee your cabinets achieve professional-grade results.
Cleaning and Sanding Steps
Before applying any primer or paint, proper surface preparation determines whether your cabinet finish will last for years or begin peeling within months. We’ll walk you through our proven cleaning and sanding process that meets product quality standards while considering environmental impact considerations.
Our Four-Step Surface Preparation Process:
- Initial Degreasing – We apply TSP solution with ScotchBrite sponges, scrubbing all surfaces thoroughly before rinsing with clean water (always wear gloves due to TSP’s corrosive nature)
- Strategic Sanding – We use 100-150 grit to roughen glossy finishes, then 220 grit for smooth scuff-sanding between coats
- Wood Filler Application – We fill imperfections, letting them dry completely before sanding smooth
- Final Dust Removal – We wipe surfaces with tack cloths, ensuring contamination-free adhesion for flawless primer application
Choosing the Right Primer
Clean, sanded cabinets require the right primer foundation to guarantee topcoat adhesion and long-term durability. We’ll guide you through primer selection considerations that match your specific refinishing needs.
For raw wood cabinets, we recommend oil-based or shellac primers like B-I-N, which seal stains and block odors effectively. When working with oak or heavily grained species, grain-filling primers such as 1107 or Sherwood high-build surfacer create smooth surfaces in two coats.
We prefer 2K primers with catalysts for superior moisture resistance benefits and enhanced durability. If you’re refinishing existing coatings, 1K primers like AWFS 414 adhere excellently without catalysts. For difficult surfaces, we trust Centurion vinyl sealer as our universal bonding solution. Self-sealing products like the 2800 series eliminate separate primer steps entirely.
Testing Paint Adhesion
Testing paint adhesion protects your cabinet refinishing investment by verifying proper primer-to-substrate bonds before topcoat application. We recommend implementing coating adhesion measurement techniques to guarantee professional-grade results in your Paul kitchen.
Essential Adhesion Test Methods for Cabinet Primers:
- Cross-Cut Test – We score a grid pattern per ASTM D3359, apply pressure-sensitive tape, then pull at 180° to rate adhesion on a 0-5 scale where 5 indicates zero removal.
- Pull-Off Test – We bond a dolly perpendicular to the surface and measure tensile force until failure occurs, documenting whether detachment is adhesive, cohesive, or glue-based.
- Knife Adhesion Test – We score coating at specific angles per ASTM D6677 for quick field verification of cure quality.
- Hot Water Immersion – We conduct crosshatch testing, immerse panels in 45°C water for 20 minutes, then retest after recovery.
Professional Painting Methods and Product Selection
Professional cabinet painting requires methodical surface preparation that directly impacts finish durability and appearance. We’ll start by thoroughly cleaning all surfaces with Dawn dish soap or Krud Kutter, scrubbing with a sponge over a bucket to catch runoff. After rinsing in clean water, we’ll sand pre-finished surfaces using 220-grit sponges, followed by 320-600 grit blocks between coats.
For primer, we recommend Benjamin Moore’s Advance interior primer tinted to your final color for superior paint coverage, or Zinsser BIN Advanced Primer with its impressive 45-minute drying time. We’ll apply one primer coat followed by two paint coats using HVLP sprayers for doors and hand-rolling techniques for cabinet bases. Benjamin Moore’s Advance paint in satin finish delivers professional results without requiring topcoat application, ensuring lasting beauty for your Paul kitchen.
Maximizing Durability With Quality Materials and Finishes
When durability determines the long-term success of cabinet refinishing projects, we prioritize catalyzed coatings and 2K polyurethane formulations that outperform standard retail paint products by significant margins. Our catalyzed coatings performance delivers chemical resistance 1,200 times stronger than over-the-counter alternatives, creating hard surfaces that withstand daily kitchen demands.
We achieve exceptional longevity through systematic preparation:
- Thorough degreasing and sanding of all cabinet surfaces
- Epoxy wood filler application to eliminate imperfections
- Durable base coat priming for proper adhesion
- Two-coat spray application using professional-grade equipment
We exclusively use premium brands including Sherwin-Williams, Benjamin Moore, and Centurion, ensuring your investment delivers lasting value. Our 18-month warranty and cross-hatch adhesion testing validate the permanent bond strength we create for your cabinets.
Frequently Asked Questions
How Much Does Cabinet Painting Typically Cost in Paul, Idaho?
We’ll find cabinet painting costs $3,000–$8,000 for full kitchens in Paul, Idaho. Our cost breakdown shows $95–$185 per piece, depending on painting techniques used. Together, we’ll achieve professional results through proper prep and quality finishes for your home.
How Long Does the Cabinet Painting Process Take to Complete?
We understand you’re enthusiastic to utilize your kitchen again. Our estimated timeline runs 5 days onsite, with drying/curing duration extending through proper recoat intervals. We’ll guarantee quality finishes that make your cabinets look factory-fresh and last years.
Do I Need to Remove Cabinet Doors Before Painting?
We strongly recommend removing doors for professional results. The advantages of removing doors include superior finish quality and complete coverage. However, we can share techniques for painting without removal if your project requires doors to stay mounted.
Can I Paint Cabinets Myself or Should I Hire Professionals?
Like David facing Goliath, you *can* paint cabinets yourself, but we’d weigh the pros and cons carefully. Cost-effectiveness disappears when DIY attempts fail—requiring professional fixes that exceed initial hiring costs, compromising quality and durability.
What Colors Are Most Popular for Kitchen Cabinets Currently?
We’re seeing trending color schemes favor deep jewel tones, earthy greens, and warm neutrals paired with minimalist cabinet designs. Natural wood finishes dominate, while moody blues and rich reds create sophisticated focal points that’ll transform your kitchen’s aesthetic completely.