We’ve learned through decades of painting homes in Twin Falls that substrate temperatures—not just ambient air readings—determine whether your exterior coating will bond properly or fail within eighteen months. Our preparation protocol begins with power washing at 1,500-2,500 PSI, followed by 24-48 hours of moisture evaporation before confirming surface temperatures stay between 40-100°F and at least 5°F above dew point. We’ll walk you through the complete monitoring process, ideal seasonal windows, and critical curing requirements that prevent adhesion failures in Idaho’s BSk climate zone.
Key Takeaways
- Paint during late spring through early fall when temperatures stay between 60-85°F with overnight lows above 50°F for optimal adhesion.
- Power wash surfaces at 1,500-2,500 PSI and allow 24-48 hours drying before applying paint to prevent moisture issues.
- Ensure surface temperature stays 5°F above dew point and between 40-100°F using infrared thermometers before painting begins.
- Schedule applications during early morning or evening hours to avoid midday heat exceeding 90°F and wind speeds above 10 mph.
- Check 48-72 hour weather forecasts to confirm no precipitation and overnight temperatures remain consistently above freezing for proper curing.
Understanding Twin Falls’ Unique Climate Challenges
Twin Falls operates within a BSk (Cold Semi-Arid) climate classification, which presents distinct challenges for exterior paint performance that we must address during surface preparation. We’re working with significant daily temperature fluctuations—from winter lows around 20°F to summer highs of 89°F—that cause substrate expansion and contraction, leading to premature coating failure if we don’t properly prime and seal surfaces.
Current drought conditions in our region create additional complications. The dry air, combined with only 10 inches of annual precipitation, accelerates moisture evaporation during application, affecting proper paint curing. We’ll need to account for our 100-125 frost days annually when scheduling projects, as temperatures below 50°F compromise adhesion. Understanding these environmental factors guarantees we’re selecting appropriate coatings and timing our work for ideal results.
Choosing the Right Season for Your Painting Project
Beyond understanding our climate’s impact on paint performance, we must strategically schedule projects to leverage Twin Falls’ seasonal weather patterns. We’ve identified late spring and summer as optimal windows, where temperatures consistently range between 60-85 degrees Fahrenheit—critical for proper curing and adhesion. Summer’s extended daylight hours accelerate our project timeline, allowing full-day work sessions while early morning applications help us avoid peak heat above 90 degrees.
Our material selection should prioritize UV-resistant formulations given Twin Falls’ high summer sunlight exposure. We’ll strategically time applications around heat peaks and guarantee temperatures won’t drop below 50 degrees post-application. Early fall remains viable through September’s dry conditions, though we’re cautious of unpredictable moisture that compromises adhesion. Together, we’re maximizing durability through informed seasonal planning.
Temperature Requirements for Long-Lasting Results
While seasonal planning establishes our project timeline, we’ll achieve ideal results only when we maintain precise temperature parameters throughout the application and curing phases. We’re targeting ambient temperatures between 50°F and 85°F, with surface temperatures measuring at least 5°F above the dew point to control surface moisture levels. Our infrared thermometer readings confirm substrate temperatures differ substantially from air readings, particularly on sun-exposed elevations.
We’ve identified ideal application windows during early morning or evening hours, avoiding midday heat that causes rapid surface skinning before underlying layers cure suitably. When temperatures drop below 50°F, we risk compromised adhesion and film formation. Night temperatures remaining above 32°F for several days post-application guarantee proper curing cycles. Strategic scheduling during Twin Falls’ early fall period provides optimal conditions before freeze events occur.
Managing Humidity Levels in Idaho’s High Desert
Temperature control pairs directly with moisture management, and Twin Falls’ high desert climate presents distinct advantages for exterior coating applications. We’re fortunate to work in conditions where relative humidity rarely exceeds uncomfortable levels—July’s 20.59% average represents ideal paint adhesion windows. Through dew point monitoring, we target application periods when readings stay below 45°F, particularly during May through September when humidity consistently remains under 50%.
While February’s 72% humidity requires caution, our region’s natural aridity eliminates most moisture-related failures like bubbling or poor curing. We recommend humidity sensor usage during pre-application assessments, though Twin Falls’ consistent low-moisture environment makes dehumidification equipment largely unnecessary. This high desert advantage accelerates cure times and guarantees superior film formation compared to humid climates—a significant benefit we leverage throughout our preparation protocols.
Wind Conditions and Weather Timing Strategies
When atmospheric movement exceeds 10 mph, we suspend all exterior coating operations to prevent contamination and application failures. Our protocol targets the 2-7 kt window consistently available during pre-dawn hours, typically before 06h when calm prevails. We’ve documented gusts reaching 22 kts that accelerate solvent evaporation, creating lap marks and compromising film integrity.
Ideal morning conditions emerge between 00h-06h when velocities stabilize at 4 kts or below. We rely on Windfinder and National Weather Service data for hourly forecasts, cross-referencing multiple sources to verify sustained conditions under 10 kts with gust maximums below 15 kts.
Observing seasonal patterns across Twin Falls’ high desert climate—particularly late spring’s 2-19 kt variability—we schedule projects during summer’s calmer cycles. This strategic timing safeguards your investment and guarantees proper cure.
Optimal Daily Painting Windows Throughout the Year
We’ve found that maximizing your painting project’s success in Twin Falls requires strategic timing based on our region’s daily temperature fluctuations and seasonal light patterns. During spring and fall, we target the 10 AM to 4 PM window when temperatures stabilize between 60-75°F, while summer projects demand early morning (6-10 AM) or evening (6-8 PM) applications to avoid the 85°F+ midday heat that compromises adhesion.
Winter interior work offers flexibility with controlled conditions, but exterior applications remain completely off-limits once we’re consistently below 50°F—typically November through March in our area.
Best Hours by Season
Idaho’s distinct seasonal shifts create four separate painting calendars, each requiring tactical adjustments to application windows. We’ve mapped strategic timing windows that align with Twin Falls’ seasonal temperature variations to maximize adhesion and durability.
Optimal Daily Hours by Season:
- Spring (April–June): We target mornings through early afternoons on dry forecast days, completing smaller projects between storm intervals while monitoring 7–10 day predictions.
- Summer (July–August): Early mornings before 10 AM and evenings after 5 PM prevent heat-related flash drying. We work sun-facing elevations first, shifting to shaded sides as temperatures peak around 3 PM.
- Fall (September–October): Morning-to-afternoon sessions leverage stable 60–80°F temperatures before daylight shortens and overnight lows drop below 50°F, ensuring proper cure conditions.
Winter months eliminate exterior work entirely, reserving November through March for interior applications only.
Managing Temperature and Light
Because surface temperatures govern paint adhesion more directly than ambient air readings, we measure both variables before commencing any exterior application. We use infrared thermometers to verify surfaces maintain 50°F minimum thresholds, accounting for radiant heat impact from direct sunlight that creates false temperature readings.
Twin Falls’ intense afternoon sun can push surface temps 15-20 degrees above air temperature, causing premature skinning and blistering.
Our paint preservation methods include strategic scheduling around light exposure patterns. We tackle sun-facing walls during morning hours when radiant heat remains manageable, reserving shaded sections for afternoon work. This approach prevents rapid evaporation that compromises bonding integrity.
Evening applications extend drying times naturally, while frost monitoring protects overnight curing cycles. By dividing projects into temperature-appropriate segments, we maintain consistent adhesion quality across all elevations.
Essential Surface Preparation Steps
Before we apply any primer or topcoat, we’ll need to establish ideal surface conditions through systematic preparation protocols.
First, we’ll verify ambient and substrate temperatures meet manufacturer specifications—typically 50°F minimum for latex systems—using an infrared thermometer to scan the siding. Once thermal parameters are confirmed, we’ll execute a thorough cleaning sequence to remove all loose dirt, organic growth, and chalking that would compromise mechanical adhesion.
Cleaning and Debris Removal
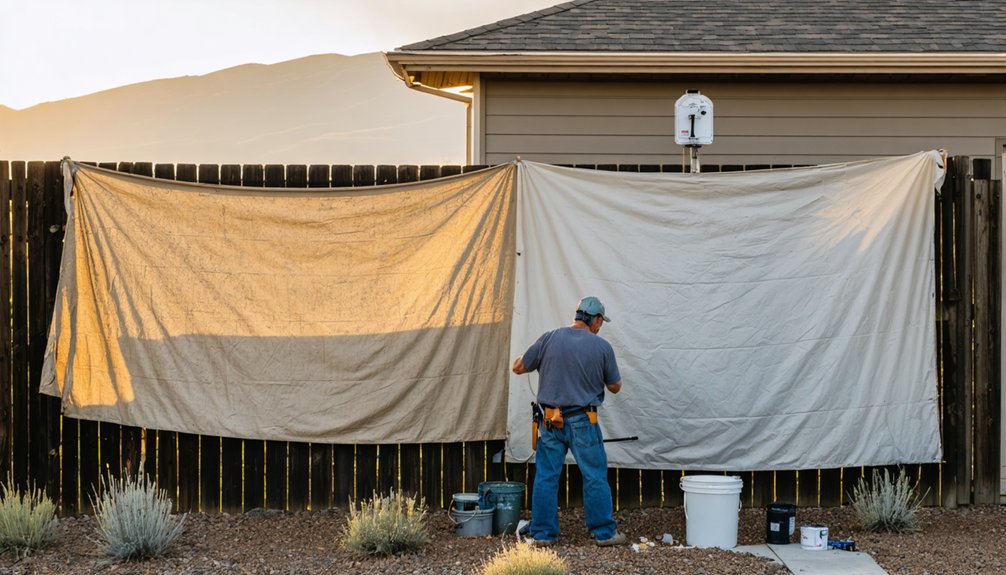
When tackling surface preparation in Twin Falls, proper cleaning stands as the non-negotiable foundation for paint adhesion and longevity. We’ll guide you through the essential techniques that professional painters rely on.
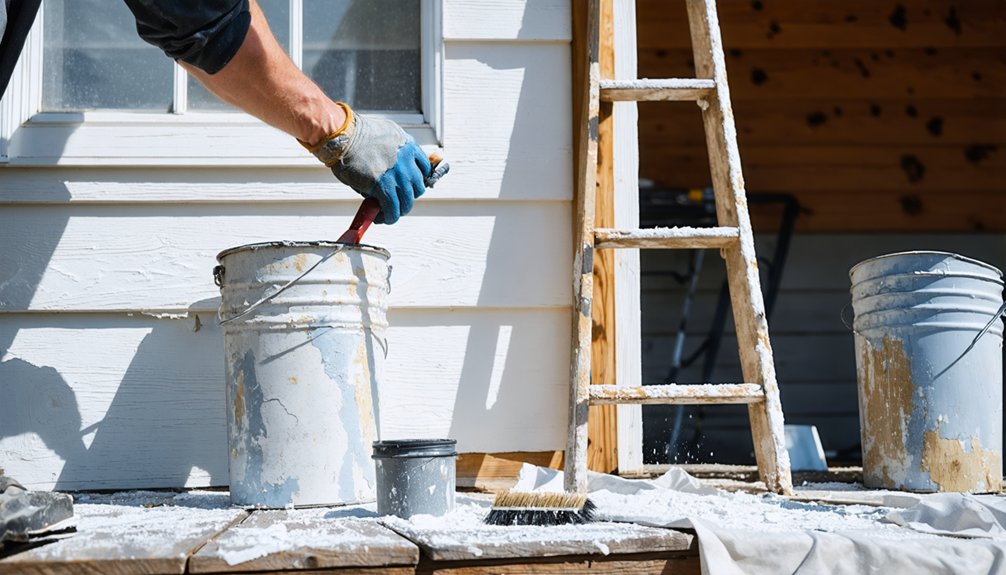
Power Washing Protocol:
- Set water pressure calibration between 1,500-2,500 PSI depending on substrate
- Maintain 12-18 inch standoff distance to prevent surface etching
- Work top-to-bottom to eliminate streaking patterns
Before power washing, we recommend implementing proper masking techniques to protect windows, fixtures, and landscaping. For stubborn contaminants like mold, apply a 1:3 bleach-water solution with stiff-bristled brushes, concentrating on north-facing walls. After washing, allow 24-48 hours for complete moisture evaporation. Remove all sanding dust with tack cloths, and treat oil residue with TSP or commercial degreasers. Starting with clean, dry surfaces guarantees maximum coating performance.
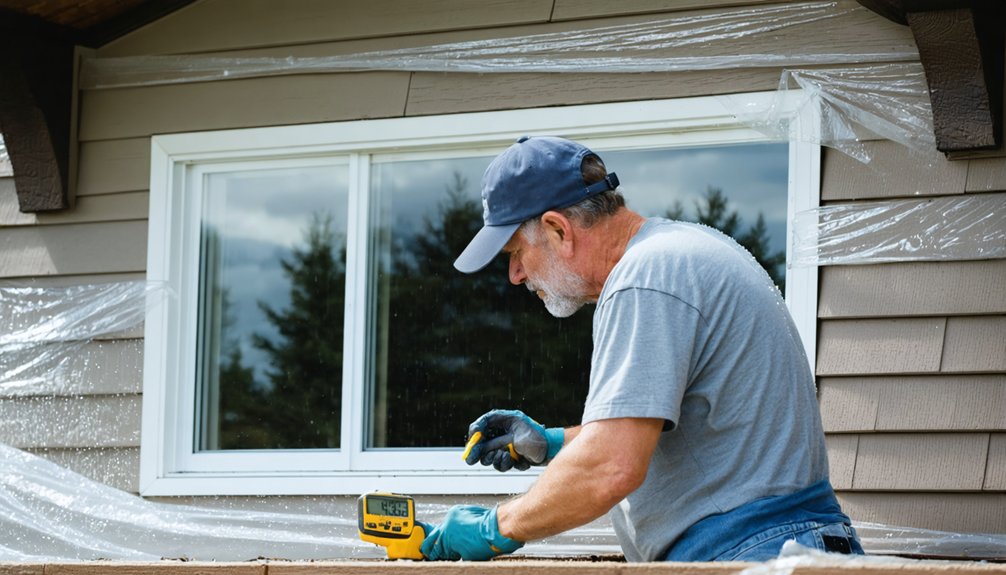
Temperature and Surface Testing
After establishing a contaminant-free surface, we must verify environmental conditions meet manufacturer specifications before applying any coating system. We’ll measure ambient and surface temperatures using proven contact thermometer usage, ensuring readings stabilize for at least two minutes. For non-contact assessment, infrared sensor accuracy provides rapid surface temperature data without physical attachment.
We’re particularly focused on maintaining surface temperatures between 40°F and 100°F while staying at least 5°F above the dew point—critical for preventing condensation-related failures like blistering and pinholing. Using a sling psychrometer, we’ll take successive wet and dry bulb readings until measurements stabilize within 0.5°F. This systematic approach protects our coating investment by confirming ideal conditions exist before application begins, preventing adhesion failures and premature coating degradation.
Monitoring Overnight Temperatures for Proper Curing
Successful exterior painting demands precise temperature monitoring throughout the entire curing period, not just during application. We’ve found that substrate temperature monitoring proves more critical than ambient air readings, since surface temps lag behind atmospheric conditions. Twin Falls’ 3,700-foot elevation creates intense UV exposure during daytime followed by rapid nighttime cooling, generating significant temperature swings that challenge paint adhesion.
Our evening application timing strategy maximizes curing success:
- Check 36-hour forecasts guaranteeing overnight lows remain above 50°F for latex, 45°F for oil-based formulations
- Measure actual surface temperatures with infrared thermometers before application begins
- Schedule applications during late spring through early fall when temperature consistency prevents volatile fluctuations
We’ll never compromise on these monitoring protocols—proper curing protects your investment and secures long-lasting results.
Protecting Your Paint Job From Rain and Moisture
We’ll need to monitor extended weather forecasts for at least 48-72 hours post-application to guarantee adequate curing time without precipitation interference.
Maintaining substrate moisture levels between 12-15% before paint application prevents adhesion failure and premature degradation.
Following manufacturer-specified drying intervals between coats—typically 4-6 hours for latex and 16-24 hours for oil-based formulations—creates proper film formation that resists moisture penetration and environmental damage.
Check Extended Weather Forecasts
Why risk compromising your entire paint investment when a thorough forecast review can prevent moisture-related failures? We recommend checking for latest precipitation updates through multiple reliable sources before scheduling any exterior work.
In Twin Falls, monitoring weather trends over time reveals critical patterns—July and August deliver ideal conditions with minimal rainfall and 81% clear skies, while spring and autumn months present elevated moisture risks.
Our professional forecast protocol includes:
- Reviewing 7-10 day extended forecasts from NWS and AccuWeather for hourly precipitation percentages
- Cross-referencing multiple meteorological sources to verify consistency in predictions
- Avoiding application when forecasts indicate 30% or higher precipitation probability within 48 hours
Understanding Twin Falls’ seasonal patterns—particularly the June 14 to October 15 dry period—enables strategic project timing that maximizes adhesion and cure rates.
Ideal Moisture Level Guidelines
While temperature receives considerable attention in paint application planning, moisture levels ultimately determine whether your coating achieves proper adhesion and long-term durability. We recommend maintaining indoor humidity between 40-70%, with 40-50% delivering ideal drying times.
For exterior projects, guarantee the dew point remains at least 10°F below surface temperature—if your substrate measures 70°F, dew point shouldn’t exceed 60°F.
Proper moisture measurement requires professional-grade meters, particularly for wood surfaces. We’ll verify moisture content stays below 16% before applying any primers or paints. Surface readings at or above this threshold ensure peeling failures.
When humidity exceeds 70%, we’ll deploy dehumidifiers and enhance ventilation. These moisture management protocols prevent tackiness, blistering, and the adhesion failures that compromise your investment in quality finishes.
Drying Time Between Coats
Each paint layer undergoes distinct chemical and physical transformations that dictate when subsequent coats can be safely applied. Understanding paint cure time guarantees we achieve professional-grade results without compromising adhesion or finish quality.
Drying Time Considerations by Paint Type:
- Water-based latex formulations require 2-4 hours between coats, though fast-dry variants allow recoating in 1 hour under ideal conditions
- Oil-based and enamel paints demand 6-8 hours minimum, with complete curing approaching 24 hours before reapplication
- Temperature-dependent factors greatly impact timelines—maintain above 50°F for latex and 45°F for oil-based products
Premature recoating causes roller pull, flaking, and uneven finishes. In Twin Falls’s variable climate, we’ll monitor evening dew formation during spring and fall applications, as moisture presents equivalent risks to light rain on uncured surfaces.
Avoiding Common Mistakes in Extreme Weather Conditions
Extreme weather conditions in Twin Falls directly compromise paint adhesion, cure rates, and long-term durability when contractors ignore environmental thresholds. We’ve observed that painting during 40-50% rain probability Saturdays causes moisture entrapment and peeling within months.
When winds exceed 15 mph—common with our 25-35 mph gusts—debris embeds into wet coatings, necessitating costly rework. Overnight lows of 26-34°F prevent proper curing below the 50°F minimum, while our 78-79°F midday highs accelerate solvent evaporation, creating lap marks.
We must monitor dew point spreads within 5°F and maintain 40-60% RH for ideal application timeframes. Understanding these seasonal painting duration considerations allows us to schedule work during stable atmospheric windows, ensuring professional-grade finishes that withstand Idaho’s variable climate year-round.
Frequently Asked Questions
How Long Should I Wait Between Applying Multiple Coats of Exterior Paint?
We recommend waiting 4-6 hours between latex coats and 24 hours for oil-based paints. However, paint drying time varies with temperature considerations—we’ll assess your home’s conditions to optimize adhesion and guarantee professional-grade results for lasting durability.
What Type of Paint Finish Works Best for Twin Falls Weather Conditions?
We recommend satin or semi-gloss finishes for Twin Falls exteriors. These formulations provide superior paint durability against your region’s temperature fluctuations, from 95°F summers to 20°F winters, while resisting UV degradation and moisture intrusion effectively.
Can I Paint Over Old Peeling Paint or Must I Remove It?
We must remove peeling paint before applying new coats. Proper paint surface preparation—scraping loose areas, sanding, and cleaning—creates stable adhesion. We’ll then complete paint primer application to guarantee your finish lasts through Twin Falls’ demanding climate conditions.
How Do I Protect Landscaping and Windows During the Painting Process?
We’ll protect your landscaping by using drop cloths and plastic sheeting over plants, while we cover outdoor furniture and shield exterior lighting fixtures with painter’s tape and protective wrapping to prevent overspray contamination.
Should I Hire Professionals or Paint My Twin Falls Home Myself?
Picture paint-spattered drop cloths and uneven roller marks—we recommend evaluating your DIY skills required honestly before committing. While cost saving benefits reach 40-60%, professional-grade surface prep, proper spray technique, and flawless trim work demand experience.