We’ve found that successful exterior painting in Rupert starts with pressure washing at substrate-specific PSI levels (2,500-3,000 for vinyl, 1,200-1,500 for stucco), followed by scraping loose paint with carbide tools and 50-60 grit sanding. You’ll need to repair cracks with flexible fillers, apply weather-appropriate caulk to all joints, and guarantee surfaces are completely dry before priming. We recommend scheduling work during late spring or early fall when temperatures stay between 60-85°F. Our thorough guide below covers the critical preparation techniques that determine your paint job’s longevity.
Key Takeaways
- Schedule painting during late spring or early fall when temperatures stay between 60-85°F and Rupert’s humidity remains ideal.
- Pressure wash surfaces at appropriate PSI levels, treat mildew with bleach solution, and ensure complete dryness before painting.
- Scrape loose paint with proper tools, sand with 50-60 grit paper, and use chemical strippers for stubborn areas.
- Repair cracks with flexible filler, seal gaps with climate-appropriate caulk, and address all moisture sources before coating.
- Apply primer to prepared surfaces, use premium exterior paint, and allow proper drying time between coats.
Timing Your Exterior Painting Project in Rupert’s Climate
Planning out your exterior painting project in Rupert requires careful attention to the region’s high desert climate patterns. We’ve found that ideal painting conditions occur during late spring (April-June) and early fall (September-October) when suitable ambient temperature ranges between 60-85°F consistently.
Summer months from July through August provide optimal conditions for larger-scale projects, with average highs reaching 73-82°F and minimal precipitation of just 9.78 inches annually.
Temperature stability is critical—we must maintain minimum 50°F during application and avoid dropping below 35°F for 36 hours post-application to guarantee proper curing. Winter’s freezing temperatures and snowfall make painting inadvisable.
The region’s 52.2% average humidity falls within our target 40-70% range, preventing moisture-related adhesion issues while supporting appropriate cure rates.
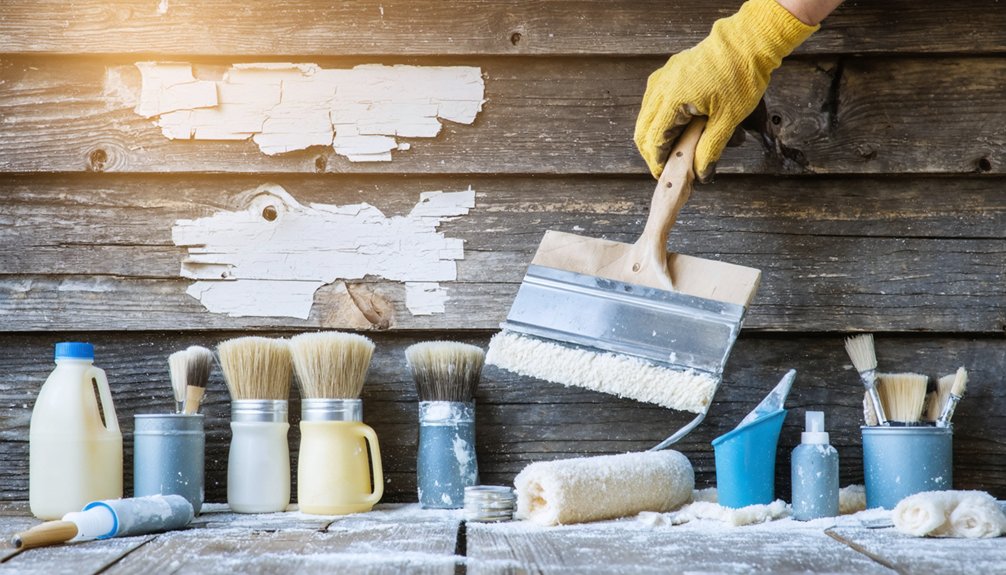
Thoroughly Cleaning Your Home’s Exterior Surfaces
Before we apply any paint to your Rupert home’s exterior, we must execute a thorough surface preparation protocol that removes all contaminants, organic growth, and loose material. We’ll employ pressure washing techniques calibrated to each substrate—using low-pressure soft washing for siding and elevated PSI for concrete—while implementing proven mildew and mold removal solutions that include bleach-based mixtures for vinyl and vinegar compounds for wood.
Critical to paint adhesion is observing proper drying intervals of 24-48 hours post-cleaning, allowing moisture levels in substrates to reach acceptable thresholds before primer application.
Pressure Washing Techniques
Effective pressure washing requires matching PSI settings to your home’s specific exterior materials to prevent surface damage while achieving ideal cleanliness. We’ll use 2,500-3,000 PSI for vinyl siding, while aluminum and stucco demand only 1,200-1,500 PSI. Brick surfaces need 1,500-2,000 PSI with a 25-degree spray tip.
Maximizing cleaning efficiency starts with proper technique. We maintain 6-12 inches between nozzle and surface, employing side-to-side sweeping motions from top downward. For painted surfaces, we use a 40-degree tip; unpainted brick requires a 25-degree tip.
Avoiding potential surface damage means keeping our wand 6 feet from electrical wires and spraying at downward angles to prevent water infiltration under siding. We’ll work in small sections, applying detergent bottom-up, then rinsing thoroughly top-down to remove all residues.
Mildew and Mold Removal
After pressure washing removes surface dirt, we often discover mildew and mold colonies that require targeted treatment before painting can begin. Our mold mitigation efforts start with proper safety protocols—we’ll need waterproof gloves, masks, and eye protection during application.
For effective spore containment strategies, we work outdoors in well-ventilated areas and dampen surrounding vegetation before treatment.
We’ve found success with natural solutions: applying undiluted white vinegar on non-porous surfaces or creating a 3:1 baking soda paste for stubborn growth. For severe cases, we use a 1:10 bleach-to-water mixture, allowing 10-20 minutes dwell time before scrubbing with stiff-bristle brushes. After treatment, we rinse thoroughly and verify complete removal.
For wood substrates, we’ll sand persistent stains before applying fresh sealant.
Proper Drying Time
Once we’ve eliminated mold and mildew, we’ll need to guarantee all exterior surfaces reach complete dryness before applying primer or paint. Rupert’s average humidity of 52.2% falls within ideal humidity levels for professional results, but we must monitor conditions carefully.
We should verify these critical parameters before starting:
- Ideal temperature ranges between 50-85°F throughout application and initial curing periods
- Minimum 48-hour weather window without precipitation or extreme temperature fluctuations
- Surface moisture assessment using touch tests to confirm complete evaporation
Latex paints reach touch-dry status within 1-3 hours under proper conditions, while oil-based formulations require 6-8 hours. Remember, touch-dry doesn’t mean fully cured—we’re building lasting protection that demands patience and adherence to manufacturer specifications for our community’s homes.
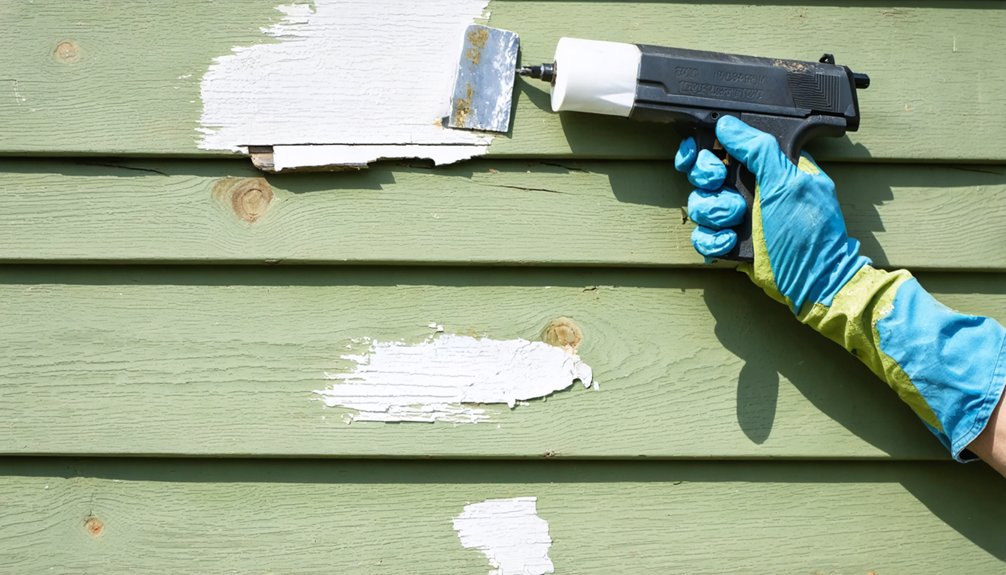
Scraping Away Loose and Peeling Paint
Before applying any primer or paint, proper surface preparation through scraping determines the longevity of your exterior coating system. We’ll need a 5-in-1 carpenter’s tool for primary work and a carbide scraper for stubborn areas. Apply firm pressure with the grain, then lightly against it, making multiple passes from different angles.
Common scraping mistakes include digging into wood and removing adhered paint—we only remove non-bonding material. For Rupert homes built before 1978, we must use lead testing kits before starting.
Expect 4-8 hours for typical projects with 10-20% loose paint. Follow scraping with 50-60 grit sanding for uniform surfaces. When necessary, chemical stripper usage addresses persistent problem areas, though proper dwell time and ventilation are essential for safe application.
Repairing Damage and Sealing With Caulk
After we’ve removed loose paint, we’ll systematically inspect all surfaces for cracks, gaps, and water damage that could compromise your paint job’s longevity.
We’ll address moisture sources first—damaged flashing, deteriorated weatherstripping, or failing joint seals—since painting over active water infiltration leads to premature coating failure.
Then we’ll apply the appropriate caulk type using proper surface preparation and application techniques to create durable, paintable seals around trim, windows, and structural gaps.
Inspect and Fix Cracks
Proper crack inspection begins with a thorough cleaning process that removes all loose debris, paint chips, and dirt using a stiff-bristle brush or shop vacuum. We’ll focus on evaluating crack types—vertical or diagonal settlement cracks in newer structures signal shifting soil beneath your foundation. Wider, deeper damage warrants professional foundation examination before painting proceeds.
Our systematic approach includes:
- Surface preparation: Remove old sealant with a putty knife and vacuum dust from crack edges
- Moisture management: Guarantee surfaces are completely dry to touch for optimal sealant bonding
- Repair selection: Apply flexible wall filler to hairline cracks; use epoxy injection for structural concrete damage
We’ll mask surrounding areas with painter’s tape, apply appropriate filler compounds, and tool sealant beads immediately for flush finishes that cure properly.
Proper Caulking Application Techniques
Once cracks and surface defects receive proper repairs, we’ll execute caulking application with systematic precision to create weathertight seals that protect your Rupert home’s exterior envelope. We’ll cut the tube tip at a 45-degree angle, starting small and adjusting for gap width while maintaining steady trigger pressure for continuous beads. Working in 2-3 foot sections prevents skinning before tooling. We’ll press caulk deep into joints, creating airtight barriers against water intrusion and energy loss.
Application effectiveness demands immediate smoothing with even pressure using professional tools. We’ll monitor curing conditions carefully—temperatures above 50°F and low humidity facilitate proper adhesion. For Rupert’s climate variations, we’ll select hybrid or polyurethane formulations that withstand thermal cycling. Proper execution reduces your heating costs by 10-20% annually.
Address Water Damage Sources
Before applying primer and paint, we’ll systematically identify and eliminate water damage sources threatening your Rupert home’s structural integrity and finish quality.
Identifying moisture sources begins with thorough inspection of vulnerable areas where Idaho’s seasonal conditions cause problems:
- Roof and plumbing leaks creating visible stains, dampness, or color changes on ceilings and walls
- Poor ventilation in bathrooms and kitchens allowing condensation buildup and mold growth
- Faulty gutters and rising damp permitting water infiltration into foundations and exterior walls
We’ll repair active leaks immediately before any surface preparation begins. Ensuring complete drying requires moisture meters confirming readiness—never paint damp surfaces. We’ll deploy fans, dehumidifiers, and extended drying periods matching Rupert’s humidity levels. This prevents paint failure, blistering, and the mold development that occurs within 24 hours on wet materials.
Applying Primer for Long-Lasting Results
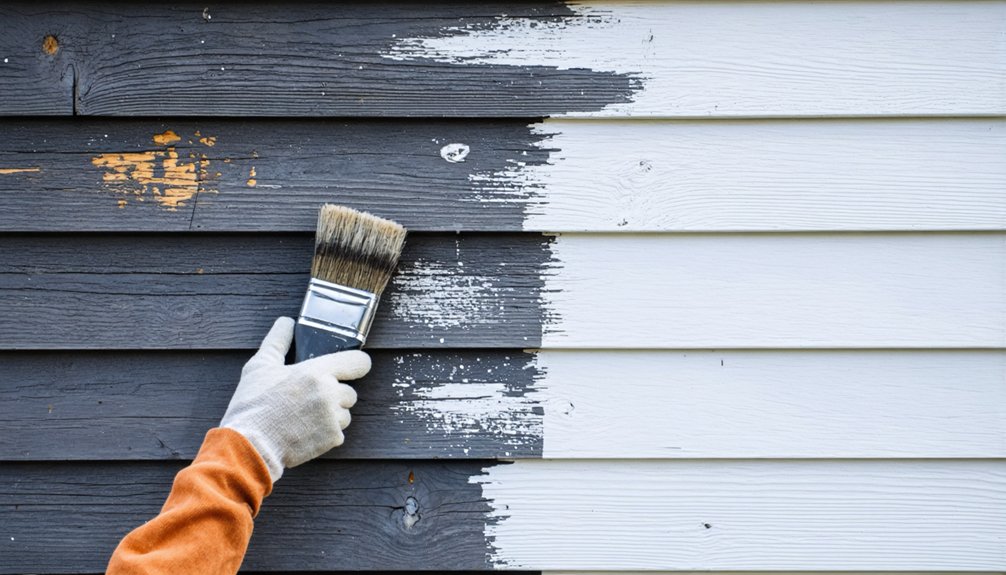
When primer serves as the foundation between your prepared surface and topcoat, it determines whether your paint job lasts two years or twenty. We select primers based on substrate composition—shellac-based formulations for stain blocking, adhesion primers for glossy surfaces, and pore-filling variants for bare wood and drywall.
Primer selection based on substrate composition—shellac, adhesion, or pore-filling formulations—determines whether your paint job endures two years or twenty.
Proper primer application requires consistent mil thickness across the entire surface. We apply primer using cross-hatching techniques on porous substrates to guarantee complete penetration and seal wood knots that bleed through standard topcoats.
For dramatic color shifts, we tint our primer to match the final shade, reducing topcoat requirements from three layers to one.
The sealed foundation prevents moisture infiltration, blocks previous stains from telegraphing through, and creates the mechanical bond necessary for paint adhesion under Rupert’s temperature fluctuations.
Protecting Landscaping and Outdoor Features
Professional exterior painting requires thorough protection protocols that extend beyond the structure itself to safeguard the surrounding landscape. We’ll implement all-encompassing coverage strategies that shield your vegetation and hardscapes from paint contamination while maintaining plant health throughout the project.
Our protection protocol includes:
- Vegetation Coverage: We cover plants, trees, and delicate features with breathable tarps, removing them daily to guarantee proper sunlight and air circulation for your Idaho landscape.
- Hardscape Masking: We mask walkways, driveways, and patios with secured plastic sheeting, preventing paint drips from reaching concrete or stone surfaces.
- Equipment Protection: We protect gravel paths with plywood when securing heavy equipment, while continuously monitoring overspray impacts on edible gardens and outdoor features.
We’ll coordinate animal safety measures and implement lead-safe practices for pre-1978 homes, ensuring complete environmental protection.
Sanding Surfaces for Optimal Paint Adhesion
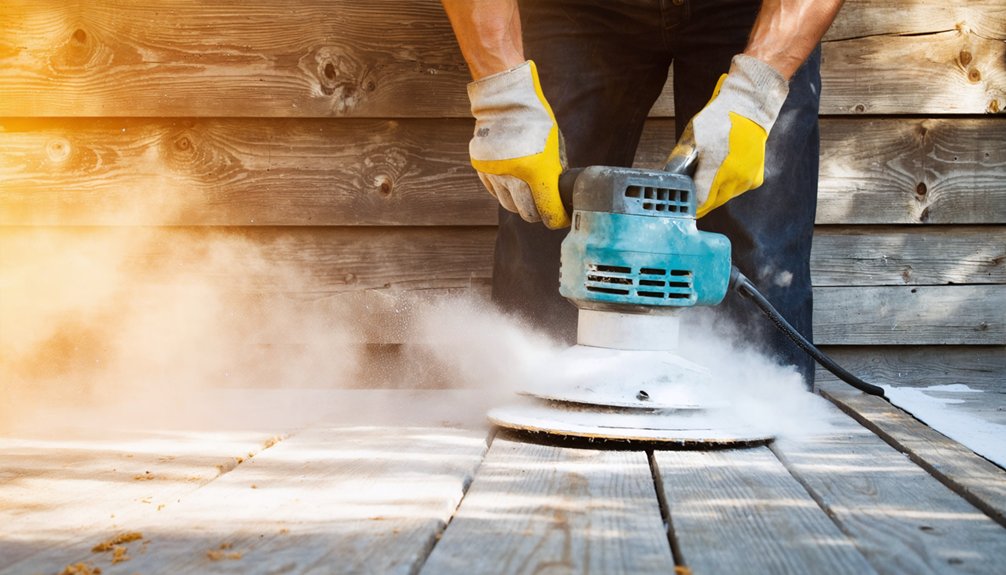
With your landscaping and outdoor features properly protected, we turn our attention to the surface preparation that determines paint longevity. We’ll create microscopic texture through proper sanding paper selection—starting with 150-grit for aggressive removal, progressing to 220-grit for standard prep, and finishing with 320-grit between coats.
On wood surfaces, we sand with the grain using progressive grits to open pores. Metal requires abrasive pads to eliminate rust and gloss. For previously painted surfaces, we scuff high-gloss finishes to guarantee mechanical bonding without deep scratching.
Dust removal is critical—we use tack cloths after sanding to prevent adhesion failures. Skipping this step invites peeling and chipping. We avoid over-sanding that creates excessive smoothness, maintaining ideal surface texture for paint grip.
Selecting the Right Paint and Primer Products
Idaho’s extreme climate demands strategic product selection that addresses UV degradation, freeze-thaw cycling, and moisture volatility. We’ll guide you through professional-grade options that withstand Rupert’s environmental challenges.
Our recommended primer-paint combinations:
- Peel Stop Triple Thick + Benjamin Moore Aura — High-resin primer bonds weathered surfaces while Aura’s self-priming, UV-resistant formula provides lifetime protection with superior paint coverage calculation efficiency
- Zinsser B-I-N + Sherwin-Williams Duration — Shellac-based adhesion beneath flexible, fade-resistant topcoat handles temperature extremes from -20°F to 100°F
- PrimeRX + Emerald — Locks compromised substrates under premium acrylic latex with mildew resistance
We prioritize 100% acrylic latex formulations for maximum flexibility during freeze-thaw cycles. Paint finish selection matters—lighter, satin sheens reflect UV radiation while maintaining cleanability. Premium products designed for Northwestern conditions deliver measurable ROI through extended service life.
Choosing the Best Application Tools and Techniques
Quality application tools directly determine finish durability and coverage efficiency—substandard equipment wastes premium paint and compromises surface adhesion. We’ll need synthetic bristle brushes for water-based paints, while natural bristles deliver superior finishes with oil-based products. For trim work, 2½-inch angled sash brushes cut in precisely around tight spaces.
Proper paint roller techniques start with dampening the 9-inch nap before loading—this reduces absorption and minimizes waste. We recommend using roller screens or grids for even paint distribution. Brush maintenance requires immediate cleaning with appropriate solvents to preserve bristle integrity.
Essential preparation tools include 180-320 grit sandpaper, flexible putty knives, and painter’s tape that removes cleanly without surface damage. We’ll protect our workspace with drop cloths meeting OSHA standards, and secure paint buckets using swivel pail hooks on ladders.
Frequently Asked Questions
How Long Should I Wait Between Primer and Paint Coats?
We’ll wait 1-3 hours for water-based primers before applying paint. Paint application timing depends on your primer type—shellac needs just 45 minutes, while oil-based requires up to 24 hours. Paint drying duration varies with temperature and humidity conditions.
What Permits or Permissions Are Required for Exterior Painting in Rupert?
We don’t need building permits for exterior painting in Rupert, as it’s exempt from county requirements. However, we should verify homeowner association guidelines and local city ordinances. Lead-paint work on pre-1978 homes requires EPA RRP certification.
How Do I Match Existing Paint Colors Accurately?
We’ll sample paint chips from inconspicuous areas, compare color swatches under various lighting conditions, and utilize spectrophotometer technology at local hardware stores. This process guarantees precise matching, accounting for UV fade and environmental factors affecting your home’s existing finish.
Should I Hire Professional Painters or Complete the Project Myself?
We’ll recommend hiring professionals for superior longevity and finish quality. DIY painting challenges include equipment costs, time investment, and technique mastery, while hiring professional advantages deliver warranted results, proper surface preparation, and code-compliant application methods that protect your investment.
What Is the Average Cost of Exterior Painting in Rupert?
Let’s paint a clear picture: we’re looking at $2,900-$4,000 for your Rupert exterior project. Average paint quality and typical painting timeline directly impact costs, but together we’ll guarantee proper surface prep and safety protocols deliver lasting results.