We prepare Kimberly homes for paint by power washing at appropriate PSI levels, scraping damaged areas with carbide tools, and sanding progressively from 1000 to 2000 grit. We apply peel bond primer at 5-10 mils wet film thickness on bare wood, seal all gaps with exterior-grade caulk using consistent 3/16-inch beads, and verify moisture content stays below 15% before topcoating. Our process accounts for Idaho’s temperature swings and UV exposure, and we’ll walk you through each critical step below.
Key Takeaways
- Power wash exterior surfaces with appropriate PSI equipment and apply compatible detergent to create a clean foundation for paint.
- Scrape peeling paint with carbide tools, then sand progressively from 1000 to 2000 grit for optimal adhesion.
- Apply water-based peel bond primer at 5-30 mils wet film thickness after verifying wood moisture is below 15%.
- Seal all gaps and joints with exterior-grade caulk using consistent 3/16-inch beads, tooling immediately for proper adhesion.
- Remove and label hardware, mask fixtures, and protect landscaping with drop cloths before beginning paint preparation work.
Power Washing Your Home’s Exterior Surfaces
Before applying paint to your Kimberly home’s exterior, you’ll need to remove accumulated dirt, mildew, and chalky residue that compromise adhesion. We’ll start by selecting equipment with appropriate PSI ratings—lower pressure for painted siding, higher for driveway cleaning. Specialized nozzles enable safe roof soft washing without damaging shingles.
Our process begins with surface assessment, identifying rot, cracks, or loose panels requiring repair. We’ll patch compromised areas and allow proper curing time. Protection measures include covering landscaping with breathable tarps and shielding electrical fixtures.
Working top-down in manageable sections, we’ll apply compatible detergent to saturated surfaces, then rinse downward. This systematic approach guarantees paint adhesion across all exterior substrates—siding, trim, decks, and walkways—creating the clean foundation your home deserves.
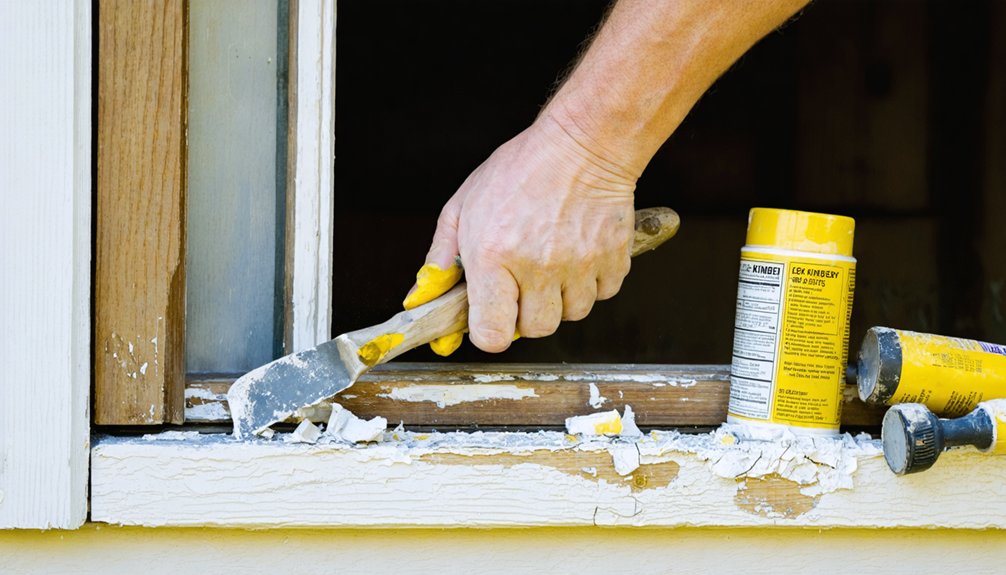
Scraping and Sanding Away Damaged Paint
Once power washing removes surface contaminants, we’ll address compromised paint layers through systematic scraping and sanding. We’ll protect your property by covering ground areas beneath work zones to collect paint debris efficiently.
Our preparation protocol includes:
- Surface Assessment – We’ll identify peeling sections and check for rot, moisture damage, or soft wood requiring immediate attention
- Strategic Scraping – Using carbide scrapers along wood grain on flat surfaces and 5-in-1 tools for edges, we’ll remove loose paint without gouging
- Progressive Sanding – We’ll employ wire brushes and graduated grits (1000 to 2000) for defect removal while avoiding overaggressive sanding
- Condition Monitoring – Throughout the process, we’re monitoring wood condition to verify structural integrity before repainting
This methodical approach guarantees reliable paint adhesion for your Kimberly home.
Applying Peel Bond Primer to Bare Wood Areas
After completing scraping and sanding operations, we’ll apply peel bond primer to all exposed wood substrates to establish a high-performance foundation for topcoat adhesion. This water-based bonding primer engineered for filling surface voids requires no thinning—we’ll use it straight from the container. We’ll apply using synthetic brushes, rollers, or airless sprayers at temperatures between 40°F and 90°F.
For standard sealing, we’ll maintain 5-10 mils wet film thickness. When filling imperfections, we’ll build up to 30 mils wet through multiple coats, achieving suitable film thickness for ideal surface leveling. The primer applies milky white and dries to hazy clear, signaling readiness for recoating. We’ll guarantee wood moisture content stays below 15% and wait minimum two hours before topcoating with latex or alkyd paints.
Sealing Gaps and Joints With Proper Caulking Techniques
We’ll seal all gaps and joints between dissimilar materials using appropriate exterior-grade caulking compounds to prevent moisture infiltration and guarantee long-term paint performance. Proper joint preparation starts with cleaning surfaces thoroughly and placing backer rods in wider gaps before application.
We achieve consistent caulk application through these proven methods:
- Load the caulk gun with exterior acrylic latex or polyurethane caulk, cutting the tip at a 45-degree angle to create a 3/16-inch opening for controlled flow.
- Apply painter’s tape along joints to confine beads and maintain quarter-inch width specifications.
- Press the nozzle into each joint while maintaining steady trigger pressure, working top-to-bottom at consistent speed.
- Tool immediately using a wet finger or spatula to press caulk deep into joints before removing tape.
Preparing Hardware, Lights, and Landscaping
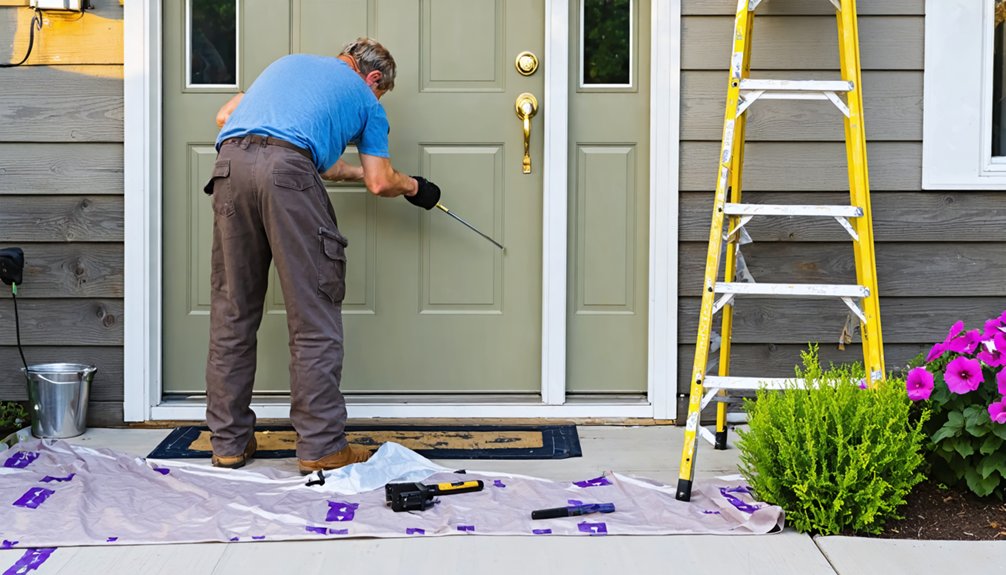
Before paint application begins, we systematically prepare all exterior hardware, lighting fixtures, and landscaping elements to protect property assets and guarantee unobstructed access to painting surfaces. We’ll remove downspouts, address numbers, and light fixtures, placing them in labeled baggies for streamlined fixture reinstallation. Working around electrical components requires protective covers over outlets and exposed wiring.
We scuff-sand glossy metal surfaces to enhance adhesion while masking door frames and trim with precision tape lines.
Your landscaping receives canvas drop cloth protection—we avoid plastic sheeting that suffocates vegetation. We’ll establish temporary walkways to prevent lawn damage and shield irrigation systems from paint debris. All windows, gutters, and non-removable fixtures get masked before work begins. This comprehensive preparation protocol guarantees we’re protecting your investment while creating ideal conditions for superior paint application.
Understanding Temperature Requirements for Paint Application
We’ll now address critical temperature thresholds that determine application success for your Kimberly exterior painting project. Standard latex formulations require minimum surface and air temperatures of 50°F, though we can utilize specialized low-temperature products like Duration or Resilience that perform down to 35°F when conditions warrant.
These advanced 100% acrylic latex formulas extend our application window but demand that both surface and ambient temperatures remain above 35°F for 24-36 hours post-application to achieve proper cure.
Minimum Temperature Guidelines
Understanding the precise temperature thresholds for paint application guarantees proper adhesion and long-term durability of your coating system. We’ll guide you through the critical minimums that protect your investment in Kimberly’s variable climate.
Essential Temperature Thresholds:
- Standard coatings: We maintain minimum surface temperatures at 40°F (5°C), though conventional two-component systems require 50°F (10°C)
- Water-based formulations: We necessitate surface, ambient, and material temperatures reach 35°F minimum
- Traditional latex systems: We apply only when temperatures exceed 60°F for proper curing
- Air temperature monitoring and surface temperature variations: We measure both parameters since substrate temperatures often differ dramatically from ambient conditions, particularly on metal surfaces that retain cold
Post-application, we verify overnight temperatures remain above 40°F for several days, preventing adhesion failures and premature coating degradation.
Low-Temperature Paint Formulations
When temperatures drop below conventional application thresholds, we utilize specialized low-temperature paint formulations engineered with modified acrylic polymer chemistry that enables proper film formation in Kimberly’s challenging climate. These advanced binders feature glass shift temperatures between 8-20°C and minimum film formation temperatures below 4°C, allowing coalescence at 35-40°F without traditional coalescing agents.
We incorporate coalescent enhancers like Optifilm 400 to facilitate zero-VOC formulations while maintaining superior performance characteristics. Low temperature cure mechanisms in these systems compensate for reduced water evaporation rates inherent to cold conditions.
The formulations demonstrate excellent scrub resistance and flexibility across wide climatic ranges, ensuring minimum application temperature thresholds extend your painting season. This chemistry-driven approach delivers professional results when standard paints would fail to form continuous, durable films.
Inspecting and Replacing Deteriorated Caulking
After completing the washing phase, we’ll conduct a thorough inspection of all caulked joints to identify deterioration before paint application. This critical step involves examining key areas—including window jambs, door frames, siding intersections, and penetrations—for specific failure indicators such as delamination, cracking, shrinkage, and gaps.
We’ll then execute proper removal protocols and apply fresh caulking using correct techniques to guarantee favorable adhesion and prevent future water intrusion beneath your new paint system.
Checking Caulk After Washing
Once your Kimberly home’s exterior surfaces have dried completely from washing, you’ll need to inspect all caulking around windows, doors, and structural joints for signs of deterioration. We recommend checking caulk integrity by examining each joint methodically, pulling sashes out or fully opening crank windows to access weather stripping and hidden seams.
When ensuring proper caulk adhesion, look for these critical failure indicators:
- Missing sections where caulk has completely separated from substrate
- Peeling areas that lift away when lightly pressed with your finger
- Cracked or crumbling beads in expansion and control joints
- Compromised seals at junctions between dissimilar building materials
Any deteriorated caulking must be removed and replaced before painting to maintain waterproof barriers against water intrusion, air infiltration, and pest entry.
Signs of Caulk Deterioration
We’ll identify critical failure indicators requiring immediate sealant replacement. Look for separation between caulk and substrates—gaps permit water infiltration behind wall systems. Check for brittleness by flexing the material; deteriorated caulk crumbles rather than rebounds.
Inspect south-facing exposures first, where UV degradation accelerates breakdown. Document discoloration patterns indicating mold colonization or moisture control failure. Note texture changes from original installation—hardened beads have lost necessary elasticity.
Peeling edges and visible cracks compromise thermal barriers and structural protection. These conditions demand complete removal and reapplication before primer application to guarantee proper paint adhesion and long-term weather resistance.
Strategic Caulking Application Methods
Before applying fresh caulk, we’ll systematically prepare each joint to guarantee ideal adhesion and longevity. Our proper gap filling techniques begin with scraping peeling paint and cleaning surfaces with denatured alcohol to eliminate debris. We’ll prime exposed wood after surface preparation, making gaps evident while enhancing curing process adherence.
Our Strategic Application Protocol:
- Gap Assessment – Limit caulk to joints ⅛-inch or less; install backer rod for wider gaps
- Material Selection – Choose urethane or hybrid formulations for superior UV resistance and 30-50 year flexibility
- Precise Application – Hold gun at 45-degree angle, cutting nozzle to match gap size
- Professional Finishing – Tool immediately with wet finger, allow multi-day cure before painting
We’ll mask quarter-inch joints with painter’s tape and avoid caulking horizontal siding laps for proper drainage.
Choosing the Right Equipment and Pressure Settings
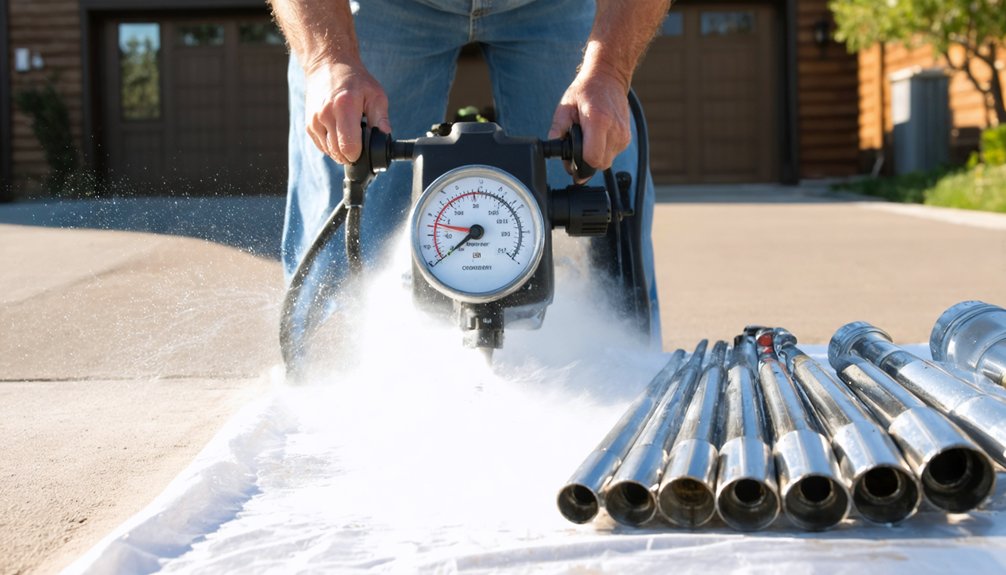
When selecting spray equipment for your Kimberly painting project, understanding the pressure requirements for each gun type determines both application quality and material efficiency. HVLP systems operate at 10-20 PSI at the tip, while conventional guns require 40-50 PSI for comparable results.
We’ll need higher settings for primers (25-30 PSI HVLP, 50-60 PSI conventional) and thick latex paints (30-35 PSI HVLP, 60 PSI conventional). Clear coats demand lower pressure at 10-15 PSI to prevent runs.
We recommend adjusting spray patterns through incremental testing on cardboard, beginning at minimum pressure and increasing gradually. Optimizing airflow settings requires trigger-engaged measurements at the regulator. Set your compressor to 60-90 PSI to maintain consistent delivery pressure.
Poor patterns indicating “railway tracks” signal insufficient atomization pressure requiring immediate adjustment.
Frequently Asked Questions
How Long Does the Entire Exterior Paint Preparation Process Typically Take?
We’ll typically complete your exterior prep in 3-5 days, though weather considerations and home condition affect our paint application timeframe. Larger properties require 5-7 days, ensuring we’re delivering the thorough surface preparation your home deserves.
Can I Paint Over Existing Sound Paint Without Completely Stripping It?
Yes, we can paint over sound existing paint successfully. For instance, we recently coated a well-adhered latex exterior—after proper surface preparation including cleaning and light sanding, paint adhesion proved excellent without stripping, saving you considerable time and cost.
What Color Options Work Best for Trim and Door Repainting?
We’d recommend black or slate blue doors with white trim for maximum contrast and value. Accent color coordination with your siding’s essential, while paint sheen selection—semi-gloss for doors, satin for trim—ensures durability in Idaho’s climate conditions.
Should I Hire Professionals or Can I Complete Preparation Myself?
We’d recommend professionals over DIY painting challenges. Professional painter benefits include proper surface preparation, substrate assessment, and adhesion protocols. You’ll gain warranty protection, optimized drying schedules, and community-backed craftsmanship that guarantees lasting results.
How Do I Prevent Paint From Showing Landscaping Grade Changes?
We’ll fill cracks thoroughly and level uneven surfaces with exterior-grade filler before priming. Using self-leveling primer, we’ll apply multiple thin base coats with cross-hatched strokes, then choose matte finishes that minimize shadows from grade variations.