We’ve found that successful exterior painting in Paul’s high-desert climate starts with pressure washing at appropriate PSI levels for your specific siding material, followed by documenting problem areas like cracks and peeling paint. You’ll need to remove all obstacles, apply proper caulking and tape for clean lines, then sand using 120-grit for initial prep and 500-600 grit for refinement. We match primers to surface conditions—latex for drywall, oil-based for stains, shellac for odors—before applying topcoats using brushes for detail work and sprayers for broad coverage. This guide breaks down each critical step we’ve refined through hundreds of Idaho exterior projects.
Key Takeaways
- Pressure wash exterior surfaces at 25-40 degree angles, maintaining 24 inches from stucco, then allow repairs to dry one week.
- Remove all obstacles including furniture, downspouts, and light fixtures while documenting cracks, peeling paint, and utility line locations.
- Sand with 120-grit to create mechanical tooth for adhesion, progress to 500-600 grit, then remove dust with tack cloth.
- Select appropriate primer: latex for drywall, oil-based for water stains, fungicidal for mold-prone areas, shellac for smoke or urine odors.
- Apply thin first coat to prevent drips, use angled brushes for edges, then roll broad surfaces for uniform coverage.
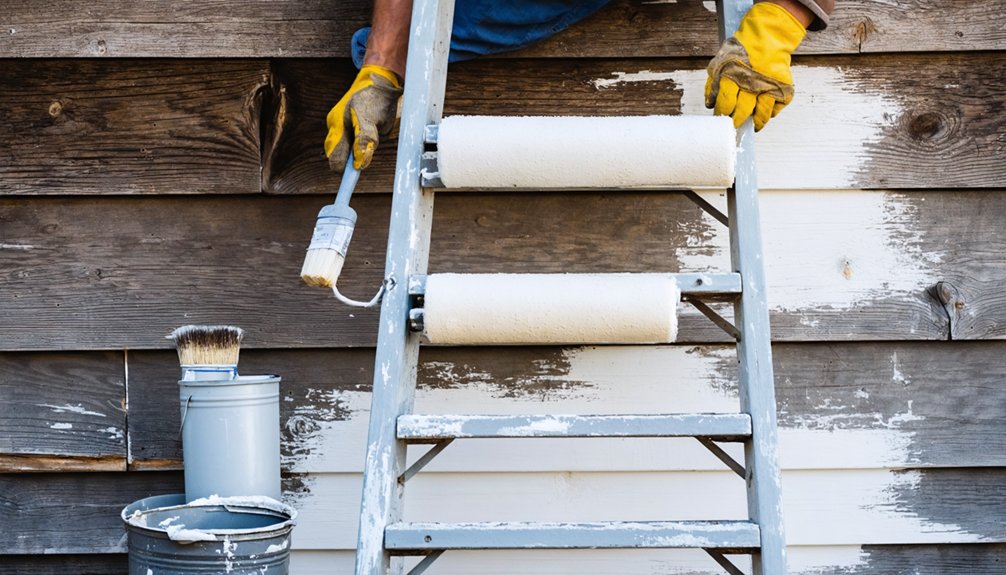
Pressure Washing and Initial Surface Inspection
Selecting the appropriate pressure washer for your Paul, Idaho home begins with understanding PSI requirements for different exterior materials. We’ll need 1,200 to 1,500 PSI for stucco, while brick surfaces handle 1,500 to 2,000 PSI effectively.
Before starting, we must repair damaged siding and patch deteriorated joints, allowing one week for drying. Surface texture protection requires maintaining 25- to 40-degree spray angles, keeping the nozzle at least 24 inches from stucco.
We’ll test inconspicuous areas first, starting with lower pressure settings and adjusting as needed. Proper detergent application technique involves pre-saturating brick surfaces and pre-rinsing siding top-to-bottom with clean water. We’ll secure all connections and wear protective goggles and gloves before operation.
Removing Obstacles and Documenting Problem Areas
Once we’ve completed pressure washing and surface inspection, we’ll systematically clear all obstacles from the work zones to guarantee unobstructioned access to every paintable surface. We’ll remove furniture, detach hose reels, and take down downspouts to prevent unpainted streaks. Light fixtures, shutters, and hardware get unscrewed and labeled for reinstallation.
Cataloging access obstacles involves documenting utility lines, vent locations, and hidden wiring before disturbance. We’ll photograph each fixture’s pre-paint condition for warranty reference.
Detailing surface wear indicators means recording cracks from settling, chalky surfaces affecting adhesion, and peeling paint requiring scraping. We’ll note rust spots on metal fixtures and log areas with lap marks from previous coats. This documentation verifies our prep addresses every imperfection systematically, delivering the professional results your Paul home deserves.
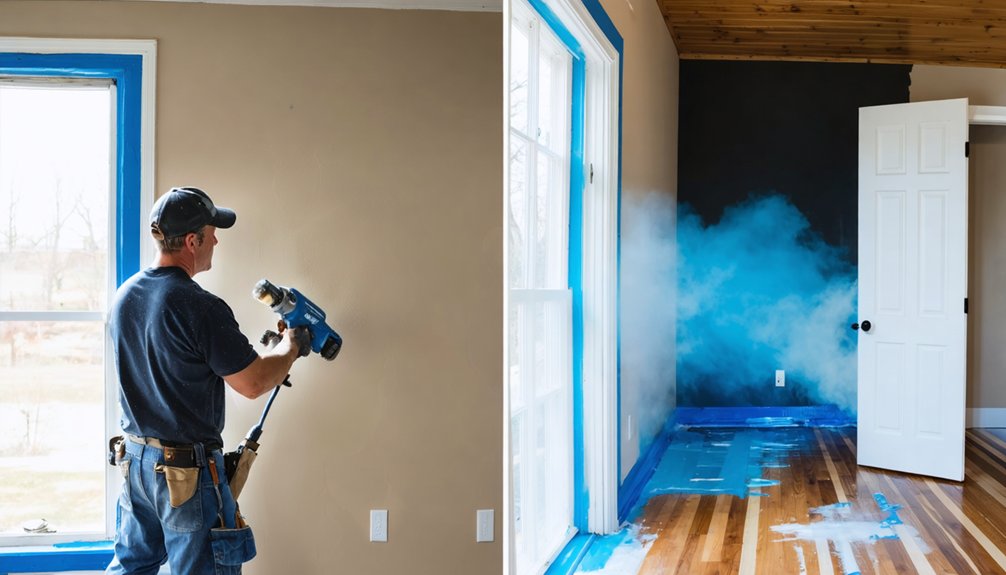
Mastering Caulking and Tape Application for Clean Lines
After documenting surface imperfections and clearing work zones, we’ll establish crisp paint lines through strategic tape and caulk integration. We’re using FrogTape Green for its moisture-activated polymer technology—apply it firmly, then activate edges with a damp rag for laser-sharp edgelock without sheen bleeding.
For sealing smaller gaps, we’ll run clear latex caulk along tape edges; white caulk works better for substantial baseboard gaps due to higher solids content. Smooth immediately with your finger, leaving thin residue across tape and wall.
Here’s our critical sequence: tape, caulk, roll second coat, then brush over the seam with soft filament brushes.
Edge activation techniques demand we pull tape while paint remains wet—this prevents splintering and bridging. Tower Sealants Accelerator guarantees rapid drying, requiring immediate painting post-smoothing for seamless integration.
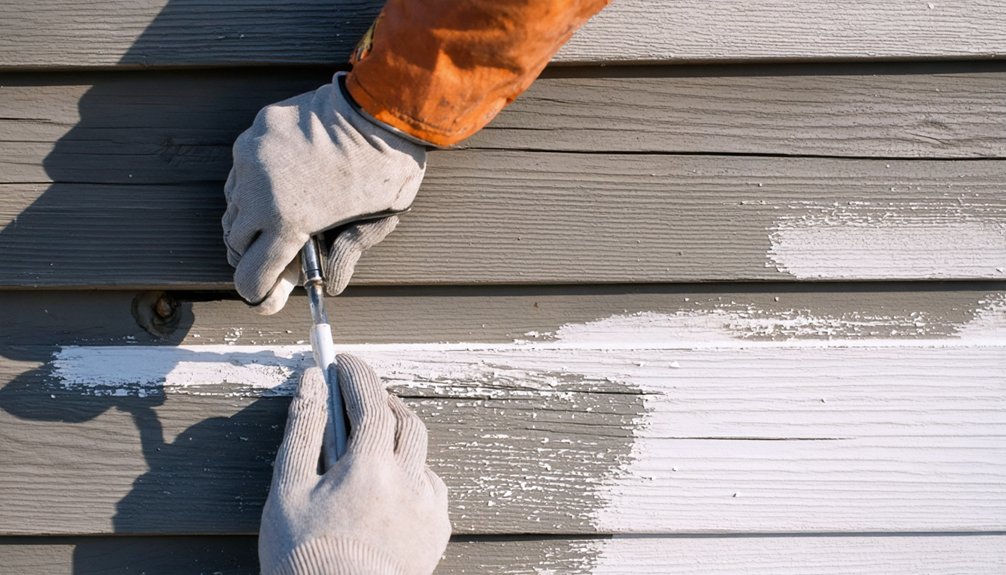
Sanding Techniques for Superior Paint Adhesion
Proper sanding transforms paint adhesion from adequate to exceptional through controlled surface profiling. We’ll begin with 120-grit abrasives to establish a uniform scratch pattern, removing defects and glossy finishes that compromise bonding. Progression to 500-600 grit refines the substrate before topcoating, while maintaining microscopic texture essential for primer adherence.
Our technique demands consistent pressure with even strokes along wood grain, utilizing hand sanders or pole sanders for thorough coverage. We’re creating mechanical tooth—not merely smoothing—to anchor coating systems against delamination and corrosion.
Post-sanding protocols require tack cloth removal of all particulates, ensuring dust free preparation before primer application. We’ll inspect for uniform surface texture and complete dryness. Between coats, light re-sanding with 120-grit maintains interlayer adhesion, delivering professional-grade durability our Paul homeowners expect.
Choosing and Applying the Right Primer
Selecting the ideal primer system requires matching substrate characteristics with coating chemistry to achieve maximum bond strength and stain suppression. We’ll utilize latex primers for drywall applications, ensuring fluid application across large interior expanses.
Oil-based formulations excel at spot-priming water stains, while shellac-based products like B-I-N block smoke, soot, and animal urine odors effectively. For mold-prone fascia and shaded exterior sections, we recommend fungicidal water-based primers that seal chalky siding.
High-resin specialized primers such as Peel Stop Triple Thick address blistering and siding failure by filling, sealing, and bonding thorough surfaces. Application methods vary—spray cans handle spot work efficiently, while airless sprayers deliver consistent coverage on full exterior projects. We’ll match primer selection to specific surface conditions, ensuring extensive substrate preparation before topcoat installation.
Understanding Temperature Requirements for Paul’s Climate
Even the most expertly selected primer won’t cure properly if applied outside manufacturer-specified temperature parameters, making climate analysis a prerequisite for scheduling exterior painting projects in Paul, Idaho.
Temperature compliance during primer application determines project success more than brand selection or surface preparation techniques combined.
We’ll find Paul’s ideal temperature range between late spring and early fall, when daytime highs consistently exceed 50°F and reach into the 77-87°F sweet spot during June through August.
Most premium exterior coatings require minimum application temperatures of 35-50°F, ruling out our harsh winter months when temperatures plummet to the low 20s.
Paul’s low humidity levels and minimal annual precipitation of just 10 inches create perfect evaporation conditions that accelerate curing times.
We’re fortunate that 206 sunny days and only 71 precipitation days annually provide us with extended work windows throughout the growing season.
Hand Brushing Versus Spray Application Methods
When we’re choosing between hand brushing and spray application for our Paul exterior project, we’ll need to weigh each method’s distinct advantages against our specific surface conditions and architectural complexity. Brushing delivers superior paint transfer efficiency, using considerably less material while providing excellent control around trim details and obstructions. However, project duration extends substantially—what spraying accomplishes in minutes requires hours with brushwork.
Sprayers excel on large, open surfaces, achieving smooth, mark-free finishes quickly, but they consume 2-3 times more paint through overspray and demand extensive masking preparation. For the best results, we’ll often combine methods: spraying for coverage speed, then back-brushing for proper adhesion and penetration. Our architectural features and timeline constraints ultimately determine which technique serves our project most effectively.
Addressing Fascia, Gutters, and Architectural Details
When we address fascia boards, we typically apply paint by hand to guarantee thorough coverage and proper adhesion on these critical horizontal surfaces.
For gutters and downspouts, we prefer spray application after removal from the structure, allowing us to coat all surfaces—including areas normally concealed behind mounting brackets.
This combination approach delivers complete protection while maintaining the efficiency required for exterior restoration projects in Paul’s variable climate conditions.
Hand Application for Fascia
After completing surface preparation and repairs, we position our extension ladder securely against the roofline and organize our hand application tools—a 3-inch wide brush, angled sash brush, 3-inch roller, and ladder pail with disposable liner. We begin brush application at the metal flashing’s top edge, working downward with consistent strokes. Tilting the brush downward allows bristle tips to reach underneath gutters effectively. Our angled sash brush navigates tight spaces and edges with precision.
For uniform paint coverage, we apply a light first coat to minimize drips, catching any overflow at bottom corners before it reaches siding. We shift to the roller for broad fascia surfaces after securing edges. The second coat guarantees durability. Between applications, we maintain a damp rag for immediate drip management and gutter cleanup, confirming professional results.
Spray Finishing Gutters and Downspouts
Hand brushwork delivers excellent results on fascia, yet we gain significant efficiency by switching to spray application for gutters and downspouts. We’re applying additive coatings that bond permanently when we use proper technique and equipment.
Our spray finishing process guarantees professional results:
- Prime with oil-based or DTM bonding primer using an airless sprayer at 2,800 PSI with a 310 fine finish tip
- Apply thin fog coats to prevent crinkling on metal surfaces while maximizing spray coverage
- Hit edges from three angles—top edge, front face, and bottom face for complete protection
- Maintain a wet edge when covering gutters, soffits, and architectural details simultaneously
- Insert cardboard shields inside gutters to protect your roof from overspray
We typically achieve full coverage with one topcoat of exterior-grade enamel, applying a second layer within 48 hours if needed.
Final Touch-Ups for a Professional Finish
The difference between an amateur paint job and a professional result lies in meticulous final preparation. We begin by inspecting imperfections visually across every surface, identifying missed cracks and unfilled nail holes. After patching damaged areas with quality compound, we sand until seamlessly blended with surrounding surfaces. Fine-grit sandpaper guarantees drywall repairs integrate flawlessly.
Next, we remove all sanding dust using tack cloths and damp rags—complete elimination prevents adhesion problems. We prime bare wood and patched spots with water-based primer, allowing full drying time before proceeding. Lightly sanding glossy surfaces dulls the finish for ideal topcoat adhesion.
Finally, we apply painter’s tape to trim and baseboards, pressing firmly for proper adhesion. This masking creates sharp, professional edges that distinguish our craft from hasty work.
Frequently Asked Questions
How Long Should I Wait Between Coats of Exterior Paint?
We’ll wait 2-4 hours between latex coats and 24 hours for oil-based paint to safeguard ideal paint drying time. Following proper paint application techniques, we’re checking surface tackiness before recoating to achieve professional-grade adhesion and finish quality.
What Type of Paint Finish Works Best for Paul’s Weather Conditions?
We recommend satin or semi-gloss exterior paint types for Paul’s semi-arid climate. These sheen level considerations balance UV resistance with durability against temperature extremes. Acrylic latex formulas handle your freeze-thaw cycles while resisting wind-driven debris effectively.
Should I Paint Over Mildew or Treat It First?
We’ll always treat mildew first—never paint over it. Let’s test mold removal methods using bleach solutions or commercial cleaners, then examine surface preparation techniques including proper drying and mold-killing primers before applying your topcoat.
How Do I Protect Landscaping and Plants During the Painting Process?
We’ll protect your landscaping by masking surrounding foliage with drop cloths and shielding delicate plants using breathable coverings. Did you know 73% of exterior paint damage occurs within eight feet of structures? Let’s safeguard your garden together.
What Is the Expected Lifespan of Exterior Paint in Paul, Idaho?
We’ll see your exterior paint last 7-10 years in Paul, with climate impact on paint varying by surface type. Paint durability factors like UV exposure, surface preparation, and product quality directly affect longevity in Idaho’s high-desert conditions.