We recommend starting with thorough TSP cleaning and moisture verification before addressing imperfections with spackling compound and 220-grit sanding. You’ll want to apply blocking primers on patches and stains, then cut in edges with a 2-3 inch angled brush before rolling in overlapping V-patterns. We’ve found that multiple thin coats with proper drying intervals between applications deliver superior bonding in Idaho’s dry climate. The sections below detail our complete methodology for achieving professional-grade results throughout your project.
Key Takeaways
- Clean walls thoroughly with TSP solution and verify moisture content before painting to ensure proper paint adhesion and performance.
- Fill nail holes with spackling compound, sand smooth with 220-grit paper, and apply blocking primer to patched areas.
- Use a 2-3 inch angled brush to cut in edges first, then roll walls in overlapping sections with microfiber covers.
- Apply thin coats using a “W” rolling pattern while maintaining a wet edge to avoid visible seams and overlap marks.
- Prime surfaces and apply topcoats within 48 hours, allowing 1-4 hours drying time between coats with light sanding.
Essential Surface Preparation Steps for a Professional-Looking Finish
Proper surface preparation determines whether your interior paint job achieves a professional finish or reveals amateur flaws within months. We’ll start with thorough cleaning using TSP or commercial degreasers, following established surface degreasing procedures to eliminate oils and contaminants that compromise adhesion. After cleaning, we’ll conduct moisture content verification to confirm substrates have dried completely—this step prevents future peeling and blistering.
Next, we’ll address imperfections using spackling compound for nail holes and cracks, applying with a putty knife and feathering edges flush. We’ll sand all surfaces with 220-grit paper to create uniform texture and mechanical tooth. Finally, we’ll prime bare spots, patched areas, and stained sections with appropriate blocking primers. This systematic approach guarantees our paint bonds properly and performs as the manufacturer intended.
Mastering the Trim Preparation Process From Start to Finish
Before we apply the first coat of paint, we’ll systematically evaluate our trim surfaces using cross-angle lighting techniques to expose every imperfection requiring remediation. We’ll mark defects with pencil, then address them using lightweight spackling compound for holes and dents. Proper trim sealant selection involves choosing appropriate caulk formulations that cure completely before proceeding.
Our sanding progression starts with 80-grit paper for rough surfaces, advancing through 100-grit, then finishing with 120-grit to eliminate gloss. For spray applications, we’ll employ 220-grit sandpaper. Post-primer sanding with 220- to 320-grit paper guarantees minimizing visible repairs.
We’ll clean surfaces using TSP solution for greasy areas, followed by tack cloth application removing all dust. Precise painter’s tape placement—adjacent to but not touching trim—safeguards professional edges when removed during wet paint stages.
Proper Priming and Top Coat Application Techniques
After completing our trim preparation, we’ll move into the critical priming phase that determines our topcoat’s adhesion quality and longevity. Our primer selection considerations depend on surface conditions—we’ll use stain-blocking primers for discoloration, bonding primers for glossy surfaces, and tinted primers for drastic color changes. We’ll cut in edges with a 2-3 inch brush before rolling walls in V-shaped strokes, maintaining a wet edge for seamless coverage.
Our primer application timeline requires 1-4 hours drying between coats, with light sanding enhancing adhesion. We’ll apply topcoats within 48 hours of priming for ideal bonding. By rolling in overlapping sections from ceiling to trim, we’ll achieve professional results while reducing overall coating requirements and ensuring true color representation.
Choosing the Right Tools and Paint Products for Interior Projects
Having established our application methodology, we’ll now examine the tool selection and paint products that enable precise execution of these techniques.
Proper paint selection begins with matching bristle composition to your coating system—synthetic bristles for latex formulations, natural bristles for oil-based products. We’ll pair our 2.5-inch angle sash brush with a 9-inch roller frame equipped with microfiber covers for thorough surface coverage.
Our essential toolkit includes:
- Paint trays with disposable liners for efficient workflow
- Roller screens for even paint loading
- Blue painter’s tape for crisp edge definition
- Canvas drop cloths for floor protection
Storage organization proves critical for multi-day projects. We’ll maintain our brushes in sealed containers between coats and arrange our supplies systematically. A 5-in-1 painter’s tool streamlines can opening, scraping, and minor surface preparation tasks throughout the project.
Achieving Flawless Coverage With Professional Rolling and Brushing Methods
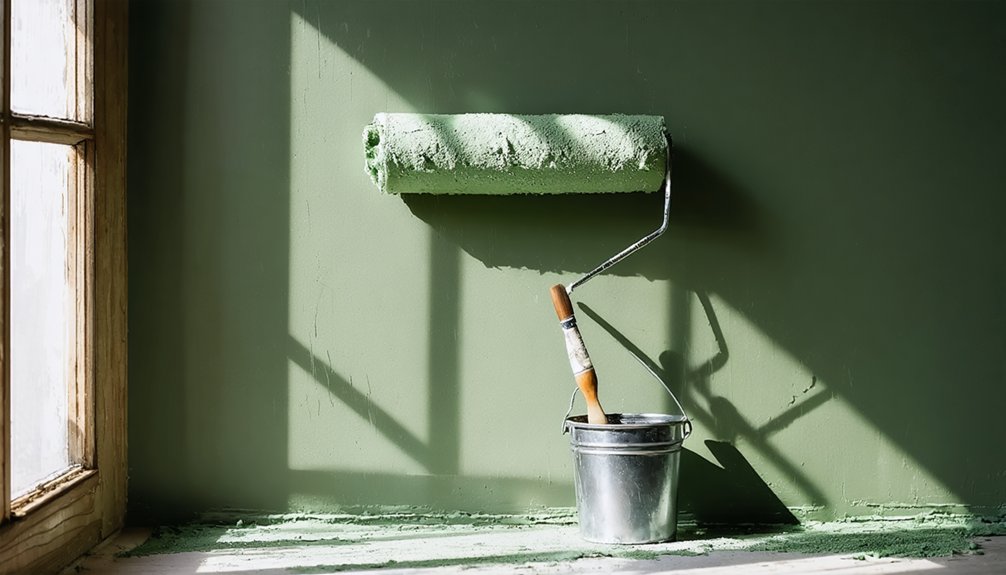
Once we’ve loaded our tools with properly selected paint products, our execution methodology determines the difference between amateur and professional-grade results. We’ll cut in edges first using angled brushes along corners and trim, maintaining consistent pressure for controlled lines.
Our rolling technique employs a “W” pattern across 3-4 foot sections, distributing paint evenly before filling gaps. Wet edge maintenance proves critical—we must blend cut-in areas with rolled sections while both remain wet, preventing hatbanding and lap marks. Paint application timing requires working quickly through small sections, avoiding overlap on dried surfaces.
We’ll apply multiple thin coats rather than single thick applications, allowing proper drying intervals between layers. Back-rolling with lighter pressure at section boundaries feathers edges seamlessly, achieving uniform texture throughout.
Frequently Asked Questions
What Temperature Is Too Cold for Interior Painting in Winter Months?
We don’t recommend painting below 50°F, as ideal paint application temperatures guarantee proper adhesion and curing. Maintaining proper paint storage conditions and consistent warmth throughout the drying cycle prevents film defects, cracking, and compromised bonding performance.
How Do I Prevent Color Inconsistencies Between Different Paint Gallons?
Like master chefs blending sauces, we’ll box your paint by pouring all gallons together, mixing thoroughly. Then apply consistent paint application techniques and maintain wet edge while painting to guarantee uniform color across your entire project surface.
Should I Use Paint or Stain on Interior Brick or Concrete Surfaces?
We’ll recommend stain for interior brick and concrete—it penetrates deeper and lasts longer. However, if you’re considering paint, we’d use acid-based surface etchers for prep or chalk-based paints for breathable, moisture-resistant coverage on masonry.
When Can I Paint Over Freshly Applied Caulk?
We’ve seen homeowners rush paint application only to face peeling seams. Allow caulk to fully cure before coating—latex requires wait 24 hours minimum, while silicone-based products demand 48 hours. Follow manufacturer specifications for ideal adhesion and long-term performance.
Do I Need Primer When Using Specialty Stains on Masonry?
Yes, we’ll need primer before specialty stains on masonry. It protects against moisture and UV while ensuring proper coverage requirements. Following correct paint application techniques, we’ll seal the porous surface first, then apply your stain for ideal adhesion.