We’ve found that successful interior painting in Kimberly requires adapting to the region’s unique 12% humidity and dramatic temperature fluctuations. You’ll need to maintain 40–50% relative humidity and 50–85°F temperatures during application, select finishes strategically for each room (flat for bedrooms, satin for moisture-prone areas), and master backbrushing techniques to eliminate roller stipple on textured surfaces. Proper primer application guarantees 7-10 year adhesion, while methodical surface preparation and environmental monitoring prevent common failures. Below, we’ll break down each critical technique that transforms amateur projects into professional results.
Key Takeaways
- Select appropriate finishes: flat for ceilings, eggshell for living areas, satin for moisture-prone spaces, and semi-gloss for trim.
- Maintain optimal conditions with 40–50% humidity and 50–85°F temperatures to ensure proper drying and paint adhesion.
- Always apply primer on dark colors and patched drywall to achieve true color representation and 7–10 year adhesion.
- Use backbrushing technique on textured walls to eliminate roller stipple patterns and push paint deeper into surfaces.
- Prepare spaces thoroughly by removing furniture, fixtures, and hardware before painting for unobstructed access and professional results.
Understanding Project Costs and Getting Accurate Professional Quotes
Understanding the true cost structure of interior painting projects requires analyzing multiple variables that directly impact your final investment. In Kimberly, you’ll find Idaho’s average rate of $3.64 per square foot applies, with regional variations between $2.02–$5.25 depending on project specifications.
When discussing tips for hiring local contractors, we recommend obtaining itemized breakdowns separating labor costs ($45–$60 hourly) from material expenses. Paint selection substantially affects budgets—latex options run $15–$30 per gallon, while premium formulations exceed $60.
Negotiating project pricing becomes more effective when you’ve measured square footage precisely and identified specific requirements: ceiling heights, surface preparation needs, trim inclusion, and coat quantities. Request proposals from three-plus Twin Falls area professionals to establish competitive baseline rates. Winter scheduling often yields discounted pricing that benefits budget-conscious homeowners.
Choosing the Right Paint Types and Finishes for Each Room
Selecting appropriate paint finishes requires matching sheen levels to room-specific functionality and traffic patterns throughout your Kimberly home. We’ll help you understand how lighting impact and color psychology work with different sheens to create cohesive spaces.
Paint Finish Selection by Room Function:
- Flat/Matte for ceilings and bedrooms – Conceals imperfections while maximizing color depth in low-traffic areas
- Eggshell for living spaces – Provides subtle light reflection and cleanability in dining rooms and hallways
- Satin for moisture-prone areas – Delivers mildew resistance and durability in kitchens, bathrooms, and family rooms
- Semi-gloss for trim and woodwork – Offers superior scrub resistance on doors, baseboards, and cabinets
- High-gloss for accents – Creates dramatic focal points on moldings requiring frequent maintenance
Match finish resilience to each room’s specific wear patterns for ideal performance.
Preparing Your Space for Optimal Painting Results
Before we apply the first coat, we’ll clear all furniture to the room’s center or relocate it entirely, then remove wall-mounted fixtures, hardware, and outlet covers that could interfere with uniform coverage.
We need to assess the room’s natural and artificial lighting sources, as these will reveal surface imperfections during preparation and affect how paint colors appear once cured. Proper clearance and lighting evaluation guarantees we can execute smooth, consistent application without obstructions while identifying areas requiring additional surface prep or primer.
Clear Furniture and Obstructions
When preparing a room for interior painting, complete furniture removal establishes the foundation for professional-grade results. We’ll systematically clear your space to guarantee unobstructed access for thorough inspection and ideal paint application.
Our clearing process includes:
- Complete furniture extraction – Remove beds, closets contents, and large pieces entirely from the workspace
- Wall accessories removal – Take down pictures, hangings, and decorative elements before painting begins
- Electrical fixture preparation – Turn off the breaker, then extract outlet plates, switch covers, and door hardware using proper equipment
- Window treatment clearing – Remove all coverings to access trim and surrounding surfaces
- Pet relocation – Safely move animals and aquariums before starting work
We’ll handle your belongings carefully, stacking furniture in adjacent spaces under protective sheeting while maintaining our safety-first approach throughout.
Assess Lighting and Direction
With your space cleared and prepped, we’ll evaluate how natural and artificial light interact with your room’s orientation—a critical step that guarantees paint selection accuracy. We assess exterior light conditions by identifying directional exposure: north-facing rooms require warmer colors with higher LRV values to counteract cooler, indirect light, while south-facing spaces benefit from cooler tones to balance intense afternoon sun.
When we evaluate room dimensions and layout, we’re tracking how east-facing rooms shift from bright mornings to darker afternoons, and west-facing spaces transform with golden evening light. We’ll check your artificial lighting specs—bulb Kelvin ratings and CRI values above 90 verify accurate color rendering. Paint 2×2-foot swatches on multiple walls, observing changes across 48 hours under varying conditions before finalizing selections.
Managing Temperature and Humidity for Faster Drying Times
Proper temperature and humidity control directly influences paint drying times and finish quality in Kimberly’s variable climate. We recommend maintaining 40–50% relative humidity and temperatures between 50–85°F for latex applications. Choosing high performance paint variants designed for Idaho’s conditions gives us better tolerance ranges. Monitoring environmental conditions during application prevents costly failures.
Monitor humidity at 40–50% and temperatures between 50–85°F when applying latex paint to ensure proper drying and lasting finish quality.
Essential control measures include:
- Running dehumidifiers when humidity exceeds 60% to prevent tacky surfaces and blistering
- Maintaining consistent HVAC settings throughout the application and curing period
- Using hygrometers to track real-time moisture levels in working spaces
- Avoiding painting when temperatures approach dew point thresholds
- Operating exhaust fans in bathrooms and kitchens to regulate localized moisture concentrations
These protocols promote optimal adhesion, uniform drying, and professional-grade finishes that last.
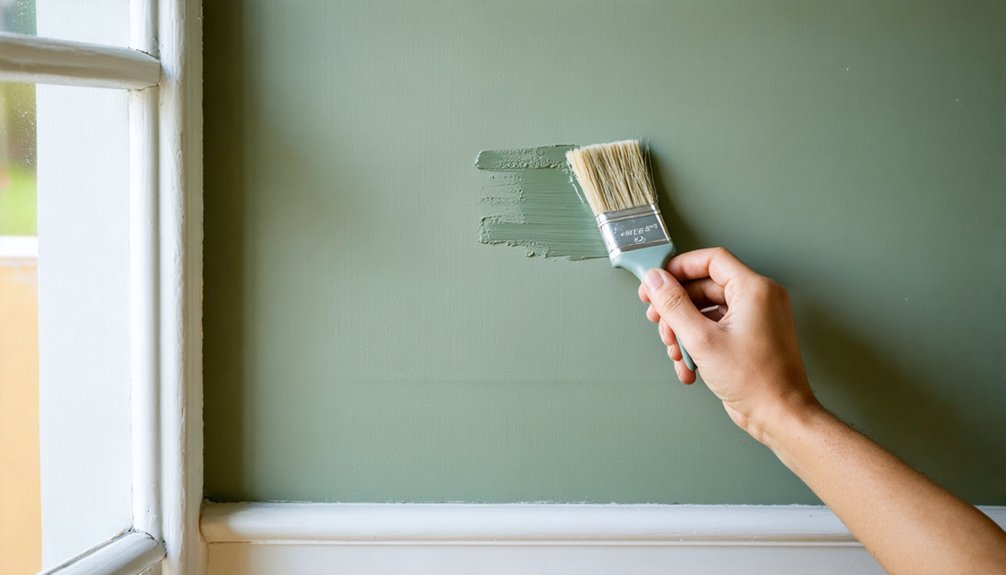
Mastering Roller and Brush Techniques for Professional-Looking Walls
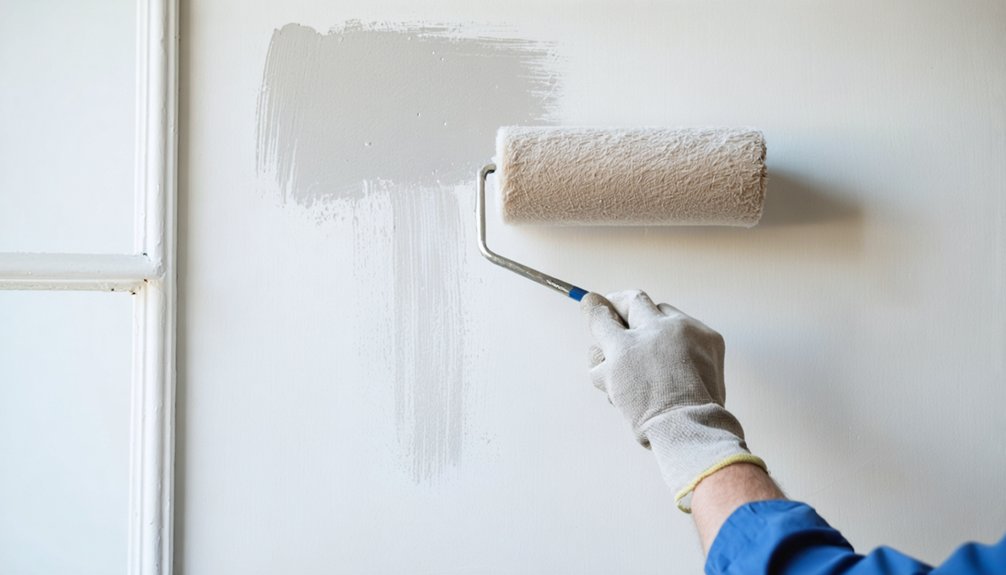
We’ll start with proper roller loading technique, which prevents the drips and streaks that compromise professional results. Fill your paint tray well 1/3 to 1/2 full, dampen the roller cover, then dip and roll on the ramp 2-3 times for even saturation without overloading.
Back-brushing complements this method by using a brush to work paint into textured surfaces or corners immediately after rolling, ensuring complete coverage before the wet edge dries.
Proper Roller Loading Technique
Before applying paint to your walls, loading your roller correctly determines whether you’ll achieve smooth, professional coverage or struggle with drips, streaks, and uneven patches. We’ve refined this technique to guarantee you get results that match contractor-quality work.
- Prepare your roller cover by dampening it with water for latex paint or paint thinner for oil-based formulas
- Pour paint ½-inch deep into the tray well after thorough stirring
- Make proper nap size selection matching your wall’s texture for ideal paint pickup
- Dip and roll slowly down the tray rake, repeating until the roller’s evenly saturated without drips
- Work the paint into the nap by letting it absorb fully before wall application
This methodical approach guarantees achieving even coat coverage across every surface.
Back-Brushing for Coverage
While most homeowners focus solely on roller application, back-brushing transforms freshly rolled paint into a professionally bonded finish that penetrates deep into your wall’s surface. We’ll share the techniques for back brushing that contractors use daily in Kimberly homes.
Here’s our process: immediately after rolling a section, use a dampened synthetic brush to work over the wet paint with light, vertical strokes. This pushes latex deeper into textured surfaces and eliminates roller stipple patterns. The keys to back brushing efficiency include maintaining wet edges and coordinating your roll-brush timing—work in 4-foot sections maximum.
We recommend this method for new drywall after PVA priming and any textured walls. On smooth, non-textured surfaces, skip this step unless you’re targeting premium adhesion for high-traffic areas.
Achieving Crisp Lines and Perfect Trim Work
Professional-grade trim work requires methodical tape selection and application techniques that directly impact the final edge quality. We’ve refined our approach through countless projects, and we’ll share what consistently delivers tape line consistency and masking technique precision.
Our proven application sequence:
- Select 1.5-2 inch painter’s tape and apply in overlapping strips, pressing firmly along the paint edge with a putty knife
- Paint a thin basecoat over the tape edge using your existing wall color to seal microscopic gaps
- Apply topcoats in thin layers with a quality brush, avoiding overloading that causes bleed-through
- Remove tape at a 45-degree angle while paint remains wet to touch for clean separation
- Use a straight edge as backup at trim joints, cleaning between strokes to prevent smearing
Avoiding Common Application Mistakes and Fixing Touch-Ups
Most interior painting failures stem from five preventable application errors that compromise finish quality and longevity. Avoiding primer skipping is critical—we need tinted primer over dark colors and patched drywall to achieve true color representation and adhesion that lasts 7-10 years.
Even paint distribution requires loading brushes one-third deep and rolling in M or W patterns; overloaded tools create drips and texture inconsistencies. We maintain 40-50% humidity and 60-75°F temperatures to prevent bubbling. Between coats, we wait for complete dehydration—rushing reduces lifespan from 7-10 years to merely 2-3 years.
For touch-ups, we mix paint thoroughly to prevent pigment separation and flashing, then apply multiple thin coats rather than single heavy applications that create visible patches and mismatched sheen.
Frequently Asked Questions
Should I Paint Walls or Trim First for the Best Results?
We’ll paint your trim first, then walls—this painting sequence delivers professional results. Our paint application techniques let wall coats cover trim mistakes while we’re cutting clean edges. It’s how we achieve flawless finishes efficiently.
How Long Should I Wait Between Applying Multiple Coats of Paint?
We recommend waiting 1-4 hours between latex coats and 6-24 hours for oil-based paints. Proper paint drying time guarantees desirable adhesion and finish quality. Our paint application techniques prioritize adequate recoat intervals to prevent surface defects and achieve professional results.
Can I Paint Interior Walls During Winter in Kimberly, Idaho?
While winter’s frost blankets Kimberly outdoors, we’ll successfully paint your interiors year-round. Your home’s temperature control requirements maintain ideal application conditions despite cold weather considerations outside. We’ll guarantee proper ventilation, consistent heating, and perfect humidity levels throughout our process.
What’s the Best Time of Year for Interior Painting Projects?
We recommend spring and fall for interior painting projects when ideal weather conditions provide moderate temperatures and lower humidity. These seasonal considerations guarantee exemplary paint curing and application performance, though we can successfully paint indoors year-round with proper ventilation.
Do I Need to Prime Walls Before Painting Over Existing Paint?
We’ll need to assess your paint sheen considerations and surface preparation needs first. If existing paint’s clean, dull, and similar in color, you can skip primer. However, glossy finishes, stains, or dramatic color changes require proper priming.