We’ve found that successful interior painting in Jerome starts with thorough wall preparation—cleaning with grease-cutting detergent, filling holes with spackle, and sanding with fine-grit paper. Idaho’s temperature fluctuations and low humidity demand contractor-grade paints with superior binders for lasting durability. We always follow the industry-standard sequence: ceilings first, then walls using wet-edge techniques, finishing with trim. The two-coat system extends lifespan to 10+ years while withstanding 2,000+ scrub cycles. Our exhaustive guide below addresses surface preparation, tool selection, application methods, and regional climate considerations.
Key Takeaways
- Prepare walls by cleaning, scraping cracked paint, filling holes with spackle, and sanding before applying tinted primer over dark colors.
- Select contractor-grade paints adjusted for Idaho’s temperature fluctuations and low humidity to ensure better coverage and long-term durability.
- Use canvas drop cloths and appropriate painter’s tape (blue high-tack for baseboards, yellow low-tack for walls) to protect surfaces.
- Follow proper sequence: paint ceilings first, then walls using wet-edge technique, and finish with trim and baseboards last.
- Apply two coats for superior results, extending interior paint lifespan to 10+ years versus 2-3 years for single applications.
Properly Preparing Your Walls Before Painting
Before applying the first coat of paint, proper wall preparation determines whether you’ll achieve a professional finish or encounter premature peeling and uneven coverage. We start by cleaning walls with warm water and grease-cutting detergent in kitchens, followed by a thorough rinse.
Next, we implement proven drywall repair techniques: scraping away cracked paint, filling nail holes with spackle, and caulking gaps between walls and trim. After repairs dry completely, we sand surfaces using fine-grit paper for water-based paint or 100-150 grit for oil-based applications.
For stain removal methods, we apply tinted primer over dark colors and aerosol primer on patched areas. On bare plaster, we always use a mist coat—a 50:50 water-to-paint ratio—to prevent flaking and guarantee robust adhesion.
Essential Tools and Materials for a Professional Finish
We’ve found that proper protection materials form the foundation of any successful interior paint project in Jerome’s dry climate. High-quality painter’s tape—blue high-tack for baseboards and yellow low-tack for walls—prevents paint bleeding and creates the sharp edges that distinguish professional work from amateur applications.
Canvas drop cloths outperform plastic alternatives by absorbing spills and staying in place, while your paint selection should account for Idaho’s temperature fluctuations and low humidity levels that affect drying times and adhesion.
Protection Materials and Tape
The foundation of any professional paint job lies in thorough surface protection that prevents costly damage and time-consuming cleanup. We’ve learned that effective floor coverage starts with selecting the right materials for your specific surfaces. For carpets in Jerome homes, we recommend a double-layer system: plastic moisture barriers topped with heavy-duty canvas drop cloths that absorb spills and won’t slip.
Hard surfaces like tile perform best with rosin paper secured beneath canvas for complete protection.
Quality materials we trust for durable tape adhesion:
- FrogTape blue with moisture-activated polymer technology that seals edges tight
- Scotch-Blue multi-surface tape that removes cleanly after two weeks
- Delicate surface tape for freshly painted trim, removable up to sixty days
Secure all protective coverings with tape along edges to prevent shifting during your project.
Quality Paint and Coatings
While proper surface preparation creates the foundation for success, selecting professional-grade tools transforms your interior painting project from amateur to exceptional. We’ll guide you through paint quality standards that separate contractor-grade products from big-box alternatives.
Premium paints contain higher pigment concentrations and superior binders, delivering better coverage and durability. We recommend microfiber roller covers—they’re virtually lint-free and release paint only when rolled, ensuring smooth application. For brushes, synthetic bristles excel with water-based latex paints, while natural bristles suit oil-based formulations.
Understanding paint sheen variations proves essential: flat finishes hide imperfections on ceilings, eggshell works beautifully in living spaces, and semi-gloss withstands moisture in kitchens and bathrooms. Quality roller covers represent your most critical investment—they’re worth every penny for professional-looking results.
The Correct Painting Sequence for Interior Rooms
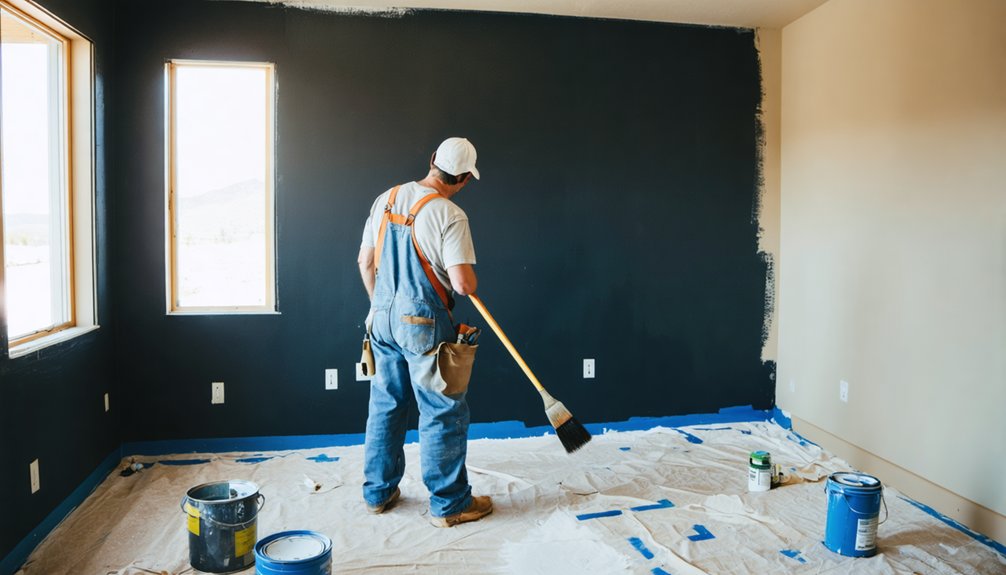
Mastering the proper sequence transforms interior painting from a frustrating exercise into a methodical process that delivers professional results. We always begin with thorough preparation—cleaning, repairing, and priming surfaces before any paint sheen selection occurs. Room layout considerations dictate starting with ceilings, working from the light source backward using low-luster finishes that minimize imperfections.
Our proven sequence includes:
- Ceilings first – safeguarding freshly painted surfaces below
- Walls second – cutting in edges before rolling with wet-edge technique
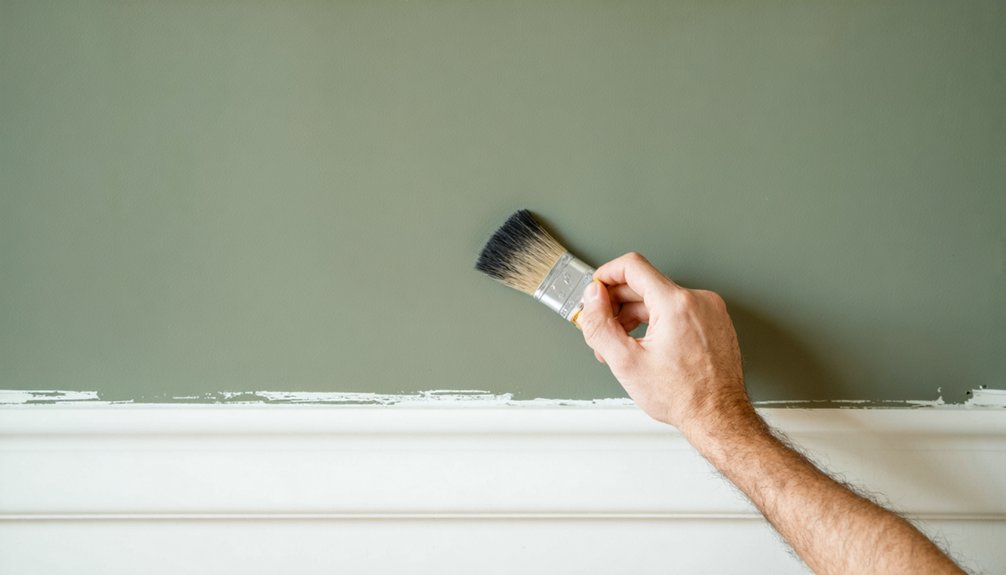
- Trim last – leveraging tape’s superior adhesion to cured paint
After walls dry completely, we tackle trim, baseboards, and doors using quality brushes for clean lines. This industry-standard approach guarantees each layer protects the next, eliminating frustrating touch-ups while delivering the flawless finish Jerome homeowners expect.
Mastering Taping Techniques for Clean, Straight Lines
We’ve found that achieving professional-quality paint lines depends on three critical factors: selecting tape with appropriate adhesion levels and paint-blocking technology for your specific surfaces, applying it with proper edge alignment and sealing techniques, and timing the removal to prevent paint lifting or tearing.
Most amateur painters struggle with paint bleed because they skip the essential step of burnishing tape edges with a putty knife and applying a light sealing coat before their final paint application.
Let’s break down each component so you can execute crisp, straight lines that match contractor-grade results in your Jerome home.
Choosing the Right Tape
When it comes to achieving professional-looking paint lines, your tape selection makes the difference between crisp edges and frustrating bleed-through. We recommend quality painter’s tape—specifically 3M Blue or FrogTape with paint-blocking technology—for reliable edge protection during your color selection process.
Sharp, clean boundaries that showcase your color selection without bleeding
Secure adhesion that won’t lift mid-project or damage existing finishes
Stress-free removal that leaves surfaces pristine and ready for admiration
We suggest stocking 2-inch rolls for most applications, with narrower widths for detailed work around trim and fixtures. Blue tape handles general projects excellently, while green or yellow FrogTape provides enhanced blocking for water-based paints. Always choose painter’s tape over standard masking tape—it’s engineered specifically for interior applications.
Proper Application Methods
Before you press a single strip of tape to your wall, surface preparation determines whether you’ll achieve razor-sharp paint lines or disappointing bleed-through. We’ll start by wiping surfaces with a damp cloth, allowing complete drying before beginning precise tape application.
For straight lines, we measure from the floor and mark lightly with pencil at regular intervals. Using a level, we pull tape taut between these marks, pressing firmly along the edge with a putty knife to seal completely. Here’s the professional trick: we paint the tape’s bottom edge with the existing wall color first, filling microscopic gaps before applying our contrasting shade.
When painting, we maintain consistent brush pressure, sweeping away from the tape edge. We’ll remove tape while paint remains wet for crisp, professional results.
Removing Tape Without Damage
After investing time in precise tape application and careful painting, the final removal stage separates amateur results from professional finishes. We’ve learned that timing proves critical—remove tape while paint remains wet, or wait until it reaches a dust-dry state for baseboards.
When troubleshooting tape adhesion issues, we employ proven techniques:
- Score dried paint edges with a utility knife at 45-degree angles, preventing underlying paint from lifting
- Apply concentrated heat from a heat gun to soften stubborn adhesive, enabling intact removal without tearing
- Dampen forgotten tape with warm water to restore pliability before peeling
For safely decontaminating surfaces afterward, we test petroleum ether on inconspicuous areas first. High-quality painter’s tape like FrogTape minimizes residue concerns when removed within manufacturer timeframes, ensuring the clean lines we’ve worked hard to achieve.
Safe and Effective Wallpaper Removal Methods
Successfully removing wallpaper requires matching your technique to the wallpaper type and wall substrate beneath it. We’ll start with dry-strippable varieties—use a plastic scraper to loosen edges, then peel back at a 10- to 15-degree angle to protect your drywall. For stubborn wallpapers, score the surface first, allowing penetration for removal solutions.
Our DIY fabric softener solution—equal parts softener and hot water—works exceptionally well on textured or vinyl-coated papers. Let it soak 15-20 minutes before scraping. Alternatively, chemical and steaming methods offer faster results: commercial removers need 5-10 minutes of dwell time, while steamers soften adhesive in 10-second intervals. Always use proper ventilation and protective equipment with chemical products. On drywall, exercise caution with steam to prevent substrate damage.
Understanding the Two-Coat System for Quality Results
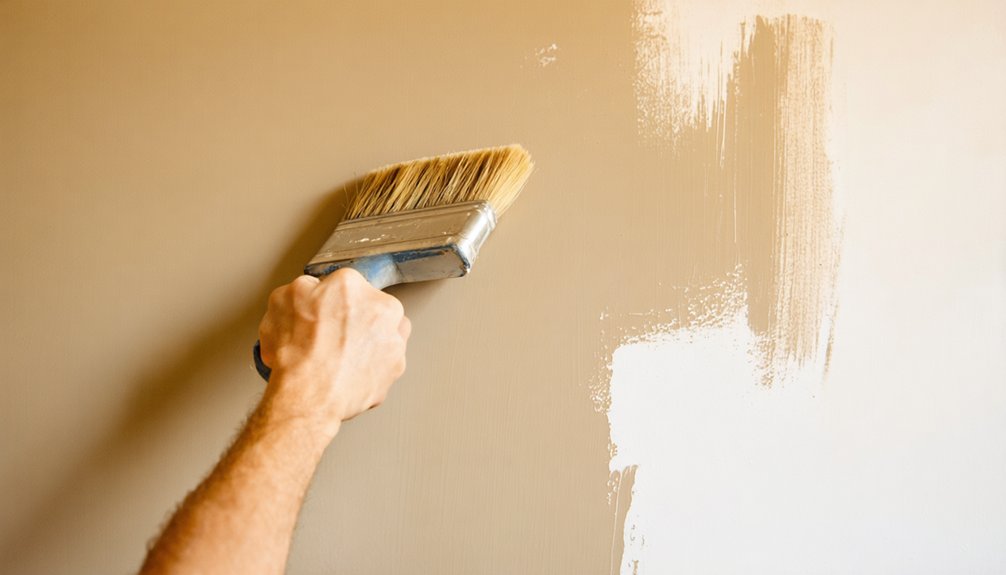
We recommend the two-coat system because it delivers measurable improvements in adhesion, durability, and finish quality that single-coat applications can’t match. The first coat bonds to the primer and substrate while filling surface pores, creating the foundation for long-term performance.
The second coat then reinforces that bond and eliminates streaking, forming a unified film that professional ASTM D3359 cross-cut tests verify can extend your interior lifespan to 10+ years.
Why Two Coats Matter
Professional painters in Jerome understand that a two-coat system isn’t simply about doubling up—it’s a fundamental requirement for achieving adhesion, durability, and visual uniformity that meets ASTM D3359 cross-cut test standards. The first coat bonds to your substrate while the second reinforces that foundation, creating a unified film that resists peeling and chalking.
We’ve seen how proper application delivers measurable benefits:
- Extended lifespan: Two coats last 6–10 years indoors versus just 2–3 years for single applications
- Superior protection: Systems withstand 2,000+ scrub cycles in high-traffic areas
- Consistent visual appeal: Eliminates streaking and achieves uniform sheen across surfaces
This versatility in applications—from drywall to trim—ensures professional results. Though upfront costs increase 25–30%, you’ll reduce repaint frequency from every 4–5 years to 8–10 years.
First Coat Versus Second
Understanding the mechanics behind that two-coat recommendation requires examining what each layer actually does. The first coat bonds to your primer while getting absorbed into porous surfaces like new drywall—it seals inconsistencies but achieves only 1-1.5 mils dry film thickness, leaving uneven patches visible.
Second coat benefits become clear when we measure performance: you’ll reach 3-4 mils DFT, doubling both washability and adhesion strength. This layer locks in true color saturation and smooths out brush strokes from below. Paint absorption properties matter less on the second pass since the surface is already sealed, allowing that coat to build protective thickness instead. We’re talking about extending lifespan by 30-50%—from 4-5 years to 8-10 years indoors—while achieving scrub resistance exceeding 2,000 cycles.
Application Techniques for Even Paint Coverage
Achieving flawless paint coverage requires mastering systematic application methods that guarantee consistent film thickness across all surfaces. We’ll employ the proven “W” or “M” rolling pattern, starting from cut-in edges to establish thin, even layers. Our criss-cross technique—diagonal strokes followed by horizontal passes and finishing with light vertical lay-off—ensures professional-grade results.
Wet edge control prevents unsightly lap marks:
- Maintain continuous wet edges by overlapping strokes before previous sections dry
- Complete entire walls in single sessions to avoid darker shift lines
- Reload rollers strategically every 9 square feet for consistent coverage
Achieving uniform finish demands rolling from bottom to top while keeping one inch from corners to prevent buildup. We’ll roll out excess paint from frames before application, then feather lightly for seamless transitions between sections.
Moving Furniture and Preparing Your Space
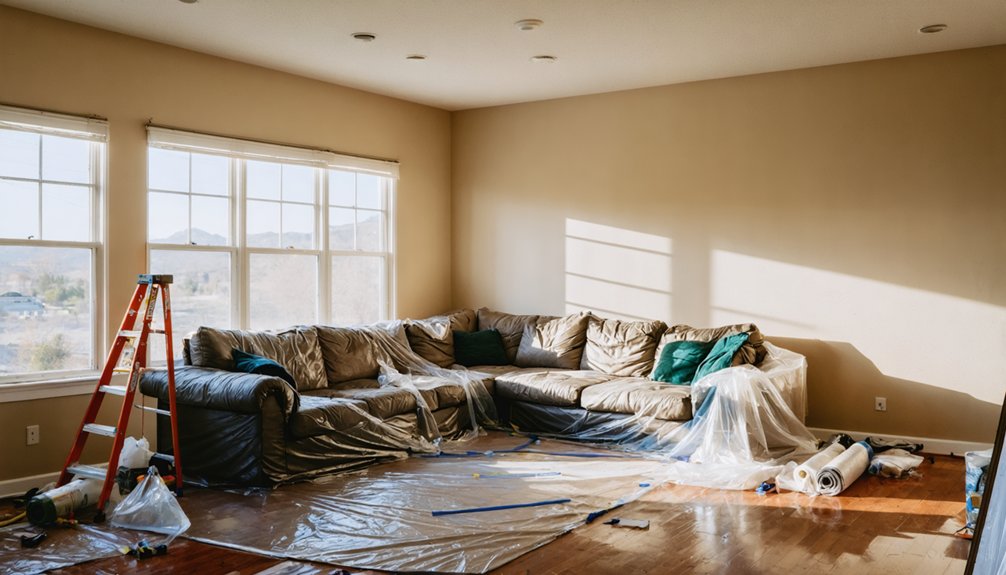
Our safe moving practices include furniture sliders—carpet-backed varieties for hardwood, flat discs for carpet—to prevent floor damage during repositioning.
We’ll remove wall hangings, outlet covers, and switch plates systematically, labeling each component for precise reinstallation.
Empty drawers before relocating to reduce weight.
Most professional painters expect prepped spaces, though they’ll handle moves for additional fees with signed liability waivers.
How Much Paint to Apply and Drying Time Considerations
- Textured walls demand up to 50 percent more paint than smooth surfaces, extending project duration
- Rough or porous surfaces absorb substantially more material, requiring additional coats
- Light colors over dark walls necessitate at least one extra coat beyond standard estimates
Most 10×12-foot rooms require approximately two gallons for single-coat coverage. Premium paint brands deliver superior coverage efficiency, potentially reducing overall quantities needed.
Common Interior Painting Mistakes to Avoid
Interior painting mistakes can transform a weekend project into a costly renovation nightmare. We’ve seen rushing prep cut a paint job’s lifespan from 7-10 years down to just 2-3 years. When we’re skipping cracks, holes, or proper surface cleaning, we’re fundamentally guaranteeing premature failure through poor adhesion and peeling.
We must match our paint selection to each room’s demands. Flat finishes in high-traffic areas like hallways show every scuff, while glossy sheens highlight wall imperfections. Using interior paint outdoors invites moisture damage and UV fading.
Our tool choices matter equally. Cheap brushes leave streaks and shed bristles. Overloading rollers beyond one-third creates drips and uneven texture. Without proper primer, we’re compromising adhesion—especially over dark or stained surfaces that’ll bleed through.
Frequently Asked Questions
What Paint Colors Are Most Popular for Homes in Jerome, Idaho?
We’re seeing neutral, earthy tones dominate Jerome homes, with Accessible Beige and Revere Pewter leading the trend. Popular gray paint colors like Iron Ore and Kendall Charcoal offer modern appeal while meeting local guidelines for earth-toned exteriors.
How Does Jerome’s Climate Affect Interior Paint Drying Times?
Jerome’s low humidity levels and warm summers dramatically accelerate interior paint drying times. We’ll see ideal humidity levels around 29% in summer, reducing paint cure duration from days to hours compared to national averages.
Should I Hire a Professional Painter or Do It Myself?
We’d recommend hiring professionals for complex projects requiring quick turnarounds and flawless finishes, while DIY works for simple rooms when budget considerations matter most. Your project timeline, skill level, and desired quality should guide this decision.
How Long Does a Typical Interior Painting Project Take to Complete?
We’ll typically complete your project in 3–6 days, depending on square footage. Proper paint application techniques and preparing the painting area drastically influence our timeline. We guarantee industry-standard results while keeping disruption minimal for your household.
What Is the Average Cost to Paint a Room in Jerome?
Room painting costs aren’t rocket science—we’re looking at $200-$500 for bedrooms in Jerome. Paint quality considerations and room size importance directly impact your final investment, though industry standards put us around $2-$6 per square foot typically.