We’ve found Hazelton’s extreme temperature swings demand specific interior painting protocols to prevent premature failure. Start by shutting off circuits and covering floors with canvas drop cloths, then wash walls with grease-cutting detergent and vacuum baseboards thoroughly. Fill imperfections with spackling compound, sand with 180-220 grit paper, and create mechanical abrasion on glossy surfaces for proper adhesion. Apply low-tack tape with caulk beads to prevent bleed-through, select appropriate roller naps for your ceiling texture, and work systematically in sections using quality microfiber tools for results that withstand Idaho’s climate challenges.
Key Takeaways
- Turn off circuit breakers and use canvas drop cloths to create a safe, slip-resistant work area before starting.
- Fill holes with spackling compound and sand with 180-220 grit paper; use adhesive patches for quarter-sized damage.
- Apply painter’s tape strategically with caulk bead along edges to prevent paint bleed and ensure crisp lines.
- Cut in 3-inch ceiling bands with angled brushes, then roll in grids using appropriate nap thickness for texture.
- Paint walls top to bottom in 4-foot sections using multiple thin layers and premium microfiber rollers for durability.
Preparing Your Walls and Work Area for a Professional Finish
Before applying the first coat of paint, we must guarantee our walls and workspace meet professional standards through systematic preparation. We’ll start by shutting off circuit breakers and protecting our floors with canvas drop cloths—they’re superior to plastic for preventing slips. Remove cover plates from switches and outlets, taping screws directly to each plate for easy reinstallation.
For wall preparation, we’ll vacuum baseboards first, then wash surfaces with warm water and sponge. Kitchen walls require grease-cutting detergent followed by a clean water rinse. Maintaining drywall integrity means patching holes with spackling compound, feathering joint compound 8-12 inches beyond repairs, and sanding between coats. Optimizing primer coverage requires spot-priming all patched areas and applying full coats to bare drywall after proper surface treatment.
Essential Surface Preparation and Sanding Techniques
We’ll address two critical preparation tasks that directly impact your paint’s long-term adhesion and finish quality.
First, we apply spackling compound to fill cracks, holes, and dents, then sand these patches with 180-220 grit sandpaper until they’re flush with surrounding surfaces.
Second, we’ll sand glossy trim surfaces to create proper mechanical bonding texture, ensuring your new paint grips instead of peeling.
Patching and Smoothing Walls
Proper wall preparation determines paint adhesion and final appearance more than any other factor in the painting process. We’ll address holes systematically based on size. For damage smaller than a quarter, we apply spackle directly. Quarter-to-credit-card-sized holes require adhesive patches with compound coverage. We jam joint compound into divots using our mudding knife’s base for ideal concave shaping.
Large repairs demand California patches or cut drywall secured to wooden backing strips. We cover all seams with drywall tape before applying joint compound in thin, successive layers. Our technique involves pulling tight with low-angle knives, minimizing visible seams through proper feathering. We alternate between spackling and light sanding until patches sit flush with existing surfaces.
We prime all bare drywall and repairs before painting, preventing flash-through. For walls requiring ultimate leveling, we skim-coat entire surfaces with lightweight compound.
Sanding Glossy Trim Surfaces
Glossy trim surfaces resist paint adhesion through their slick, non-porous finish, making mechanical abrasion our primary preparation method. We’ll start with 150-grit sandpaper for general de-glossing work, folding sheets into thirds to maximize efficiency on trim edges.
For elaborate millwork, we recommend sanding profiles with flexible sanding sponges that conform to contoured details. Sand at angles to create uniform scratch patterns while working into grooves thoroughly.
When addressing existing paint issues, we’re sanding feathered edges around peeling areas—light pressure prevents burn-through while creating smooth shifts. Wet sanding controls dust effectively: dampen both surface and paper, then work methodically to dull the shine.
After abrading all surfaces, we’ll wipe down with damp cloths, removing residual dust before applying bonding primer to these high-contact areas.
Mastering the Tape and Caulk Method for Clean Paint Lines
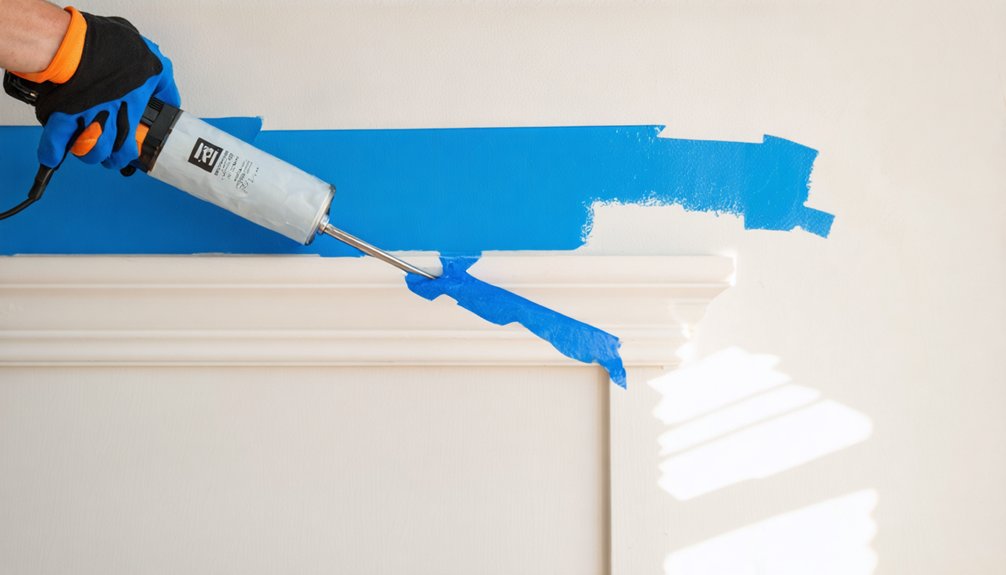
We’ll show you how to achieve razor-sharp paint lines using the tape-and-caulk method that professionals rely on for baseboard and trim work. The technique requires selecting the right tape product, applying a caulk bead that prevents paint bleed-under, and timing your tape removal while both materials remain wet.
Master these three critical steps, and you’ll eliminate the ragged edges that plague standard taping methods.
Proper Tape Selection Tips
While selecting the right painter’s tape might seem straightforward, matching adhesion levels to your specific surface determines whether you’ll achieve crisp lines or damage your walls. We’ll use low-tack tape (like yellow varieties) on delicate surfaces including freshly painted walls and wallpaper. Medium adhesion blue tape handles standard walls, trim, and glass effectively.
For textured surfaces like stucco, we need high-adhesion green tape that conforms to irregularities.
Tape removal timing proves equally critical—we can safely remove ScotchBlue Original within 14 days, while Super Blue USA allows 21-day removal windows. For freshly painted surfaces, we wait 24 hours before applying 3M #2080, giving us 60 days for removal.
Match your tape’s capabilities to project duration and surface sensitivity for professional results.
Caulking for Bleed Prevention
Even perfectly selected tape creates vulnerable gaps where paint can seep through texture valleys and surface irregularities—that’s where the caulk-and-tape method delivers professional-grade paint lines. We apply a thin bead along the tape edge designated for painting, then smooth it firmly into the seam between tape and wall.
This technique requires understanding caulk types: white variants contain more solids and dry faster, while clear caulk offers thinner consistency at approximately 60% coverage. We always work one wall section at a time, caulking and painting while both materials remain wet. The caulk consistency must fill texture gaps without over-application.
Using soft-filament brushes with light pressure prevents forcing paint beneath edges, and we remove tape while paint’s still wet to avoid peeling or defects.
Timing Your Tape Removal
The difference between amateur paint lines and professional results often comes down to a single decision: when to pull the tape. We’ve learned that preparing adequate drying time separates clean edges from disaster.
For water-based paints, remove tape when dry to touch—typically one hour after application. Evaluating paint type factors becomes critical with solvent-based products, which require manufacturer-specific timing to prevent bridging. We pull before full cure, never exceeding 24 hours for most applications.
Temperature plays a role too; Hazelton’s climate means monitoring ambient conditions above 18°C. If resistance occurs during peeling, we score the tape edge with a utility knife to break the paint seal. Pull at 45 degrees, slowly and deliberately, rolling the tape over itself to avoid chipping our hard work.
Ceiling Painting Strategies to Avoid Common Mistakes
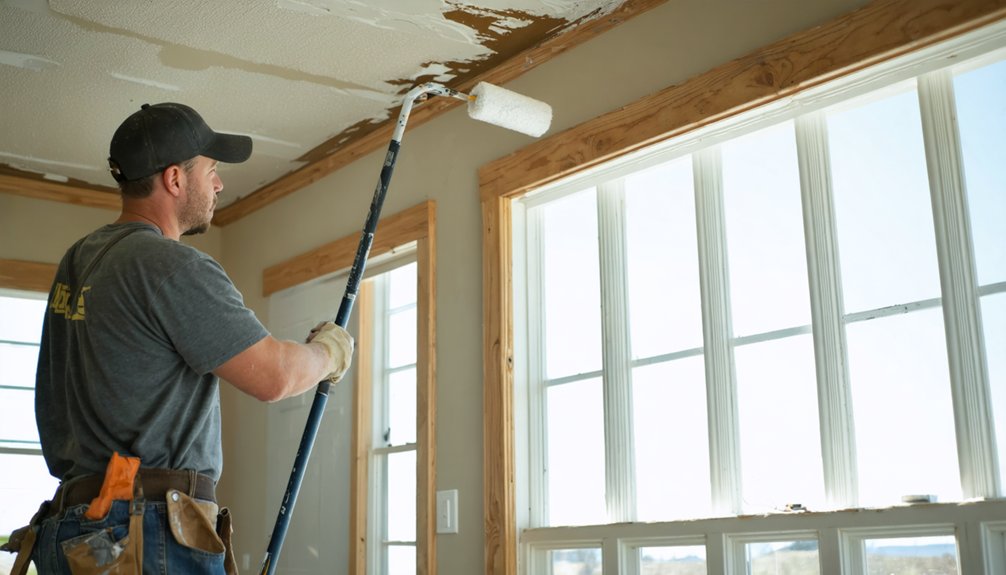
Successful ceiling painting hinges on executing five critical phases in proper sequence: preparation, tool selection, cutting-in, rolling application, and finishing.
Mastering these five sequential phases transforms ceiling painting from amateur struggle into professional-grade results with superior coverage and lasting finish quality.
Critical Execution Steps:
- Preparation and Surface Assessment – We’ll clear the room completely, inspect for defects, fill imperfections with joint compound, and sand smooth ceilings with 100-grit paper. Prime with latex drywall primer using appropriate nap thickness.
- Ceiling Texture Considerations and Tool Matching – We’ll select 10mm nap rollers for flat surfaces, 19mm for orange peel textures. Proper paint selection means choosing ultra-flat waterborne ceiling formulations without acrylic additives for superior coverage.
- Application Technique – We’ll cut in 3-inch bands with angled brushes, then roll in 3- to 5-square-foot grids using “W” patterns. Apply second coat perpendicular to first for maximum coverage uniformity.
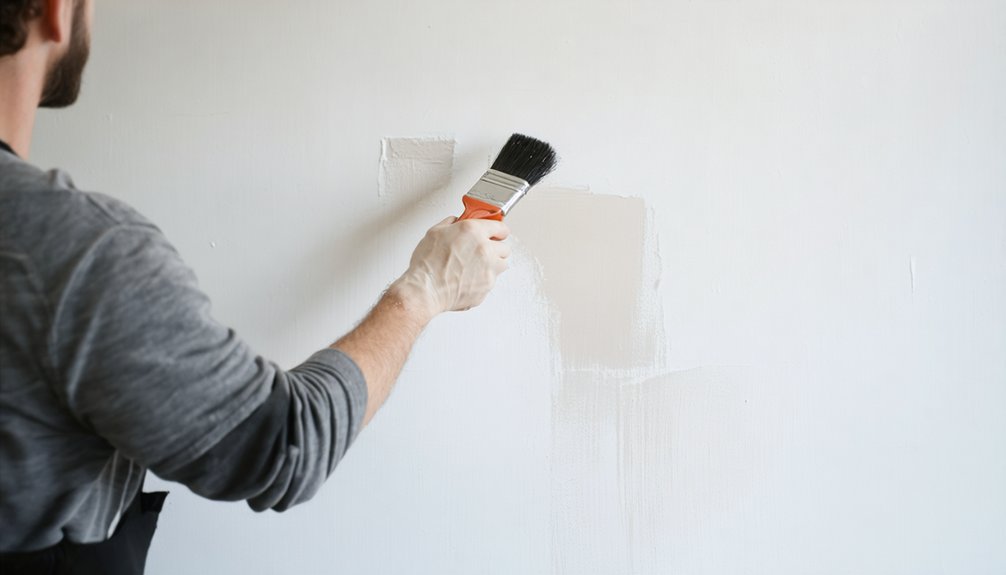
Wall Painting Application for Even, Long-Lasting Results
While ceiling work establishes the foundation, wall painting demands precision in material selection and systematic application methods to achieve uniform coverage and extended durability. We’ll start by thoroughly cleaning and sanding surfaces, then filling imperfections before applying primer. After 24-hour drying periods, we’ll establish our base coat using proper brushwork techniques for cutting in edges, followed by roller application in consistent sections.
For uniform topcoat application, we’ll work from top to bottom in 4-foot sections, crossing each stroke slightly while maintaining steady pressure. We’ll roll continuously around the perimeter without stopping mid-wall to prevent visible lines. Semi-gloss sheens work excellently for decorative techniques, while matte finishes minimize shine variations. Multiple thin layers deliver superior depth and longevity compared to single heavy coats.
Professional Tools and Products That Make the Difference
Here’s what separates professional results from amateur attempts:
- Generation 2 Picasso brushes feature patented “No Drip” interiors with Advantage PBT/N filaments—synthetic for latex, natural bristles for oil-based applications
- Premium microfiber rollers hold 40% more paint in 3/8-inch naps, with Wooster R189 Super Doo-Z providing shed-resistant performance on trim work
- Adjustable extension poles with secure pin locks every 3 inches eliminate fatigue while maintaining even pressure across ceiling planes
We pair these tools with proper surface prep—180 to 320-grit sandpaper sequences—and quality painter’s tape for crisp edges.
Frequently Asked Questions
What Paint Colors Work Best in Hazelton’s High-Altitude Lighting Conditions?
We’ve found soft, muted tones work exceptionally well here, as they optimize natural light reflection without creating glare. These hues compensate for high-altitude UV intensity while maintaining color stability. We’d recommend testing samples in your specific exposure conditions first.
How Does Hazelton’s Climate Affect Interior Paint Drying Times Year-Round?
Last winter, we tracked a client’s bedroom recoat extending to six hours versus summer’s three. Hazelton’s seasonal temperature fluctuations and humidity levels directly impact cure rates—winter’s cold slows evaporation while summer’s heat accelerates solvent release exponentially.
Should I Hire Local Hazelton Painters or Do It Myself?
We’d recommend hiring local Hazelton painters for large-scale projects requiring extensive prep work and professional substrate conditioning. However, you’ll save substantially tackling smaller rooms yourself with quality paint brushes and proper surface preparation techniques.
What’s the Average Cost of Interior Painting in Hazelton, Idaho?
Like mapping uncharted territory, we’ll navigate Hazelton’s painting costs together. Expect $4-7 cost per square foot for interior work. Your budget considerations should account for prep work, paint quality, and local labor rates matching Idaho Falls’ regional pricing standards.
Do I Need Special Permits for Interior Painting in Hazelton?
We don’t need paint permit requirements for standard interior painting in Hazelton. Local building codes focus on structural work, not cosmetic finishes. However, we’d recommend confirming with City Hall at 208-829-5415 before starting any project.