We’ve found that successful paint touch-ups start with thorough surface prep—clean the area with mild soap, fill holes with spackle, and sand smooth using 120-grit paper. Match your original paint’s color and sheen exactly, then apply thin coats from the repair’s center outward, feathering edges with light strokes. For water-based paints, we thin 5-10% with water to reduce sheen differences. Skip priming on stable walls, but use stain-blocking primer for marks. Our robust techniques below guarantee invisible repairs.
Key Takeaways
- Clean and sand the damaged area, fill holes with spackle, and feather edges smooth for seamless blending with existing paint.
- Match the original paint’s color and sheen using leftover cans, spectrophotometer testing, or by identifying the finish type under angled light.
- Prime only when touching up glossy surfaces, stains, or color changes; skip priming on stable matte walls with matching paint.
- Apply thin coats from the repair’s center outward using brushes for small spots or foam rollers for larger areas.
- Feather edges with light, overlapping strokes and thin water-based paint 5-10% to blend new paint into the surrounding surface.
Preparing the Surface for Touch-Up Work
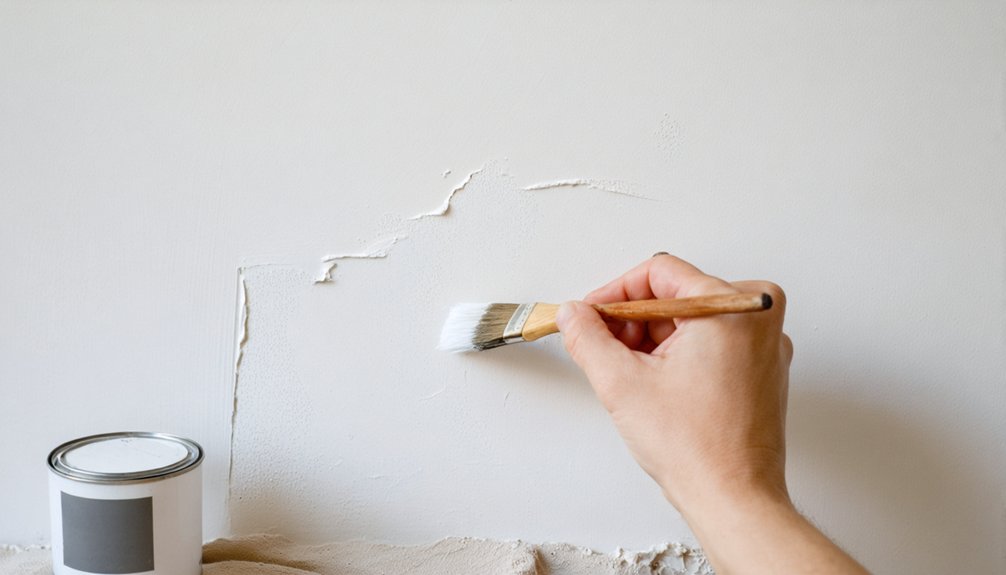
Anyone can achieve professional-looking touch-ups by starting with proper surface preparation. We’ll begin by evaluating the condition of our damaged area—small spots under a few inches work best for touch-ups, while larger sections require full repainting.
After removing existing damage like peeling paint or debris, we’ll clean the surface with a damp cloth and mild dish soap solution to eliminate oils, dust, and grime that interfere with adhesion. Next, we’ll fill any holes or dents with lightweight spackle, allowing it to dry completely.
Once dry, we’ll sand the repair smooth using 120-grit sandpaper, feathering the edges for seamless blending. Finally, we’ll wipe away all dust and apply a thin primer coat confined strictly to the repair dimensions.
Finding and Matching Your Original Paint
Before we can touch up effectively, we’ll need to locate any leftover paint from the original job—check your garage, basement, or utility closet for cans with manufacturer labels that specify the exact color formula and finish type.
If original paint isn’t available, we must identify whether the existing wall has a flat, eggshell, satin, semi-gloss, or gloss finish, since mismatched sheens create visible patches even when color matches perfectly.
We’ll use the paint can’s lid notation or test the wall’s reflectivity under angled light to determine finish, which directly impacts our matching strategy and material selection.
Locating Leftover Paint Supplies
When leftover paint from your original project isn’t in the garage or basement, consider tapping into local paint reuse networks before purchasing new materials. Paint reuse programs operate through partnered facilities that distribute quality leftover paint at minimal or no cost—check the PaintCare drop-off locator for locations marked with reuse program icons. These sites often require proof of residency and maintain inventories of various colors and finishes.
Donation and sharing options extend beyond formal programs: connect with community buy-nothing groups, local art studios, or neighborhood exchanges where members share excess supplies. Facebook marketplace and contractor networks also facilitate paint transfers. Before visiting any facility, confirm their current inventory matches your color requirements and verify operational hours. This approach maximizes resource efficiency while reducing project costs considerably.
Identifying Paint Finish Type
When analyzing existing paint layers, photograph the surface under natural lighting and bring samples to your paint supplier. Their spectrophotometer equipment assists in determining paint composition and color matching.
We recommend testing in inconspicuous areas first, as even slight finish mismatches become visible under direct light. Document your findings—record brand names, color codes, and finish types for future touch-ups within our painting community.
Deciding Whether to Prime Before Touching Up
Primer application hinges on three core factors: surface condition, color shift, and existing finish integrity. When determining primer necessity for touch-ups, we’ll skip it on stable walls showing no stains, damage, or color change—especially when matching existing hues on matte finishes.
However, evaluating priming requirements becomes critical when addressing water marks, scratches, or visible stains that’ll bleed through. We must prime glossy areas after light sanding to guarantee proper adhesion.
For minor touch-ups, paint-and-primer all-in-one products eliminate separate priming steps while maintaining adequate coverage. Dedicated stain-blocking primer remains non-negotiable for marks or tannin bleed. The cost differential matters too—standalone primer runs 50% less than combo products, though we’ll need that extra paint coat.
Surface preparation, not product choice alone, determines our finish quality.
Applying Paint to Small Problem Areas
We’ll achieve professional results by matching our application method to the original finish—selecting a small angled brush for spots under an inch or a foam roller for larger areas. Our technique centers on building thin, even coats from the repair’s center outward, using minimal paint to cover the defect.
We’ll feather the edges with light, outward strokes that gradually blend new paint into the existing surface, eliminating visible demarcation.
Choose the Right Applicator
The applicator determines touch-up success as much as paint quality itself. We match tools to repair size for precision application and consistent coverage.
Paint pens like the SlobProof (5/5 rating) deliver marker-like control for chips and scratches, while refillable designs keep our utility closets stocked. Touch-up brushes handle larger areas—the Magimate multi-pack (4.8/5) excels at trim and corners with sizes from 0.5 to 1-inch. We’ve found cotton swabs work surprisingly well for impromptu fixes without shedding.
For filled repairs, putty sticks and cabinet markers dry instantly. The Allen+roth Painted Putty Stick resists shrinking and cracking in moulding gaps. We support brush work with mini rollers for blending and painter’s tape for clean edges. Repairs under half a square inch rarely need sanding.
Apply Thin, Even Coats
Successful touch-ups depend on applying multiple thin coats rather than one thick layer. We’ll load our applicator with minimal paint—just enough to cover the damaged area. For non-flat finishes, we recommend thinning water-based paints 5-10% with water to match the existing sheen perfectly.
Our application techniques start from the repair’s center, working outward with light, overlapping strokes. For spots under one inch, we’ll use dabbing motions with extremely small amounts. Between each coat, we must wait for complete drying per manufacturer specifications—thinned paint accelerates this process.
Product recommendations emphasize quality matching paint applied sparingly. We’re limiting film thickness to prevent halos or texture differences. This methodical approach keeps our touch-ups invisible, avoiding the need for full wall repainting.
Feather and Blend Edges
After building up our thin coats, feathering creates the invisible edges that distinguish professional touch-ups from amateur patches. We’ll achieve smooth paint shifts by gradually reducing pressure as we work outward from the repair center toward existing paint.
With rollers, we press lighter at edges to eliminate hard lines. For brush work, we load our flagged-tip bristles fully, then blend outward in gentle strokes that extend slightly beyond the damaged area.
Once our paint dries completely, wet sanding with 320-grit paper becomes critical. We tilt our sander slightly, lifting the rear edge while feathering the front into surrounding layers. This technique guarantees uniform surface texture across the transition zone.
Multiple light passes trump single heavy applications—we’re building imperceptible layers that disappear into the original finish.
Blending Techniques for Seamless Results
Achieving invisible touch-ups requires mastering three core blending techniques: feathering, thinning, and pattern matching. We’ll start by thinning water-based paint 5–10% with clean water—this reduces sheen differences and prevents visible film buildup that telegraphs repairs.
Next, we apply paint from the repair’s center outward using light, overlapping strokes that feather into surrounding areas. Load your weenie roller (1/4″ to 1/2″ nap) minimally and work in a flower pattern for even distribution.
For achieving consistent consistency, match the original application texture—whether smooth or orange peel—by replicating the roller type and technique. Between coats, allow complete drying. This systematic approach guarantees we’re maintaining uniform appearance across the entire wall surface without hard edges or sheen variations.
Working With Different Paint Finishes and Surfaces
Each paint finish presents distinct touch-up challenges that directly impact our blending success. With flat finishes, we’ll achieve seamless results through minimal light reflection, but we must apply thin layers to prevent texture buildup.
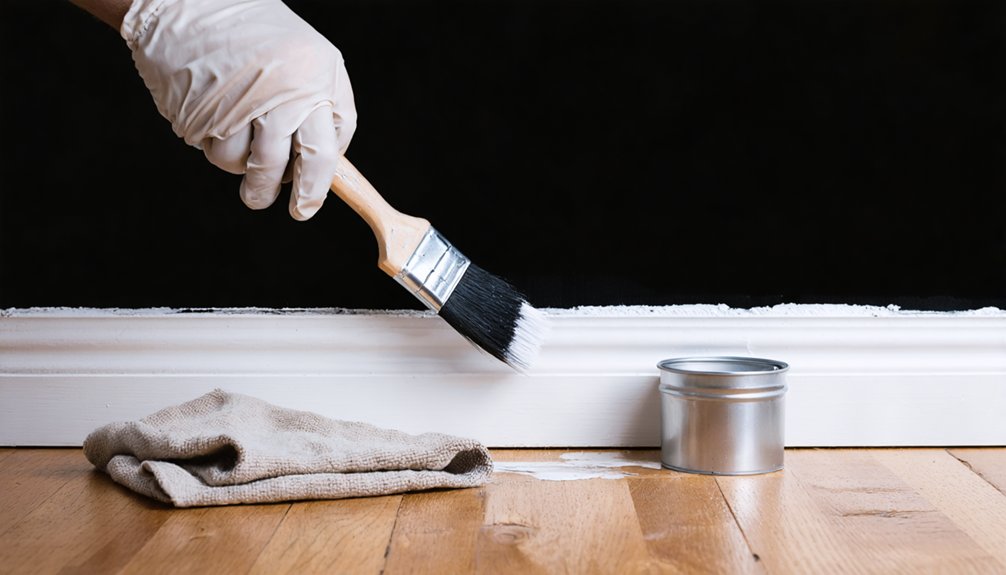
Satin and eggshell demand precise feathering—we’ll sand surrounding areas lightly and overlap strokes in thin coats for smooth adjustments. For gloss and semi-gloss surfaces, we’re reducing sheen by diluting paint 5% with water while using fine-bristle brushes for precision.
Varying cleaning requirements matter greatly: we’ll thoroughly clean glossy trim before touch-ups, ensuring color matching through proper primer application over repairs. Our texture replication depends on matching original applicator tools—small brushes for scratches, foam rollers for larger areas. We’ll roll dry rollers over brushed sections, preserving wall texture while achieving professional-grade uniformity.
When to Repaint the Entire Wall Instead
While perfecting our touch-up techniques maximizes minor repairs, we’ll encounter damage patterns that render spot treatments ineffective and demand complete wall repainting. Full wall repaint triggers include extensive peeling, flaking, or widespread staining that compromises surface integrity across large sections.
We recognize circumstances requiring full repaint when paint exceeds five years in age, particularly in high-traffic zones like hallways and children’s bedrooms showing wear every 2-4 years. Kitchens and bathrooms demand repainting every 3-5 years due to moisture and grease accumulation.
High-sheen finishes present additional challenges—satin and glossy surfaces resist blending on aged coatings, creating visible patchiness from touch-ups. When our walls exhibit these conditions, we pivot from spot repairs to thorough repainting for uniform coverage and lasting results.
Frequently Asked Questions
How Long Should I Wait Between Applying Multiple Thin Coats?
Patience isn’t our strongest suit, but we’ll wait 10-15 minutes between thin coats for ideal results. Monitor drying time between coats until the surface achieves proper paint sheen considerations—that telltale satin finish signals we’re ready for the next application.
Can I Touch up Paint That Is More Than Five Years Old?
We can attempt it, but results will likely disappoint. First, test paint adhesion and match paint sheen carefully. However, five-year-old paint rarely blends well due to fading and moisture loss—we’d recommend repainting the entire wall instead.
Will Touching up Change the Warranty on My Painted Walls?
Touch-ups won’t affect your wall paint warranty—there isn’t one. However, warranty considerations apply if contractors performed recent work. We’ll notify contractors before touching up their surfaces, ensuring we don’t compromise their workmanship guarantees or our professional relationships.
Should I Use the Same Brand of Paint for Touch-Ups?
Yes, we always recommend using the same brand for touch-ups. Different manufacturers formulate unique pigment ratios that affect paint sheen consistency. Matching application techniques with identical products guarantees we achieve seamless blending that meets our professional standards every time.
How Do I Store Leftover Paint Properly for Future Touch-Ups?
“Waste not, want not”—we’ll transfer your paint into airtight containers, minimizing headspace for ideal preservation. We’re storing them in temperature-controlled storage away from light, ensuring your touch-up reserves stay workable for years ahead.